

For information about the new Avast One, refer to the following article:
Avast One is an all-in-one security and optimization software that scans your PC for malicious software and performance issues, frees up disk space, and helps you browse safely and privately.
Avast One is an all-in-one security and optimization software that scans your Mac for malicious software and performance issues, frees up disk space, and helps you browse safely and privately.
Avast One is an all-in-one security and optimization software that scans your Android device for malicious software and performance issues, frees up disk space, and helps you browse safely and privately.
Avast One is an all-in-one security and privacy software that helps protect your iOS device from online threats, keeps your data private, and enhances safe browsing.
Navigate the Home screen
Each time you open Avast One, you see the application ![]() Home screen. If any issues require your attention, you see an alert on the Home screen with the option to resolve it. If you have no immediate alerts to resolve, you have the option to run a Smart Scan.
Home screen. If any issues require your attention, you see an alert on the Home screen with the option to resolve it. If you have no immediate alerts to resolve, you have the option to run a Smart Scan.
Each time you open Avast One, you see the app ![]() Home screen. If any issues require your attention, you see an alert on the Home screen with the option to resolve it. If you have no immediate alerts to resolve, you have the option to run a Smart Scan.
Home screen. If any issues require your attention, you see an alert on the Home screen with the option to resolve it. If you have no immediate alerts to resolve, you have the option to run a Smart Scan.
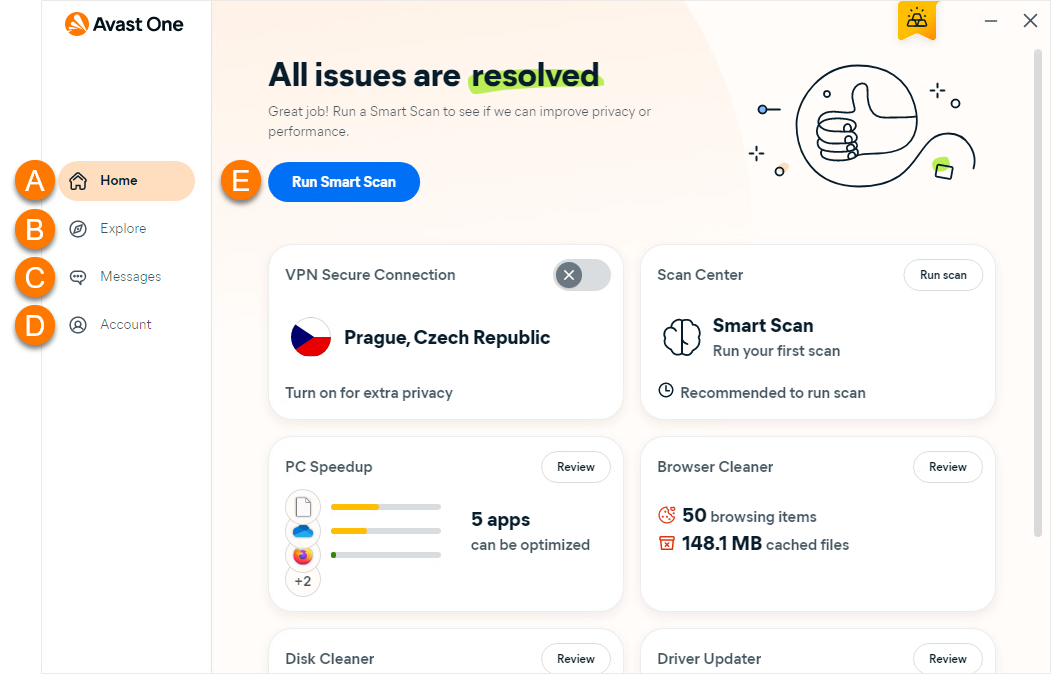
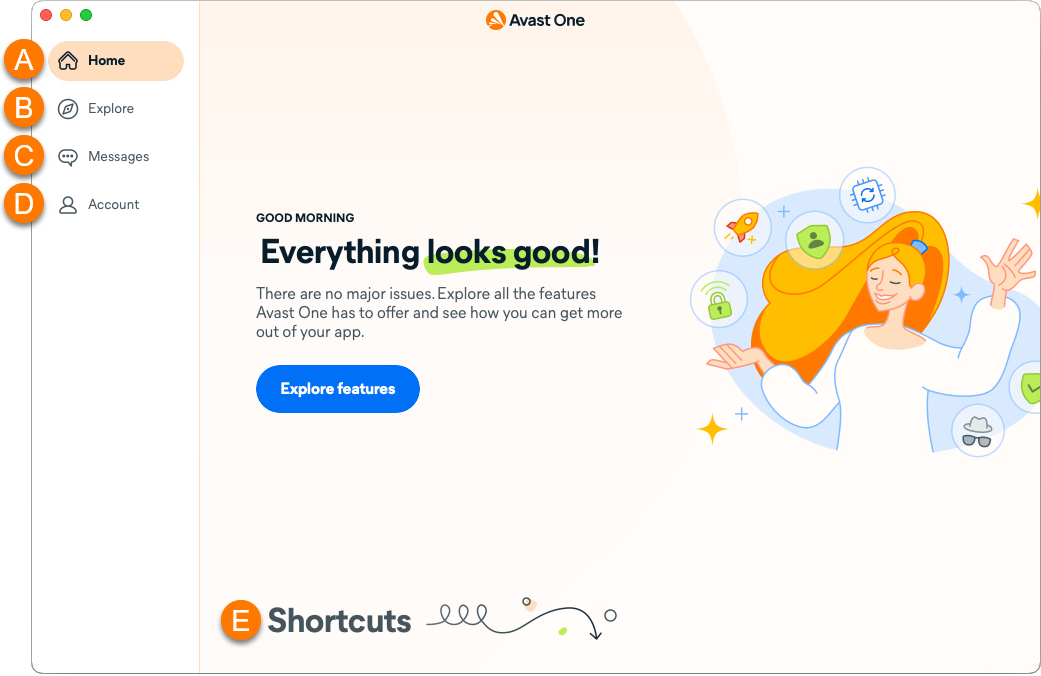
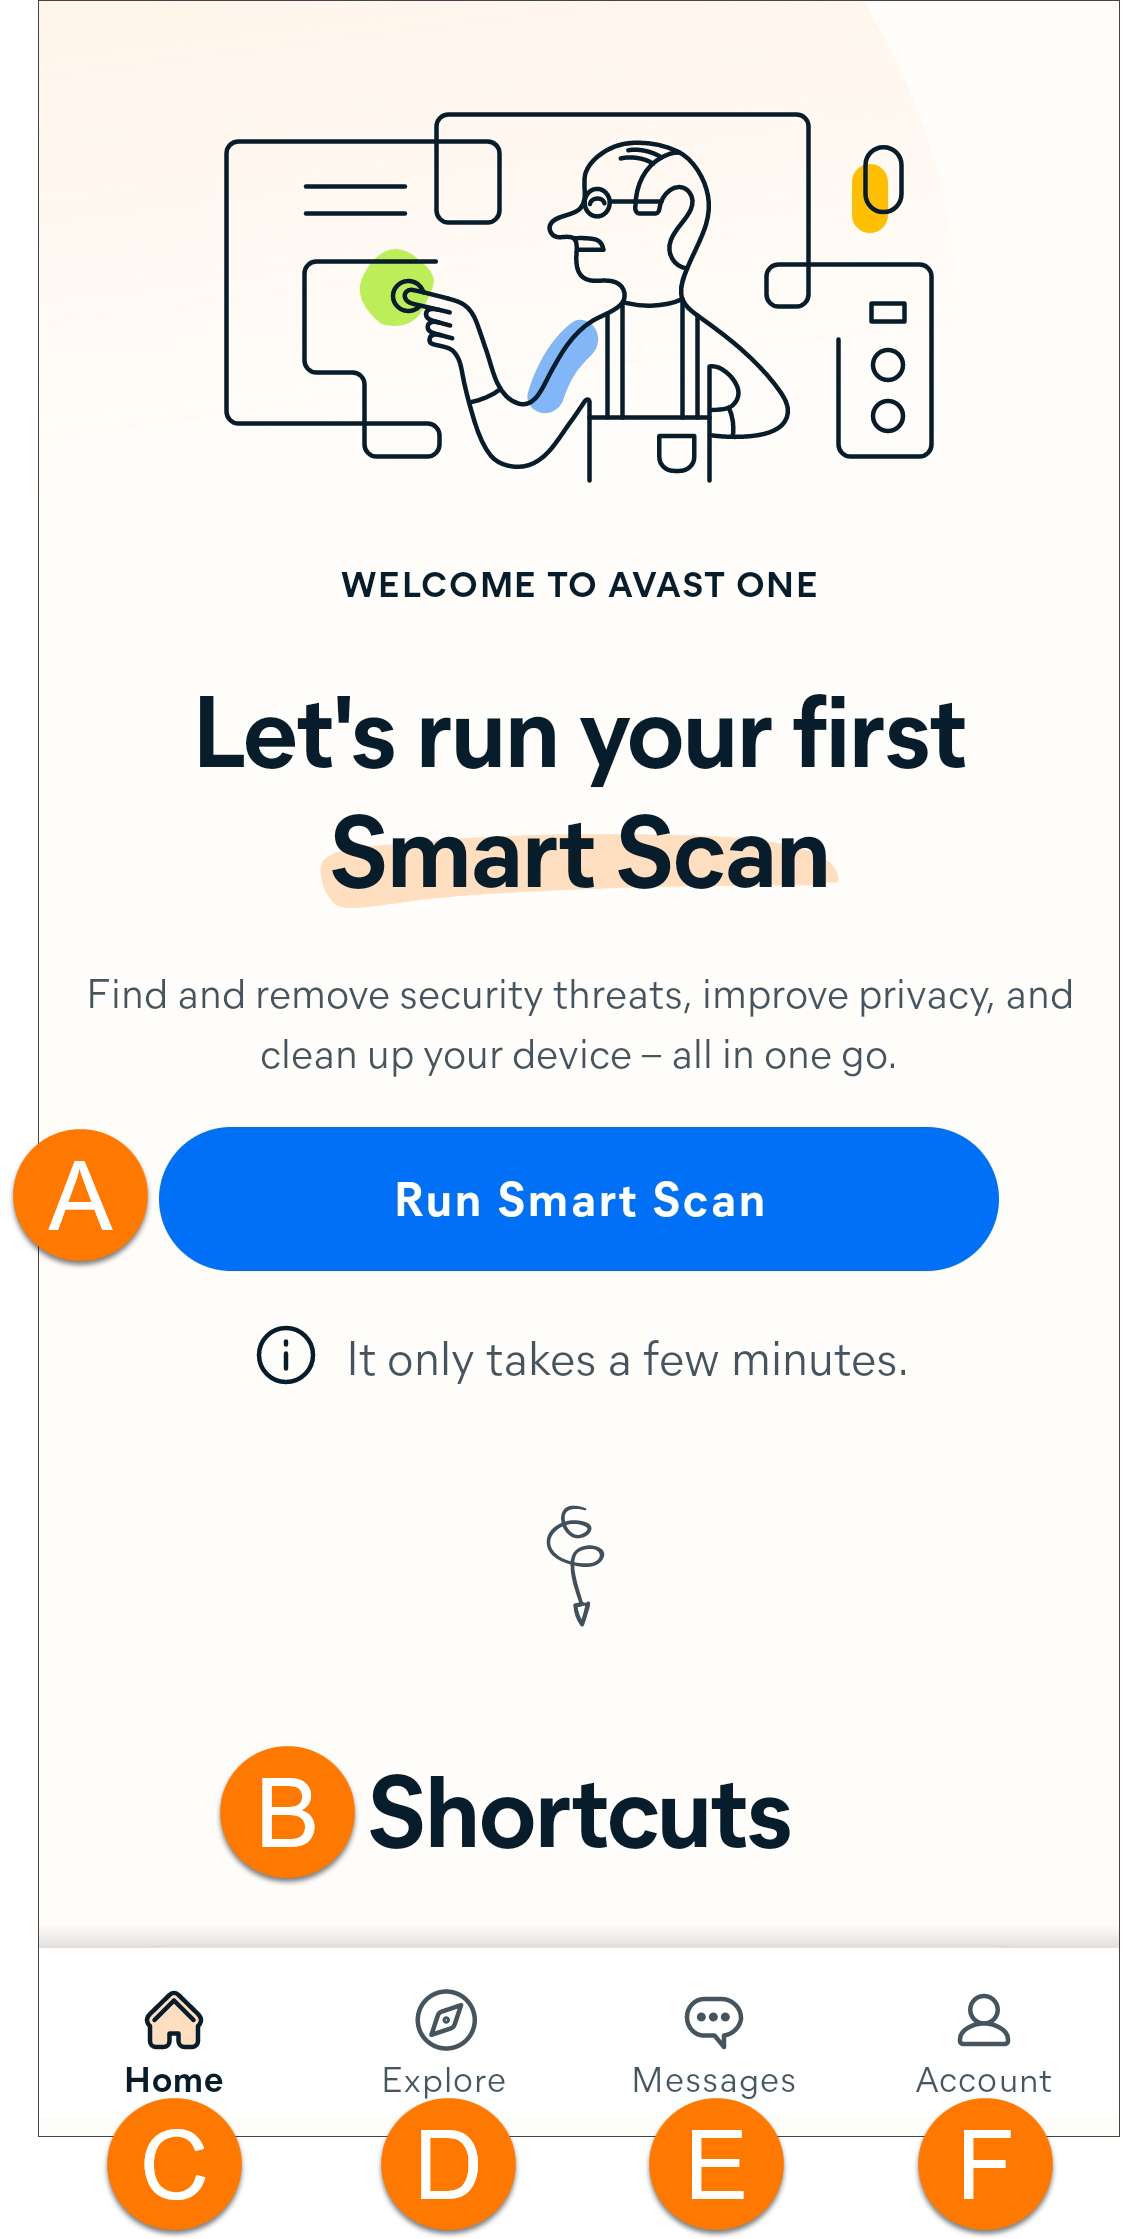
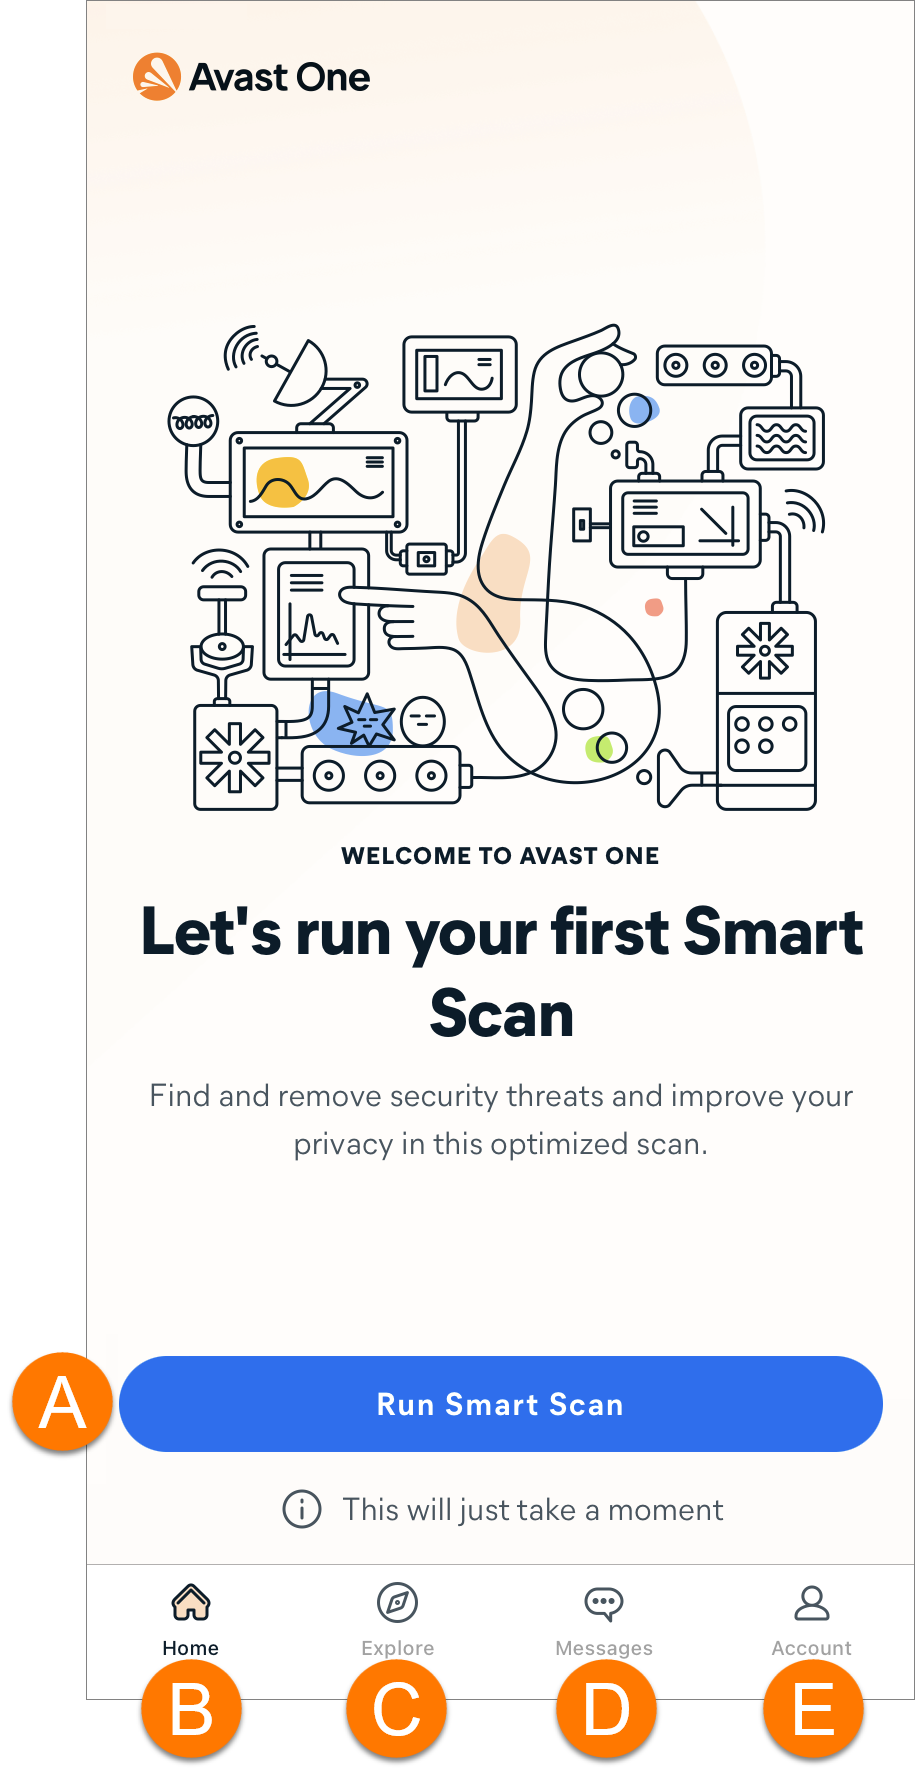
From the Home screen, the following options are available:
- Home: Provides quick access to Avast One Home screen.
- Run Smart Scan: Performs a comprehensive scan that detects malware and other issues.
- Shortcuts: Provides quick access to some of the most popular Avast One features. A full list of features is available via Explore.
- Home: Provides quick access to Avast One Home screen.
- Explore: Provides access to all of the product features.
- Messages: Displays alerts that allow you to easily resolve any detected issues.
- Account: Includes various options, such as signing in to your Avast Account, checking your subscription details, and accessing the Settings.
- Account: Includes various options, such as signing in to your Avast Account, checking your subscription details, and accessing the Preferences.
- Account: Includes various options, such as signing in to your Avast Account, checking your subscription details, and accessing the Settings.
- Run Smart Scan: Performs a comprehensive scan that detects malware and other issues.
- Shortcuts: Provides quick access to some of the most popular Avast One features. A full list of features is available via Explore.
Protect your device
Avast One includes many protection features, which help ensure your device runs safely and alert you about harmful files and connections. To explore the protection features in Avast One:
- Open Avast One and click
 Explore in the left panel.
- Under Device protection, click a feature to learn more.
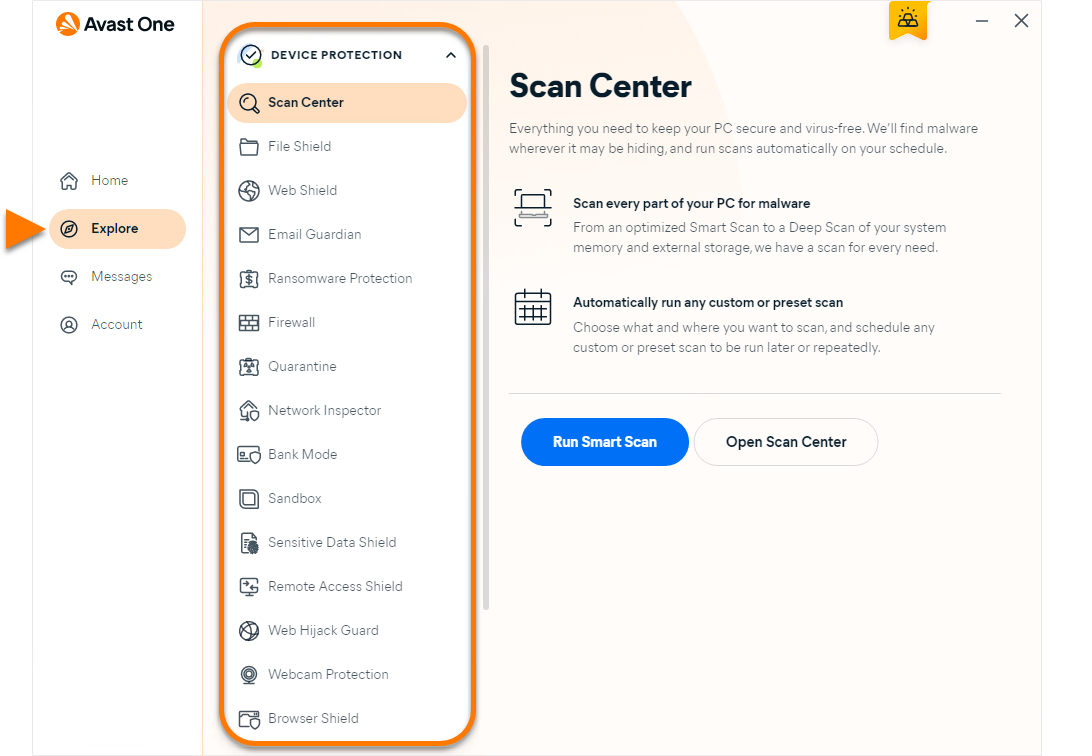
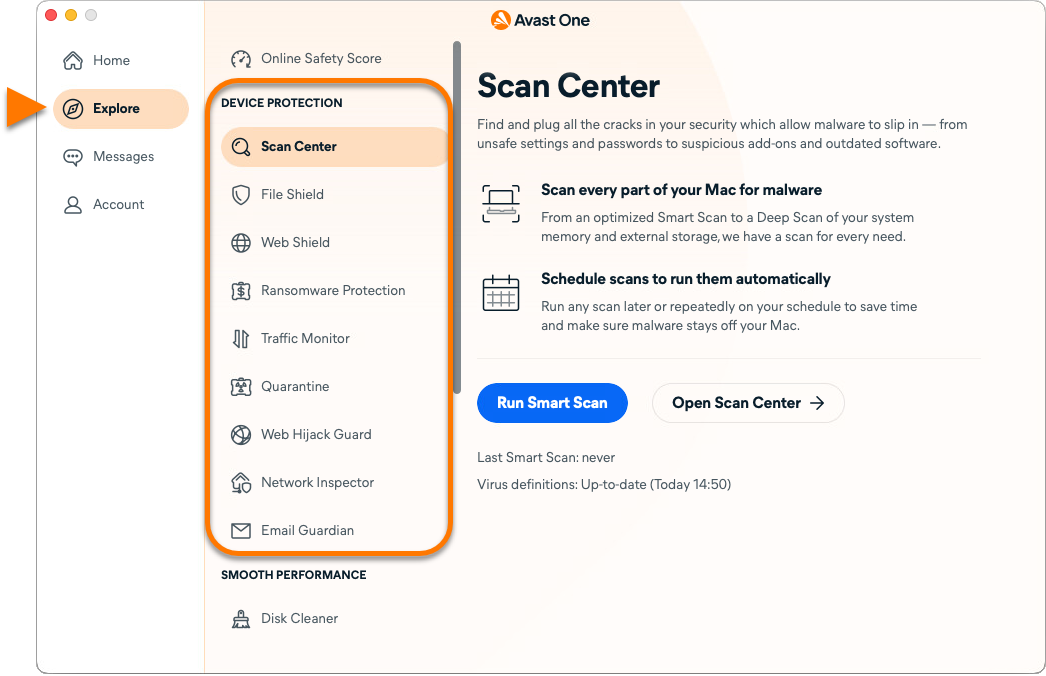
To stay protected, keep Device protection features enabled and run regular scans to check for malware and other security vulnerabilities on your device.
- Avast One - FAQs ▸ Device protection
- Adjusting File Shield settings in Avast One
- Adjusting Web Shield settings in Avast One
- Avast One Email Guardian - Getting Started
- Ransomware Protection - Getting Started
- Avast One Firewall - Getting Started
- Quarantine - Getting Started
- Avast One Network Inspector - Getting Started
- Bank Mode - Getting Started
- Avast One Sandbox - Getting Started
- Avast One Sensitive Data Shield - Getting Started
- Remote Access Shield - FAQs
- Webcam Protection - Getting Started
- Avast One Browser Shield - Getting Started
- Avast One - FAQs ▸ Device protection
- Adjusting File Shield settings in Avast One
- Adjusting Web Shield settings in Avast One
- Ransomware Protection - Getting Started
- Avast One Firewall - Getting Started
- Quarantine - Getting Started
- Avast One Network Inspector - Getting Started
- Email Guardian - Getting Started
Avast One includes many protection features, which help ensure your device runs safely and alert you about harmful files and connections. To explore the protection features in Avast One:
- Tap the Avast One icon on the Home screen of your device to open the app.
- Tap Explore in the bottom panel.
- Under Device protection, select from the following features:
- Scan Center: Allows you to run a scan to check for malware, security vulnerabilities, and performance issues on your device.
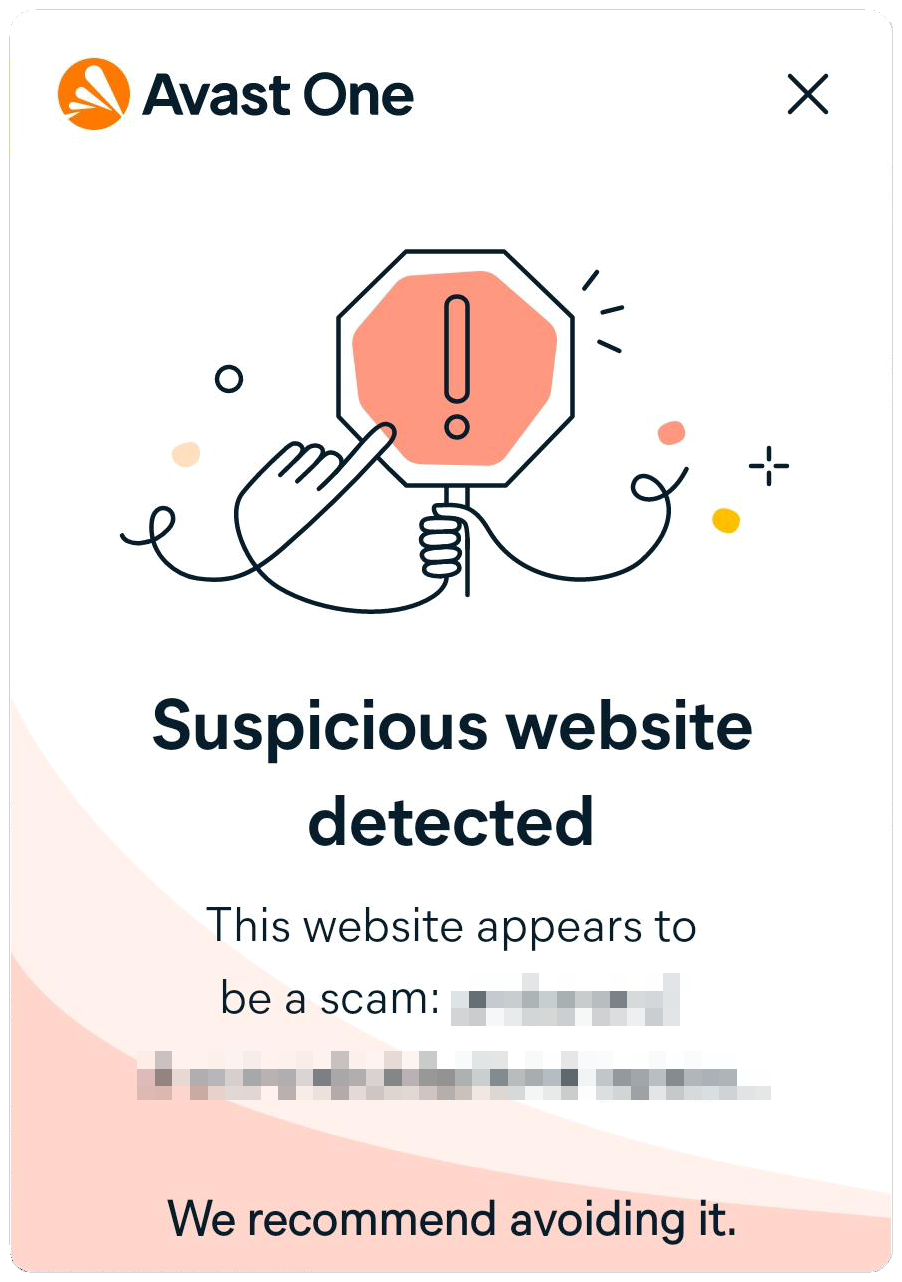
- Web Shield: Blocks malicious URLs and warns you when you try to visit a dangerous website.
- Email Guardian (paid feature): Scans your incoming emails for up to 5 mailboxes when you check them using a web browser. For more information, refer to the article: Email Guardian - Getting Started.
- Scam Protection (paid feature): Checks if the links you receive via email or SMS are safe.
- App Lock (paid feature): Protects your sensitive apps with a PIN, pattern, or fingerprint.


To stay protected, keep Device protection features enabled and run regular scans to check for malware and other security vulnerabilities on your device.
Scan for threats
Scan Center includes a range of scans to detect malware, security vulnerabilities, and performance issues on your PC. To access Scan Center and run a scan:
- Open Avast One and select Explore ▸ Scan Center, then click Open Scan Center.
- Select the Scan now tab, then choose your preferred scan from the following options:
- Smart Scan: Performs a comprehensive scan that detects malware and other issues, including vulnerable software, bad browser add-ons, and performance issues.
- Deep Scan: Performs an in-depth scan for malware, checking your whole system from top to bottom. This scan may take several minutes to complete.
- Targeted Scan: Performs a scan for malware in the folders or drives that you specify.
- Boot-Time Scan: Performs a scan of your PC as it boots to scan for malware that is hard to reach after startup. This advanced scan is designed for use when you suspect a threat in the system.


If a scan detects malware on your PC, the suspicious file is moved to Quarantine.
Scan Center includes a range of scans to detect malware, security vulnerabilities, and performance issues on your Mac. To access Scan Center and run a scan:
- Open Avast One and select Explore ▸ Scan Center, then click Open Scan Center.
- Select the Scan now tab, then choose your preferred scan from the following options:
- Smart Scan: Performs a comprehensive scan that detects malware, as well as privacy and performance issues.
- Deep Scan: Performs an in-depth scan for malware, checking your whole system from top to bottom. This scan may take several minutes to complete.
- Targeted Scan: Performs a scan for malware in the folders or drives that you specify.
- External Storage Scan: Performs a scan of any USB, external drive, or other storage device connected to your Mac.
- Scheduled Scans: Create your own scan and specify the parameters.


If a scan detects malware on your Mac, the suspicious file is moved to Quarantine.
Scan Center includes a range of scans that allow you to check for malware, security vulnerabilities, and performance issues on your device. To access Scan Center and run a scan:
- Open Avast One and select Explore ▸ Scan Center.
- Choose your preferred scan from the following options:
- Smart Scan: Performs a comprehensive scan that detects viruses, malware, vulnerable device and app settings, and advanced issues you can resolve by purchasing a premium subscription.
- Deep Scan: Performs an in-depth scan for malware and potential security vulnerabilities, checking every part of your Android device.
- File Scan: Performs a scan for malware in the files or folders that you specify.
- Network inspector: Checks the networks you are connected to for security risks.

Smart Scan
Smart Scan performs a comprehensive scan that detects when your app settings are not configured for optimal security and privacy. To run a Smart Scan:
- Tap the Avast One icon on the Home screen of your device to open the app.
- Tap Run Smart Scan.
- Wait while Avast One scans your device for vulnerability issues, then tap Resolve. Optionally, tap the Advanced protection panel to view the advanced issues.
- Follow the instructions for each found vulnerability to resolve the issue.


For detailed instructions on how to solve the found issues, refer to the sections below.
Enable Web Shield
Web Shield analyzes your connections to websites and alerts you about harmful files and dangerous or fraudulent connections. To enable Web Shield:
- Open Avast One and tap Explore ▸ Web Shield.
- Tap Switch ON, then follow the on-screen instructions to give Avast One the required permissions.
- If prompted, tap Open Settings and follow the instructions to disable battery optimization for Avast One.


Web Shield is now enabled. The following options are available via the Web Shield screen:
- Disable: Tap
⋮More options (three dots) ▸ Turn off Web Shield to temporarily disable the feature. - Scam Protection: When Scam Protection is enabled, Avast One opens behind the scenes to quickly scan links from outside your web browser (for example, from an email, SMS, or messaging app).
- Block or allow websites: Specify webpages that are always allowed or blocked.
- Threats blocked: View the number of blocked threats on an hourly basis.

Web Shield analyzes your connections to websites and alerts you about harmful files and dangerous or fraudulent connections. To enable Web Shield:
- Open Avast One and tap Explore ▸ Web Shield.
- Tap Next twice, then tap Enable.
- If prompted, tap Allow to add VPN configurations.


Web Shield is now enabled. The following options are available via the Web Shield screen:
- Disable: Tap Turn off Web Shield to temporarily disable the feature.
- Statistics: View the number of scans and blocked threats on an hourly basis.
- Blocked websites: Tap to view a list of malicious websites blocked by Avast One.

Set up Email Guardian
Email Guardian is a paid feature which scans your incoming emails for up to 5 mailboxes when you check them using a web browser. Every new email is labeled as either ![]() , or
, or ![]() for potentially malicious and phishing emails. To set up Email Guardian:
for potentially malicious and phishing emails. To set up Email Guardian:
- Open Avast One and tap Explore ▸ Email Guardian.
- Tap Next, then tap Add mailbox.
- Enter your email address, tap Continue, then tap Sign in. Your browser opens.
- Follow the on-screen instructions to give Avast One permissions to flag suspicious emails, then tap Got it.


Your mailbox is now set up for monitoring by Email Guardian.
For more information about Email Guardian, refer to the following articles:
Boost performance
When you use the Avast One performance tools regularly, they can enhance your Mac's performance by clearing disk space and eliminating unwanted programs and security risks. To use the performance features:
- Open Avast One and select Explore in the left panel.
- Under Smooth performance, select from the following features:
- Disk Cleaner (paid feature): Scans for and safely deletes dispensable files that may be using a large amount of disk space on your Mac.
- App Uninstaller (paid feature): Free up space by removing unused apps and helps ensure that all junk files are deleted.
- Photo Cleaner (paid feature): Delete bad or similar photos to create space for more photos and easily browse your library.
- Duplicate Finder (paid feature): Scans and lets you review the detected duplicate files and select which files you want to remove from your Mac.

Connect to VPN
VPN Secure Connection is a Virtual Private Network (VPN) that disguises your real IP address while you browse online. To connect to the VPN:
- Open Avast One and select Explore ▸ VPN Secure Connection.
- Click the gray (OFF) slider so that it changes to green (ON). By default, you are connected to the Fastest location.


- Open Avast One and select Explore ▸ VPN Secure Connection.
- Click the red (OFF) slider so that it changes to green (ON). By default, you are connected to the Fastest location.
The first time you connect to the VPN, you are prompted to add VPN configurations. Click Allow on the permissions dialog that appears.


You are now connected to the internet via our secure Avast VPN servers.
- Open Avast One and select Explore ▸ VPN Secure Connection.
- Tap the large gray OFF button so that it changes to blue ON.


You are now connected to the internet via our secure Avast VPN servers. By default, you are connected to the Fastest location.
The following options are available via the VPN Secure Connection screen:
- Change location: With the paid version of Avast One, you can tap the Server location tile and select a different location from the list of available servers.
- Auto-connect on public Wi-Fi: Automatically enables VPN Secure Connection whenever you connect to an untrusted public Wi-Fi network (such as in an airport or cafe). To enable this setting, tap the gray (OFF) slider so that it changes to blue (ON).

- Open Avast One and select Explore ▸ VPN Secure Connection.
- Tap Next twice, then tap Enable.
- If prompted, tap Allow to add the necessary VPN configurations.


You are now connected to the internet via our secure Avast VPN servers. By default, you are connected to the Fastest location.
The following options are also available via the VPN Secure Connection screen:
- Disable: Tap Turn off to temporarily disable the feature.
- Location: With the paid version of Avast One, you can tap Your location appears to others as: and select a different location from the list of available servers.
- IP address: Shows the randomly assigned virtual IP address, keeping your real location hidden while you are connected to the VPN.

Check for leaked passwords
Dark Web Monitoring allows you to check if the login details for any of your online accounts have been involved in a data breach. The exact functionality of this feature differs according to your version of the product. Refer to the relevant section below:
You can run a one-time breach check at any time to verify if your passwords have already been exposed in a data breach. To run a one-time breach check:
- Open Avast One and select Explore ▸ Dark Web Monitoring, then click Open Dark Web Monitoring.
- Enter the email address that you want to scan for breaches, then click Check data breaches.
- When the scan is complete, the email address appears in the Compromised passwords tab. Refer to the relevant information below:
- If you see the Compromised passwords message at the top of the screen, we have found that at least one of your online accounts has been involved in a data breach. We recommend you immediately change the passwords for all listed accounts.
- If you see 0 Passwords next to your email address, we have not found any data breaches involving your online accounts.
- If you see the Compromised passwords message at the top of the screen, we have found that at least one of your online accounts has been involved in a data breach. We recommend you immediately change the passwords for all listed accounts.


For more information about Dark Web Monitoring, refer to the following articles:
You can monitor a maximum of 5 email addresses and are notified if your online accounts that use these email addresses are involved in a data breach.
Your Avast Account email address is automatically added as a monitored email address. To add a monitored email address:
- Open Avast One and select Explore ▸ Dark Web Monitoring, then click Open Dark Web Monitoring.
- Select the Breach monitoring tab, then click + Add an email.
- Enter the email address that you want Avast One to monitor, then click Monitor for data breaches.
- Go to your email inbox and follow the on-screen instructions to confirm the email address is yours, then return to Avast One and click Email is verified.


Avast One will now continuously monitor for new data breaches involving this email address. You can check for breached online accounts at any time by clicking the Compromised passwords tab on the main Dark Web Monitoring screen.
For more information about Dark Web Monitoring, refer to the following articles:
Data Breach Monitoring allows you to check if the login details for any of your online accounts have been involved in a data breach. The exact functionality of this feature differs according to your version of the product. Refer to the relevant section below:
You can run a one-time breach check at any time to verify if your passwords have already been exposed in a data breach. To run a one-time breach check:
- Open Avast One and select Explore ▸ Data Breach Monitoring, then click Open Data Breach Monitoring.
- Enter the email address that you want to scan for breaches, then click Check data breaches.
- Follow the relevant step below according to the message you see on the results screen:
- Compromised passwords: We have found that at least one of your online accounts has been involved in a data breach. We recommend you immediately change the passwords for all listed accounts. Click Change password to view more details about a particular breach.
- No compromised passwords: We have not found any data breaches involving your online accounts. Click the back arrow in the top-left corner to return to the data breach monitoring screen.
- Compromised passwords: We have found that at least one of your online accounts has been involved in a data breach. We recommend you immediately change the passwords for all listed accounts. Click Change password to view more details about a particular breach.


You can monitor a maximum of 5 email addresses and are notified if your online accounts that use these email addresses are involved in a data breach.
Your Avast Account email address is automatically added as a monitored email address. To add a monitored email address:
- Open Avast One and select Explore ▸ Data Breach Monitoring, then click Open Data Breach Monitoring.
- Select the Breach monitoring tab, then click Add an email.
- Enter the email address that you want Avast One to monitor, and click Monitor for breaches.
- Go to your email inbox and follow the on-screen instructions to confirm the email address is yours, then return to Avast One and click Continue.


Avast One will now continuously monitor for new data breaches involving this email address. You can check for breached online accounts at any time by clicking the Breach monitoring tab on the Data Breach Monitoring screen.
Data Breach Monitoring allows you to check if the login details for any of your online accounts have been involved in a data breach. The exact functionality of this feature differs according to your version of the app. Refer to the relevant section below:
You can run a one-time breach check at any time to verify if your passwords have already been exposed in a data breach. To run a one-time breach check:
- Open Avast One and select Explore ▸ Data Breach Monitoring.
- Select the Check now tab, then enter the email address that you want to scan for breaches and tap Check data breaches.
- Data Breach Monitoring scans for data breaches containing the email address you entered, then displays the status of your account. Follow the relevant information according to the message you see on the results screen:
- Compromised accounts: We have found that at least one of your online accounts has been involved in a data breach. We recommend you immediately change the passwords for all accounts listed under Compromised accounts.
- No compromised accounts: We have not found any data breaches involving your online accounts. Tap Done.


You can monitor a maximum of 5 email addresses and are notified if your online accounts that use these email addresses are involved in a data breach.
Your Avast Account email address is automatically added as a monitored email address. To add a monitored email address:
- Open Avast One and select Explore ▸ Data Breach Monitoring.
- Tap Add email, then enter the email address that you want Avast One to monitor and tap Add.
- After the scan completes, tap Start monitoring.
- Go to your email inbox and follow the on-screen instructions to confirm the email address is yours, then return to Avast One and tap Already verified.


After the email address is verified, Avast One will continuously monitor for new data breaches involving this email address. You can check for breached online accounts at any time on the main Data Breach Monitoring screen.
Data Breach Monitoring allows you to check if the login details for any of your online accounts have been involved in a data breach. The exact functionality of this feature differs according to your version of the app. Refer to the relevant section below:
You can run a breach check at any time to verify if your passwords have already been exposed in a data breach. To run a breach check:
- Open Avast One and tap Explore ▸ Data Breach Monitoring.
- Tap Next twice.
- Enter the email address that you want to scan for breaches, then tap Scan breaches.
- Data Breach Monitoring scans for data breaches containing the email address you entered, then displays the status of your account. Follow the relevant information according to the message you see on the results screen:
- Compromised accounts: We have found that at least one of your online accounts has been involved in a data breach. We recommend you immediately change the passwords for all the listed compromised accounts. Tap any listed account for more details about the breach.
- No compromised accounts: We have not found any data breaches involving your online accounts. Tap Done.
- Compromised accounts: We have found that at least one of your online accounts has been involved in a data breach. We recommend you immediately change the passwords for all the listed compromised accounts. Tap any listed account for more details about the breach.


You can monitor a maximum of 5 email addresses and are notified if your online accounts that use these email addresses are involved in a data breach. To monitor an email address:
- Open Avast One and tap Explore ▸ Data Breach Monitoring.
- Tap Next twice.
- Enter the email address that you want Avast One to monitor, then tap Scan breaches.
- After the scan completes, tap Turn on breach alerts. A verification email is sent to the provided address.
- Check your inbox for the verification email and tap the Verify my email button.
- Return to Avast One and tap OK to confirm verification.


Avast One will continuously monitor for new data breaches involving this email address. To resolve compromised accounts, follow the steps below:
- Open Data Breach Monitoring and tap the email address that has been involved in a data breach.
- Choose a compromised account to view additional information about the breach and tap Change password to update your details.


Repeat for all breached accounts.
Turn on Tracking Prevention
Tracking Prevention is a paid feature that helps you be more private online by preventing data collection companies from assigning you an online ID to track your behavior and share the data with advertisers.
- Open Avast One and select Explore ▸ Tracking Prevention.
- Click the red (OFF) slider so that it changes to green (ON).
Tracking Prevention is now enabled.
Tracking Prevention is a paid feature which helps you be more private online by preventing data collection companies from assigning you an online ID to track your behavior and share the data with advertisers.
- Open Avast One and select Explore ▸ Tracking Prevention.
- Click Turn on.
Tracking Prevention is now enabled.
Set up Photo Vault
Photo Vault protects your photos and images from prying eyes by moving them to a passcode-protected, encrypted vault. To start using Photo Vault, follow the instructions below:
- Open Avast One and select Explore ▸ Photo Vault.
- Tap Next twice, then tap Enable Photo Vault.
- Create a four digit access code that you will use to sign in to your Photo Vault. Type it a second time to confirm.
- To add photos, select either Photo Library or Camera and follow the relevant steps below:
- Photo Library
- If prompted, tap Allow Access to All Photos to give Avast One permission to access your Photo Library.
- Tap a photo to select it, then tap Import.
- Optionally, tap Delete to remove the photo from your photo library.
- Camera
- If prompted, tap OK to give Avast One permission to access your camera.
- Take a photo, then tap Use Photo or Retake.
- Photo Library


Your photo is imported into Photo Vault.
Use Privacy Advisor
Privacy Advisor helps you change the privacy settings of your online accounts (such as Facebook or Amazon) to control your data. To follow Privacy Advisor guides:
- Open Avast One and tap Explore ▸ Privacy Advisor.
- Tap Open guide or choose another guide on the list.
- Follow the steps in the guide to change your privacy settings, then tap Mark as complete.


- Open Avast One and tap Explore ▸ Privacy Advisor.
- Tap Next.
- Tap Open featured guide or choose another guide on the list.
- Follow the steps in the guide to change your privacy settings, then tap Mark guide as completed.


Your privacy settings are now updated.
Boost performance
When you use the Avast One performance tools regularly, they can enhance your PC's performance by clearing disk space and eliminating unwanted programs and security risks. To use the performance features:
- Open Avast One and select Explore in the left panel.
- Under Smooth performance, select from the following features:
- PC Speedup: Scans for applications that are running in the background on your PC and allows you to safely put them to sleep. This improves the performance of your PC and reserves its resources for the applications you choose to run.
- Software Updater: Keeps common third-party software up to date to eliminate potential security risks. Software Updater displays the most popular programs installed on your PC and allows you to easily update all outdated software.
- Do Not Disturb Mode: Helps silence unnecessary notifications while you run almost any application in fullscreen. For more information, refer to the article: Avast One Do Not Disturb Mode - Getting Started.
- Disk Cleaner (paid feature): Scans for and safely deletes dispensable files that may be using a large amount of disk space on your PC.
- Driver Updater (paid feature): Scans your hardware for broken and outdated drivers, and updates them to prevent problems with your PC.
- Duplicate Finder (paid feature): Scans and lets you review the detected duplicate files and select which files you want to remove from your PC.

Free up space
Junk Cleaner detects dispensable items that are occupying your device's storage, including leftover APKs, residual files, visible cache, and shared cache. To remove these items to free up storage space:
- Open Avast One and select Explore ▸ Performance Center.
- Select Junk Cleaner.
The first time you run the Junk Cleaner, you may be prompted to grant All files access to Avast One in your device settings.
- Once the scan completes, tap Resolve.
- Tap Delete to clean a specific category or Delete all to clean everything.
- Tap Done to return to the Performance Center screen.


Your device is now optimized. With the paid version of Avast One, you can enable Automatically free up space to ensure that Avast One automatically removes junk files from your device once per day.
Manage Settings
Manage Preferences
To access the Avast One application settings:
- Click Account in the left panel, then select Settings.
- Select a tab to view the settings for each category:
- General: Check for virus definition and application updates, change the app language, adjust notification settings, and protect the application with a password.
- Exceptions: Specify websites, files, and folders you want to exclude from all scans and shields.
- App permissions: Add an application to the allow or block lists for Ransomware Protection, Sensitive Data Shield, Webcam Protection, and Password Protection.
- Troubleshooting: Access advanced troubleshooting options to resolve issues with Avast One. These settings are designed for advanced users only. Otherwise, we recommend contacting Avast Support if you experience issues with Avast One.
- Privacy policy: Choose which data you share with Avast and the types of offers and communications you receive from us.


- Click Account in the left panel, then select Preferences.
- Select a tab to view settings for each category:
- General: Check for virus definition and application updates, adjust notification settings, and optionally join our beta program.
- Privacy: Choose which data you share with Avast and the types of offers and communications you receive from us.
- Notifications: Manage your notification preferences.
- Disk Cleaner: Choose whether to scan your Downloads folder, external drives, system cache, and logs.
- Duplicate Finder: Choose whether to ignore hidden files, move duplicates to trash, and adjust the size of target duplicate files.


Manage Account and Settings
Tap ![]() Account in the bottom panel, then choose from the following options:
Account in the bottom panel, then choose from the following options:
- Account: Sign in to an existing Avast Account or check which account is currently connected to Avast One.
- Subscription: View your subscription status or upgrade to the paid version of the app.
- Settings: Customize which notifications you want to receive and update your personal privacy settings.
- Help and support: View the FAQs.
- About: Check your current app version.

Tap ![]() Account in the bottom panel, then choose from the following options:
Account in the bottom panel, then choose from the following options:
- Account: Sign in to an existing Avast Account or check which account is currently connected to Avast One.
- Subscription: View your subscription status or upgrade to the paid version of the app.
- Settings: Manage your account, set or change your Photo Vault access code, and update your personal privacy settings.
- Help and support: Contact Avast Support, send us a message, or explore the Avast forum.
- About: Read the End User License Agreement (EULA) and Privacy policy, open the list of third-party libraries used by Avast One, or check your app version.

Further recommendations
For more information about Avast One, refer to the following article:
- Avast One
- Windows, Mac, Android and iOS
Updated on: 29/04/2026
