

After installing or upgrading your Avast app, you need to allow all permissions so that your Avast product can fully protect your system. The Avast setup tutorial guides you through this process.
- This Mac is not fully protected
- Allow us to fully protect your Mac
- Missing kernel extensions
- Missing system extensions
- Allow Full Disk Access
- Add Avast certificates to the Keychain
If any permission is needed, the Avast setup tutorial appears automatically after opening your Avast app. To allow necessary permissions, follow the steps in the relevant section below:
- Allow real-time protection
- Add DNS proxy configurations
- Allow Full Disk Access
- Add Avast certificates
- Allow Focus mode access
- Allow location services
- Allow Local Network access
Allow real-time protection
Granting permission to enable real-time protection allows Avast to protect your Mac and detect malware in real time.
- Open your Avast app and, if you are running it for the first time, click Open on the setup screen that asks you to enable real-time protection.

- Click the slider next to Avast Security, so that it changes from gray (OFF) to blue (ON).
- When prompted, enter the password that you use when you start your Mac, and click Modify Settings.
- Click Done.


The necessary real-time protection permission is granted.
- Open your Avast app and, click Open on the setup screen that asks you to enable real-time protection.
- Ensure Privacy & Security is selected, scroll to the Security section, then click Allow below System software from application "Avast Security" was blocked from loading.
- When prompted, enter the password that you use when you start your Mac, and click Modify Settings.


The necessary real-time protection permission is granted.
Add DNS proxy configurations
Adding a DNS proxy to your Mac enables Avast to actively monitor websites for threats while you browse the internet.
- Click Open on the setup screen that asks to keep you safe while browsing.
- Click Allow.


The necessary DNS proxy configurations are added.
Allow Full Disk Access
Allowing Full Disk Access enables Avast to scan your entire Mac for hidden threats.
- Click Open on the setup screen that asks to scan your disk for malware.
- Select your Avast application using either option A or B below:
- Option A: Click the slider next to Avast Security, so that it changes from gray (OFF) to blue (ON).
- Option B: Click the
+plus icon, then select Avast Security in the Applications folder, and click Open.
- Option A: Click the slider next to Avast Security, so that it changes from gray (OFF) to blue (ON).
- When prompted, enter the password that you use when you start your Mac, and click Modify Settings.
- When prompted, we recommend to select Quit & Reopen.
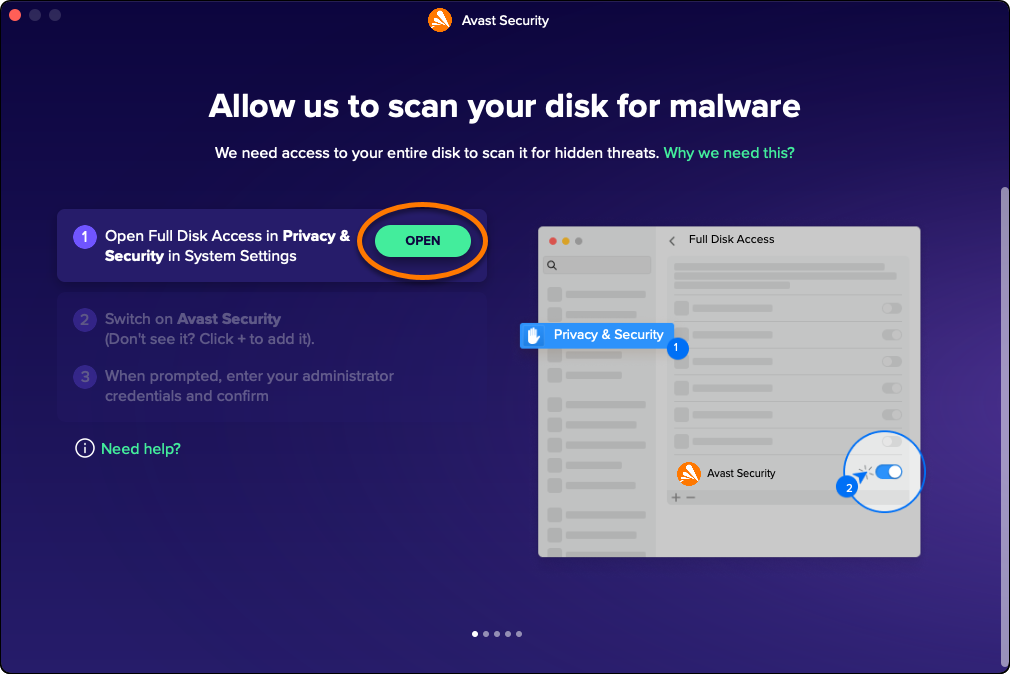


Full Disk Access is granted for Avast.
Add Avast certificates
Adding Avast certificates allows Avast to stop browser threats. If you are prompted to add Avast certificates to the Keychain, follow the steps below:
- Click Open on the setup screen that asks to update your certificate settings.
- Enter the password that you use when you start your Mac, then click Update Settings.
- Click Got it.
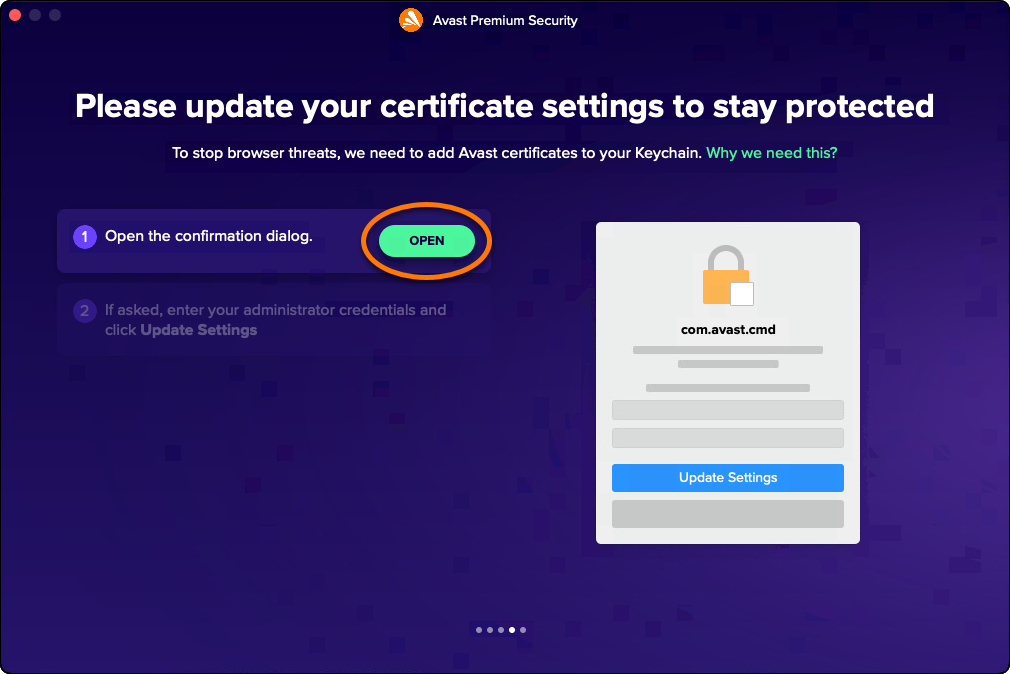


Avast certificates are now added.
Allow Focus mode access
Allowing access to Focus mode enables Avast to know when to silence notifications.
- Click Open on the setup screen that asks you to let us know when you do not want to be disturbed.
- Click the slider next to Avast Security, so that it changes from gray (OFF) to blue (ON).
- When prompted, enter the password that you use when you start your Mac, and click Modify Settings.
- When prompted, click Quit & Reopen.


Access to Focus mode is now granted for your Avast app.
Allow Location Services
Grant permission to enable Location Services for your Avast app to analyze your network's safety.
- Click Open on the setup screen that asks to analyze your network's safety.
- In the Security & Privacy window, click the lock icon at the bottom.
- When prompted, enter the password that you use when you start your Mac, and click Unlock.
- Enable the toggle switch next to Location Services.
- Enable the toggle switch next to Avast.
Allow Local Network access
Grant Local Network access to allow the Avast app to analyze the safety of your network.
If prompted, click Allow to grant Avast permission to access and analyze your local network.
To manually update the permission:
- Go to Apple menu ▸ System Settings.
- In the sidebar, click Privacy & Security. You may need to scroll down.
- Click Local Network.
- Locate Avast in the list of apps, then turn Local Network access On or Off as needed.
Troubleshooting
If you are unable to allow the permissions described in this article, refer to the following article for help:
- All Avast apps
- macOS
Updated on: 9/21/26

 © 2025 Gen Digital Inc.