Ransomware Protection secures your personal photos, documents, and files from being stolen, modified, deleted, or encrypted by ransomware attacks. Refer to the sections in this article to learn how to adjust and manage all Ransomware Protection settings.
Modify your protected folders
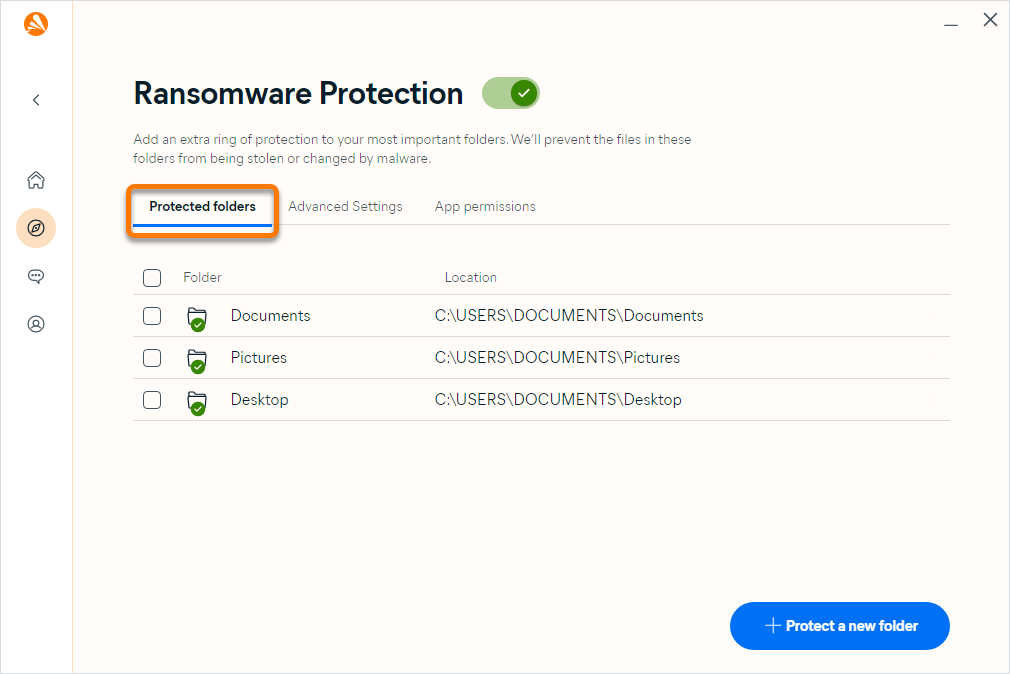
By default, Ransomware Protection scans your PC and automatically secures folders where your personal data might be stored. These folders are added to the protected folders list. You can also specify other folders you want to protect from untrusted applications or remove an automatically secured folder from the list.
To add or remove folders from the protected folders list:
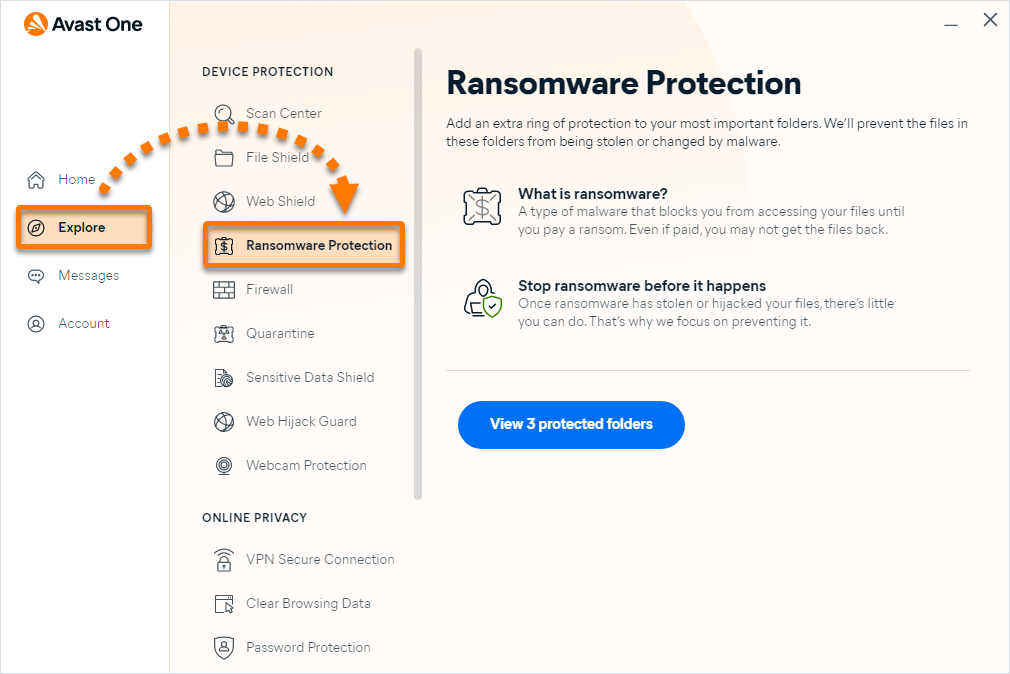
- Open Avast One, then select
 Explore ▸ Ransomware Protection.

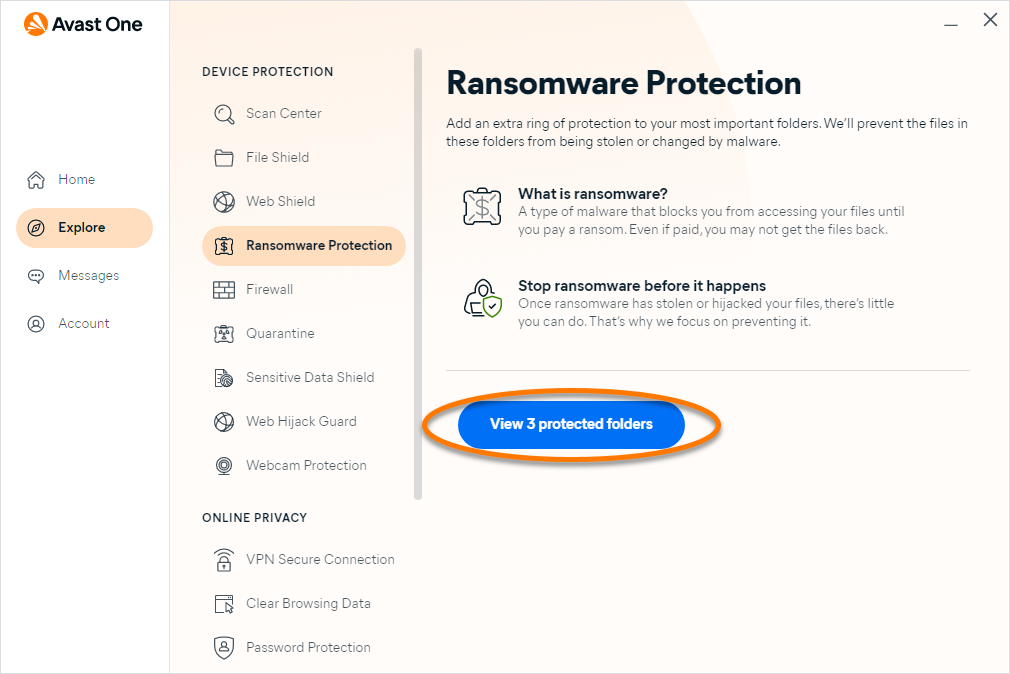
- Click View protected folders.

- Ensure the Protected folders tab is selected.

- Add or remove a selected folder:
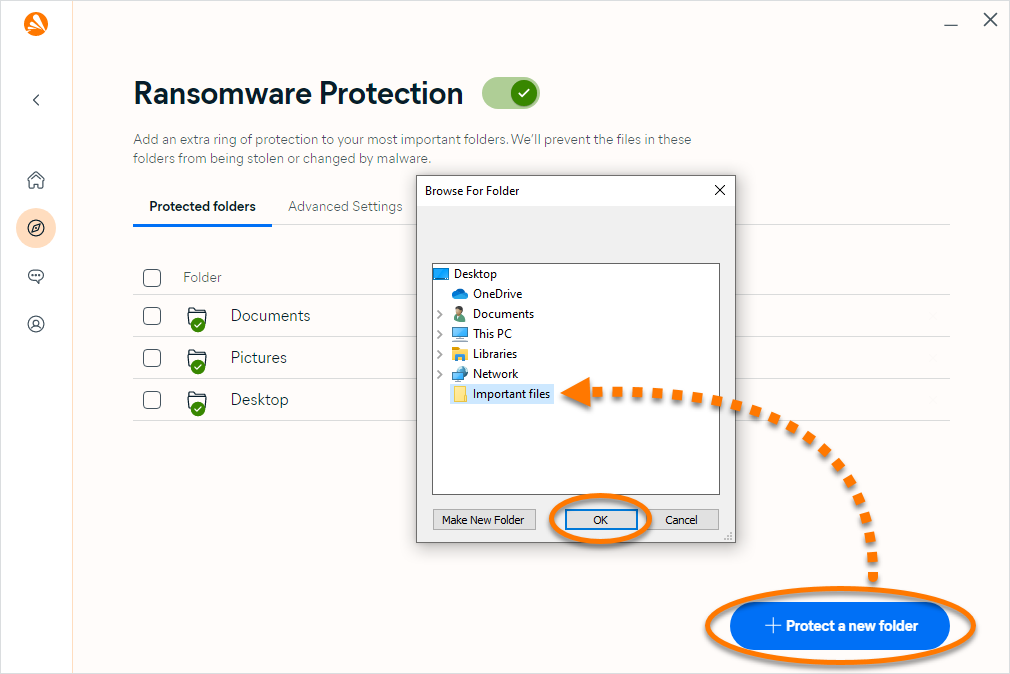
- To add a folder: Click + Protect a new folder, select the folder you want to protect, then click OK.

- To remove a folder: Hover your cursor over the folder's panel, click the X icon that appears, then select Yes, stop protecting.

- To add a folder: Click + Protect a new folder, select the folder you want to protect, then click OK.
Select your preferred behavior mode
You can adjust how sensitively Ransomware Protection monitors applications that attempt to access files in your protected folders. To configure Ransomware Protection's behavior:
- Open Avast One, then select
 Explore ▸ Ransomware Protection.

- Click View protected folders.

- Select the Advanced Settings tab.

- Click an option to select your preferred mode:
- Smart Mode (default and recommended setting): Ransomware Protection refers to a list of commonly used and trusted applications to determine which applications can modify files in your protected folders. If any applications that are not in this list attempt to modify files in your protected folders, you are notified and asked for permission.
- Strict Mode: If any applications attempt to modify files in your protected folders, you are notified and asked for permission every time (excluding the applications you have already added to the app permissions list). Selecting this option may result in frequent and potentially obtrusive alerts.

Specify protected file types
Some common file types are automatically protected by Ransomware Protection. To view this list and optionally select or add other file types:
- Open Avast One, then select
 Explore ▸ Ransomware Protection.

- Click View protected folders.

- Select the Advanced Settings tab.

- Scroll to the Select which file types to protect section to view the file types secured in your protected folders. All listed file types are selected by default. Untick the box next to a file type to deselect it.

- You can also add other file types by typing the file extension (for example, .html) into the text box below the list of protected file types.

Manage app permissions
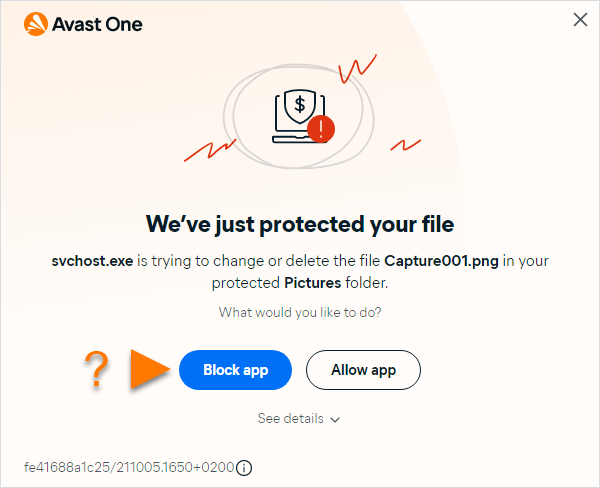
When an application tries to access a protected file, a Ransomware Protection notification appears, prompting you to select your preferred action. Click Block app to always block the app from accessing your protected folders, or click Allow app to always allow the app to access your protected folders.
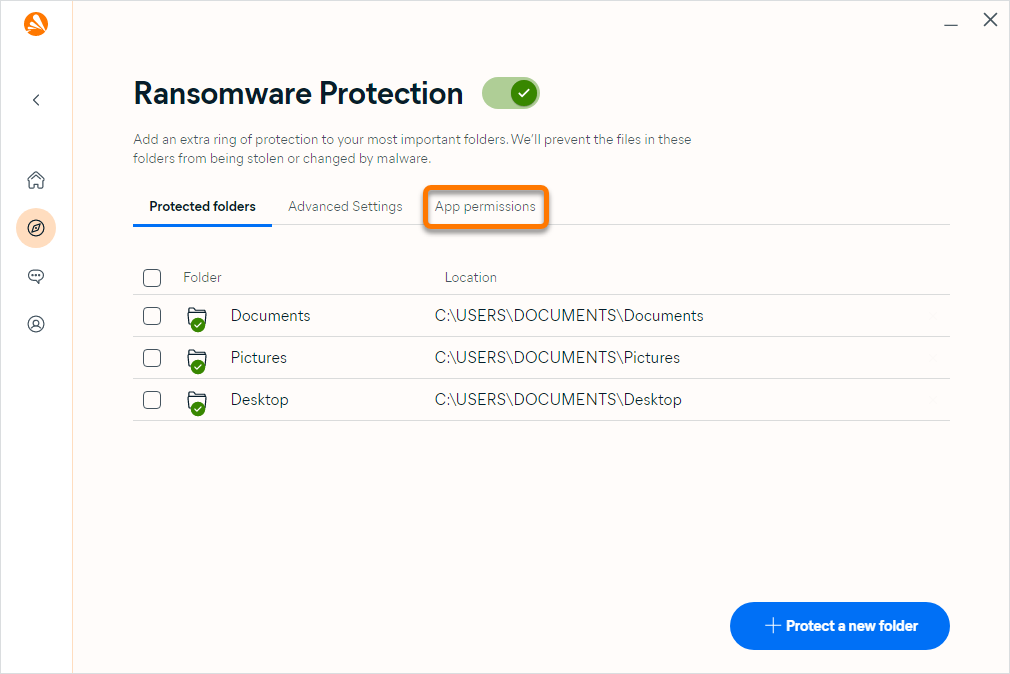
Alternatively, on the App permissions tab, you can specify applications that are always blocked or allowed access to your protected folders.
- Open Avast One, then select
 Explore ▸ Ransomware Protection.

- Click View protected folders.

- Select the App permissions tab.

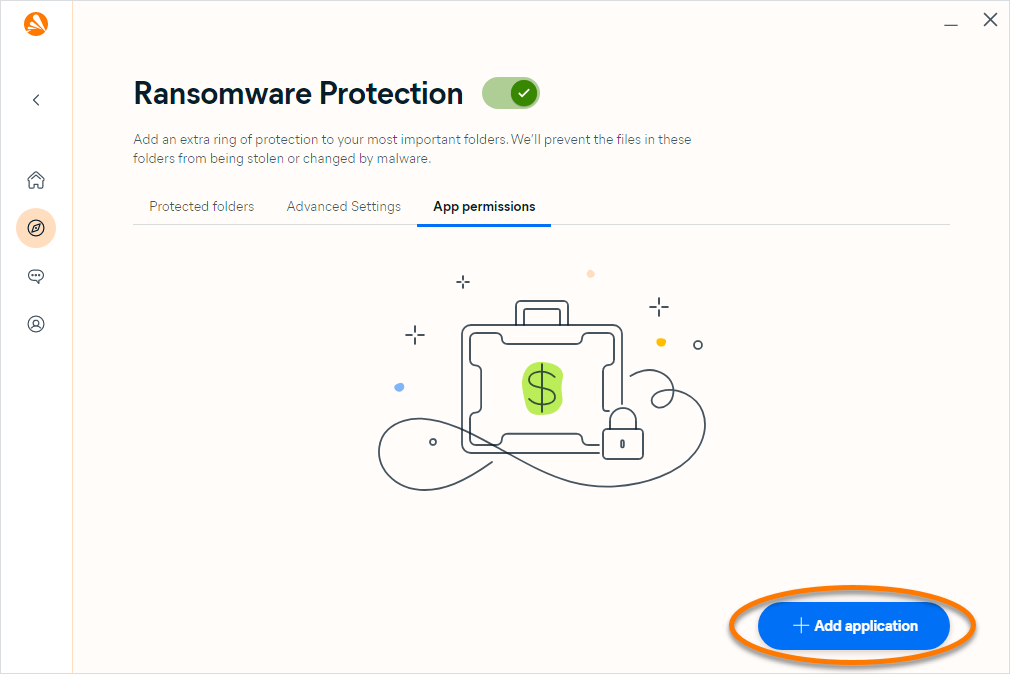
- Click + Add application.

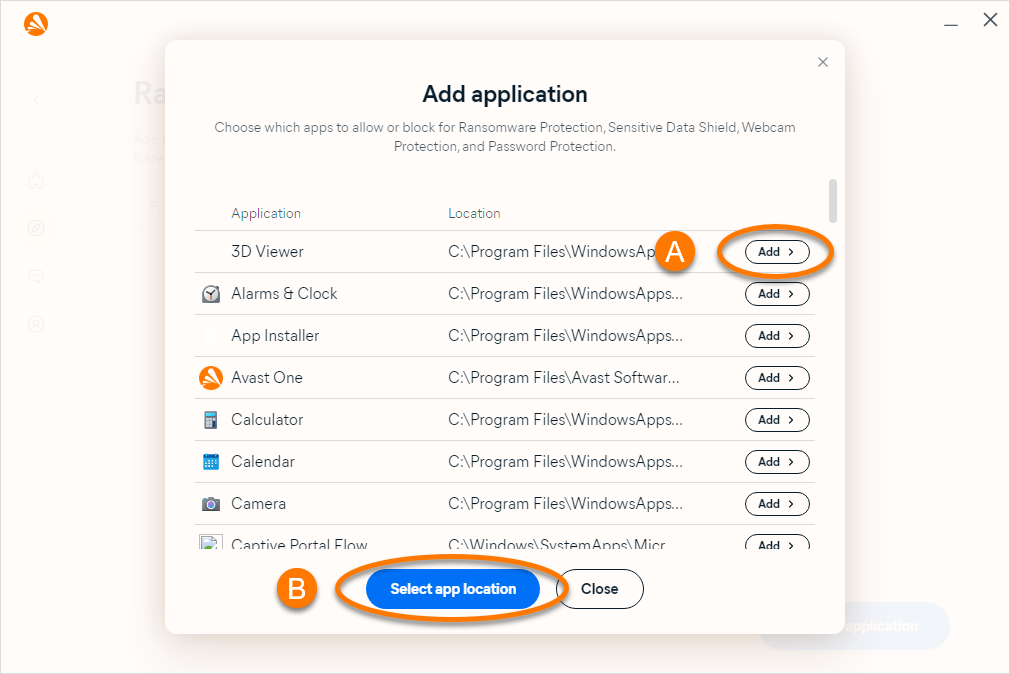
- Select an app using either method below:
- Select from list: Click Add next to the application you want to block or allow.
- Select by location: Click Select app location, then locate the application on your PC and click Open.

The application is added to the app permissions list and the status is set to Blocked. To change the status to Allowed, click the red (Blocked) slider next to an application in the list so that it changes to green (Allowed).
To remove an application from the list, tick the box next to the relevant app, then click Remove app.
Disable Ransomware Protection
Ransomware Protection is enabled by default, but can be disabled for troubleshooting purposes by following the steps below:
- Open Avast One, then select
 Explore ▸ Ransomware Protection.

- Click View protected folders.

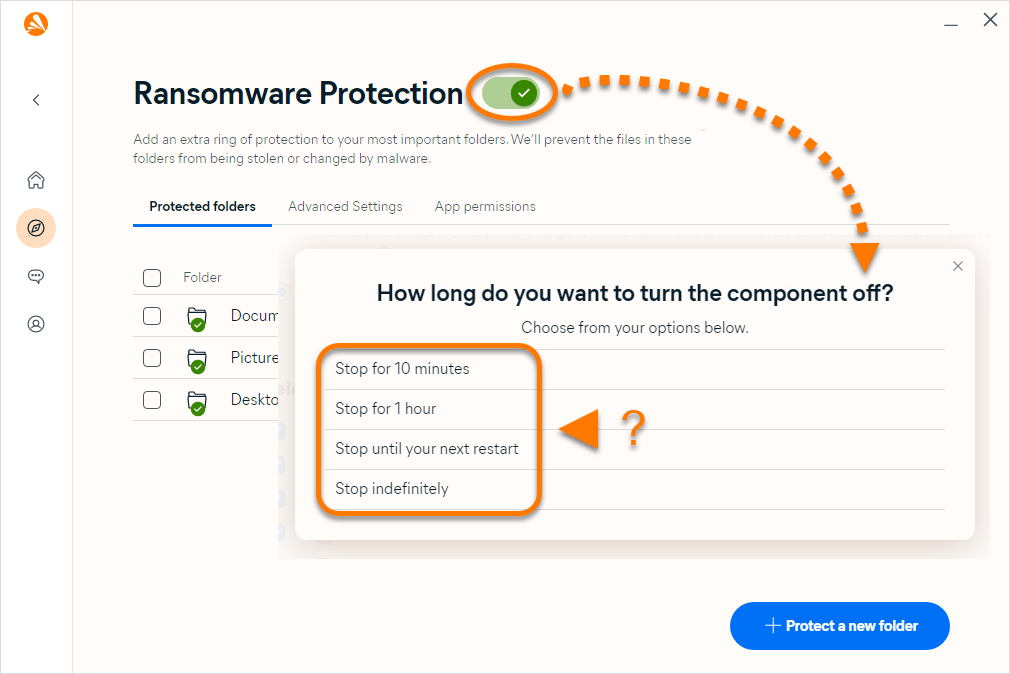
- Click the green (ON) slider, then select a time duration to disable Ransomware Protection.

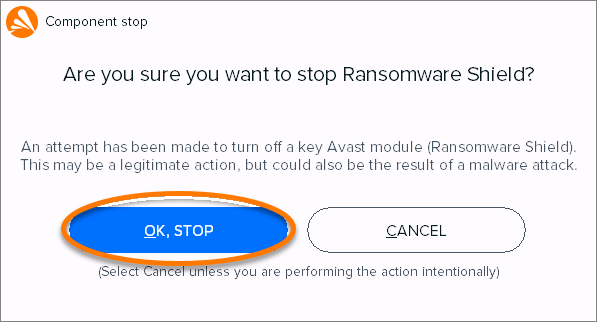
- Click OK, stop to confirm.

Ransomware Protection is now disabled. To enable it again, click the red (OFF) slider so that it changes to green (ON).
Troubleshoot issues
Refer to the information below to troubleshoot these common issues:
- Ransomware Protection displays pop-ups too frequently: Ensure that Ransomware Protection behavior is set to Smart Mode. If Ransomware Protection is set to Strict Mode, Avast One notifies you every time any application attempts to modify files in your protected folders (excluding any applications you have already added to the app permissions list).
- You cannot save files using an editing application: Ensure the application you are using is not set to Blocked in your app permissions list. Alternatively, you can add the application to the app permissions list and set it to Allowed.
Modify your protected folders
By default, Ransomware Protection secures your Documents and Pictures folders where your personal data might be stored. These folders are added to the protected folders list. You can also specify other folders you want to protect from untrusted applications or remove an automatically secured folder from the list.
To add or remove folders from the protected folders list:
- Open Avast One, then select
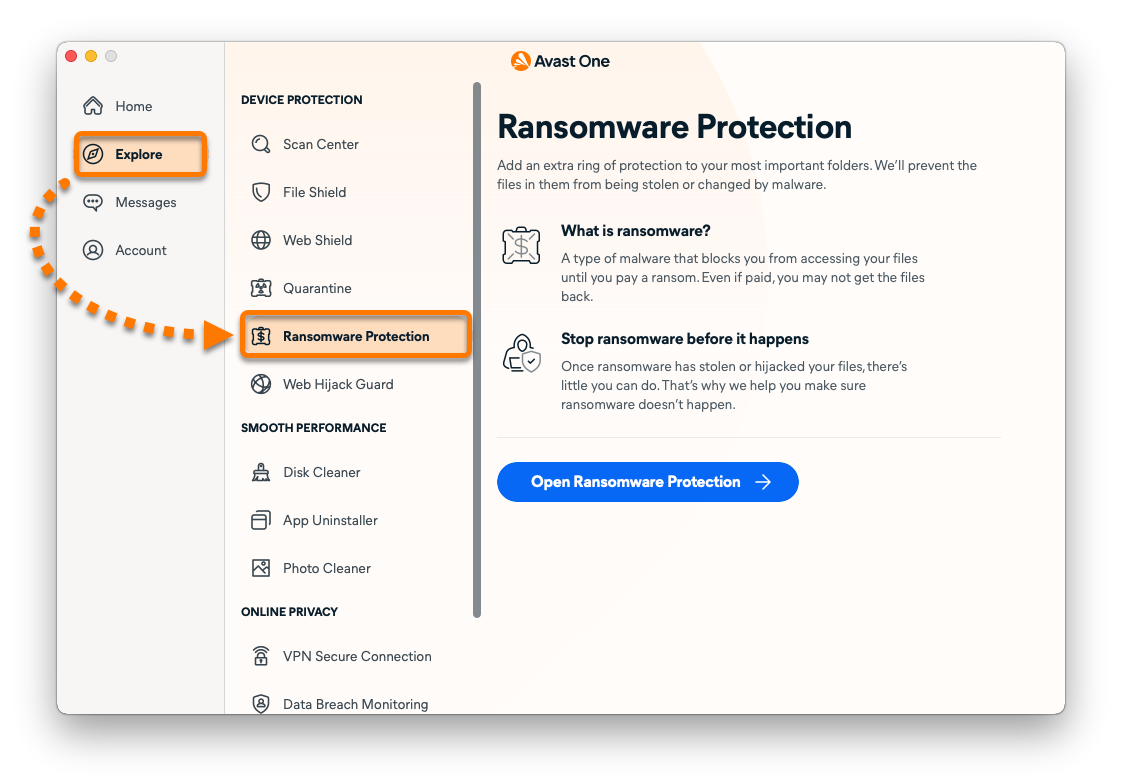
 Explore ▸ Ransomware Protection.

- Click Open Ransomware Protection.

- Add or remove a selected folder:
- To add a folder: Click Protect a new folder, select the folder you want to protect, then click Open.

- To remove a folder: Hover your cursor over the folder's panel, then click the X icon that appears.

- To add a folder: Click Protect a new folder, select the folder you want to protect, then click Open.
- If prompted, enter the password that you use when you start your Mac, then click OK.

Manage app permissions
On the Allowed Apps tab, you can specify applications that are always allowed access to the files in your protected folders.
- Open Avast One, then select
 Explore ▸ Ransomware Protection.

- Click Open Ransomware Protection.

- Select the Allowed Apps tab.

- Click Add an app, then select the application and click Open.

- If prompted, enter the password that you use when you start your Mac, then click OK.

The application is added to the Allowed Apps list. To remove an application from this list, hover your cursor over the application's panel, then click the X icon that appears.
Specify protected file types
Select which file types to secure in your protected folders:
- Open Avast One, then select
 Explore ▸ Ransomware Protection.

- Click Open Ransomware Protection.

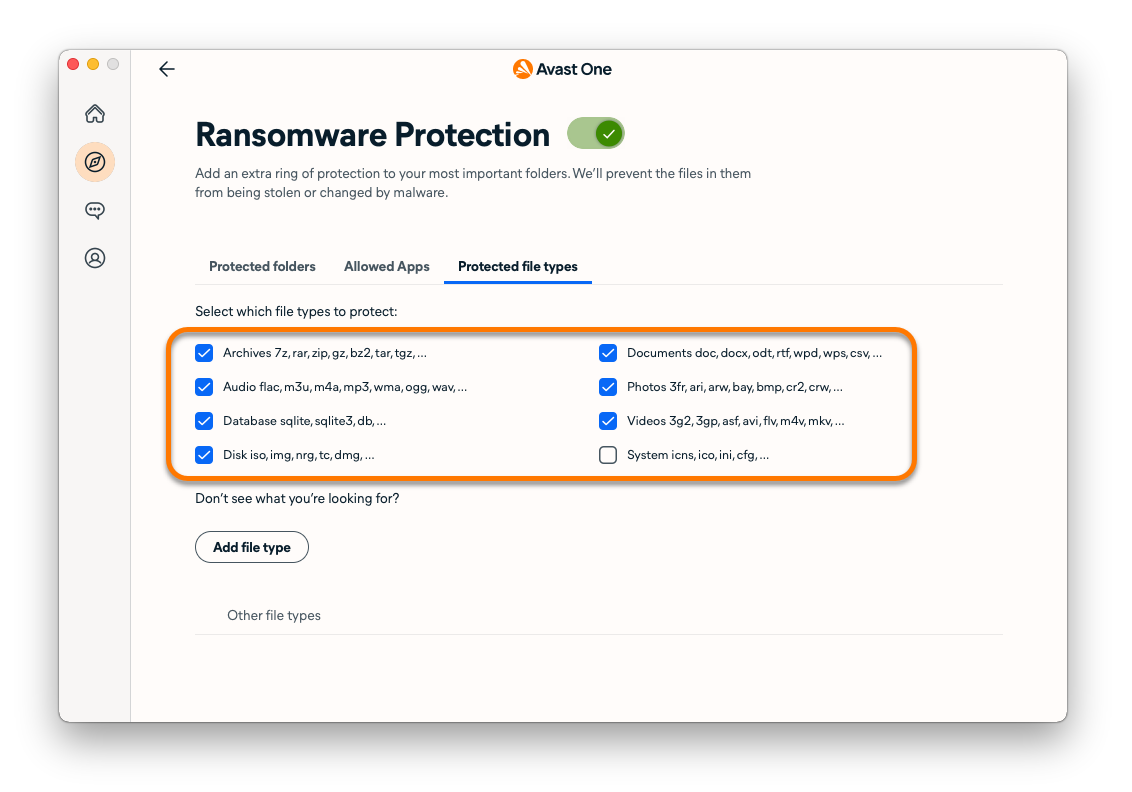
- Select the Protected file types tab.

- All listed file types are selected by default. Untick the box next to a file type to deselect it.

- To add additional file types, click Add file type, then type the file extension (for example, .html) into the text box and click Save.

- If prompted, enter the password that you use when you start your Mac, then click OK.

Disable Ransomware Protection
Ransomware Protection is enabled by default, but can be disabled for troubleshooting purposes by following the steps below:
- Open Avast One, then select
 Explore ▸ Ransomware Protection.

- Click Open Ransomware Protection.

- Click the green (ON) slider.

- If prompted, enter the password that you use when you start your Mac, then click OK.

Ransomware Protection is now disabled. To enable it again, click the red (OFF) slider. If prompted, enter the password that you use when you start your Mac, and click OK.
- Avast One 24.x for Windows
- Avast One 24.x for Mac
- Microsoft Windows 11 Home / Pro / Enterprise / Education
- Microsoft Windows 10 Home / Pro / Enterprise / Education - 32 / 64-bit
- Microsoft Windows 8.1 / Pro / Enterprise - 32 / 64-bit
- Microsoft Windows 8 / Pro / Enterprise - 32 / 64-bit
- Microsoft Windows 7 Home Basic / Home Premium / Professional / Enterprise / Ultimate - Service Pack 1 with Convenient Rollup Update, 32 / 64-bit
- Apple macOS 14.x (Sonoma)
- Apple macOS 13.x (Ventura)
- Apple macOS 12.x (Monterey)
- Apple macOS 11.x (Big Sur)
- Apple macOS 10.15.x (Catalina)
- Apple macOS 10.14.x (Mojave)
- Apple macOS 10.13.x (High Sierra)
Updated on: 02/06/2022
