Uninstall via Start menu
To uninstall Battery Saver, follow the GIF or the steps below:
To follow the GIF, left-click your mouse when the orange circle appears and right-click your mouse when the blue circle appears.

- Right-click the Windows
 Start icon, then select Apps and Features from the menu that appears.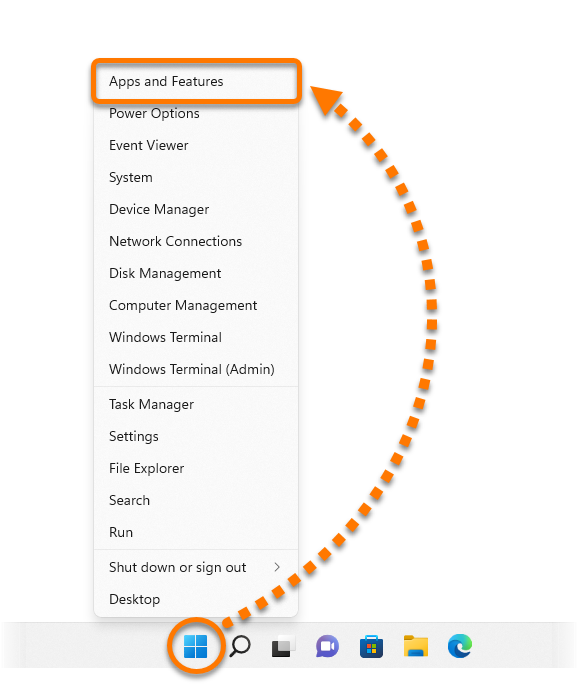
- Ensure that Apps is selected in the left panel, then click
⋮ Options (three dots) next to Avast Battery Saver and select Uninstall twice. 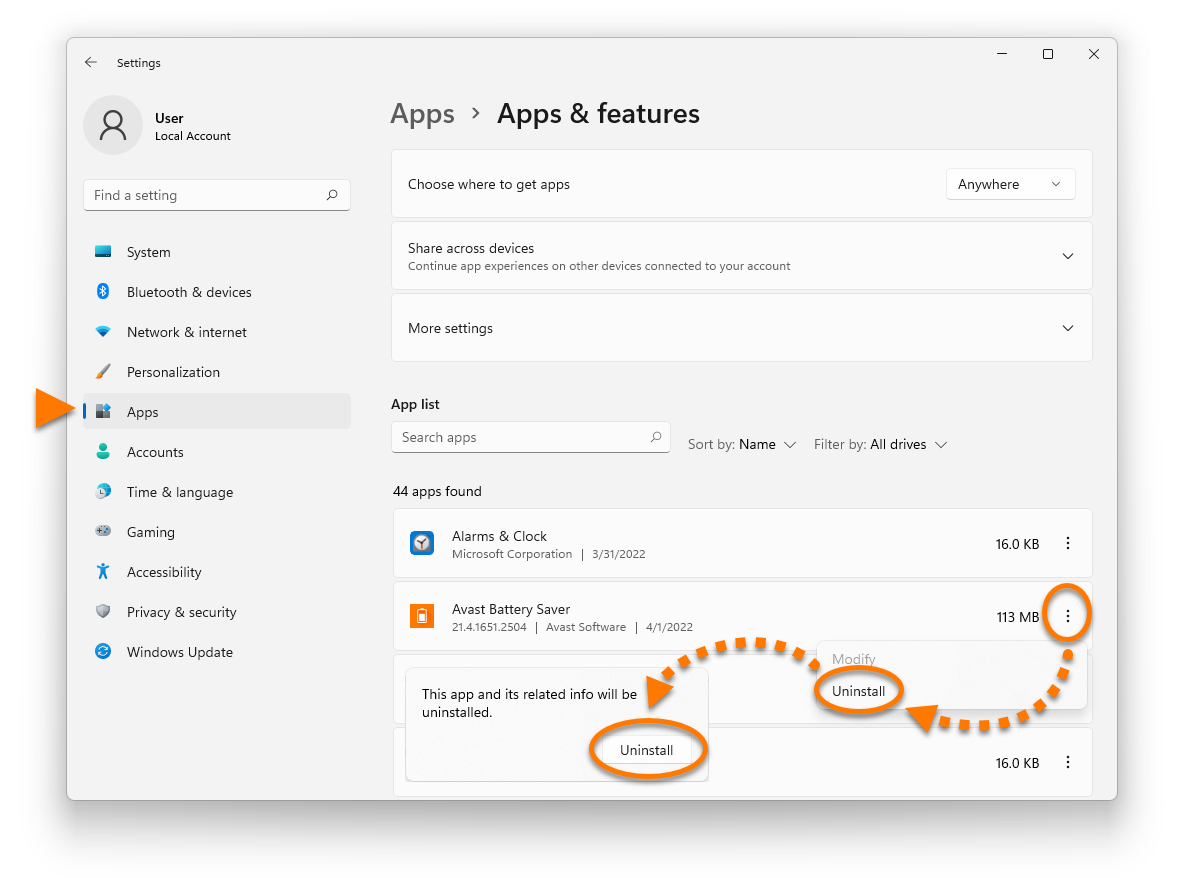
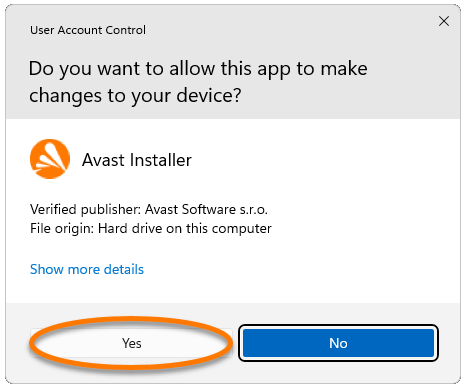
- If prompted for permission by the User Account Control dialog, click Yes.
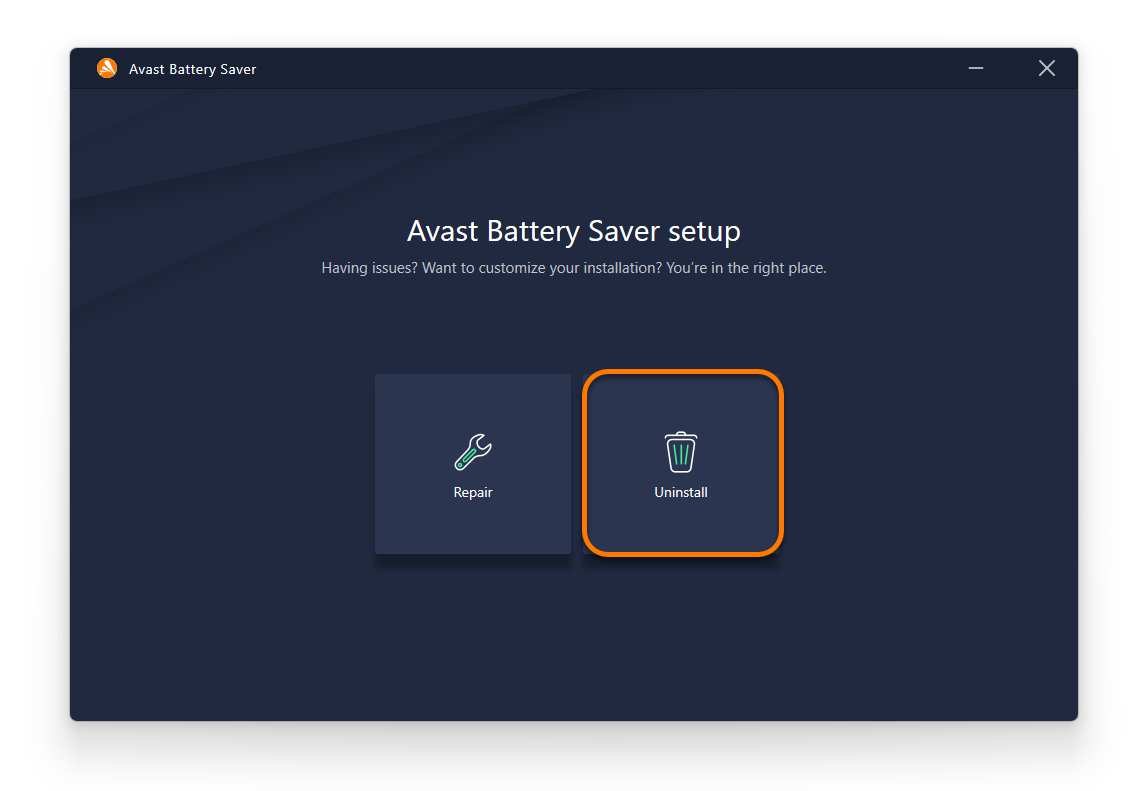
- When the Battery Saver setup window appears, click Uninstall.
- Optionally tick the box next to Delete all log files if you do not plan to reinstall Battery Saver. If you intend to reinstall Battery Saver in the future, we recommend keeping this box unticked so that the log files remain available for troubleshooting purposes.
Click Uninstall to start the uninstallation of Battery Saver. 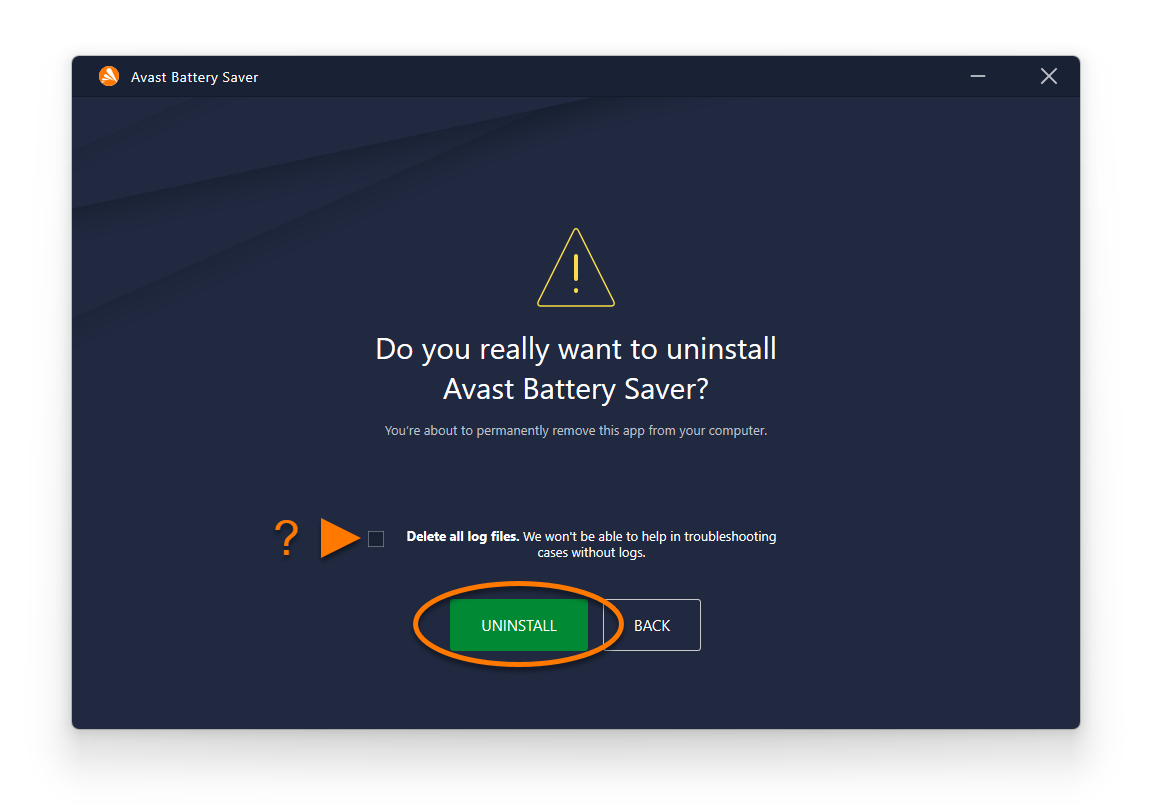
- Wait while the uninstaller removes Battery Saver from your laptop.
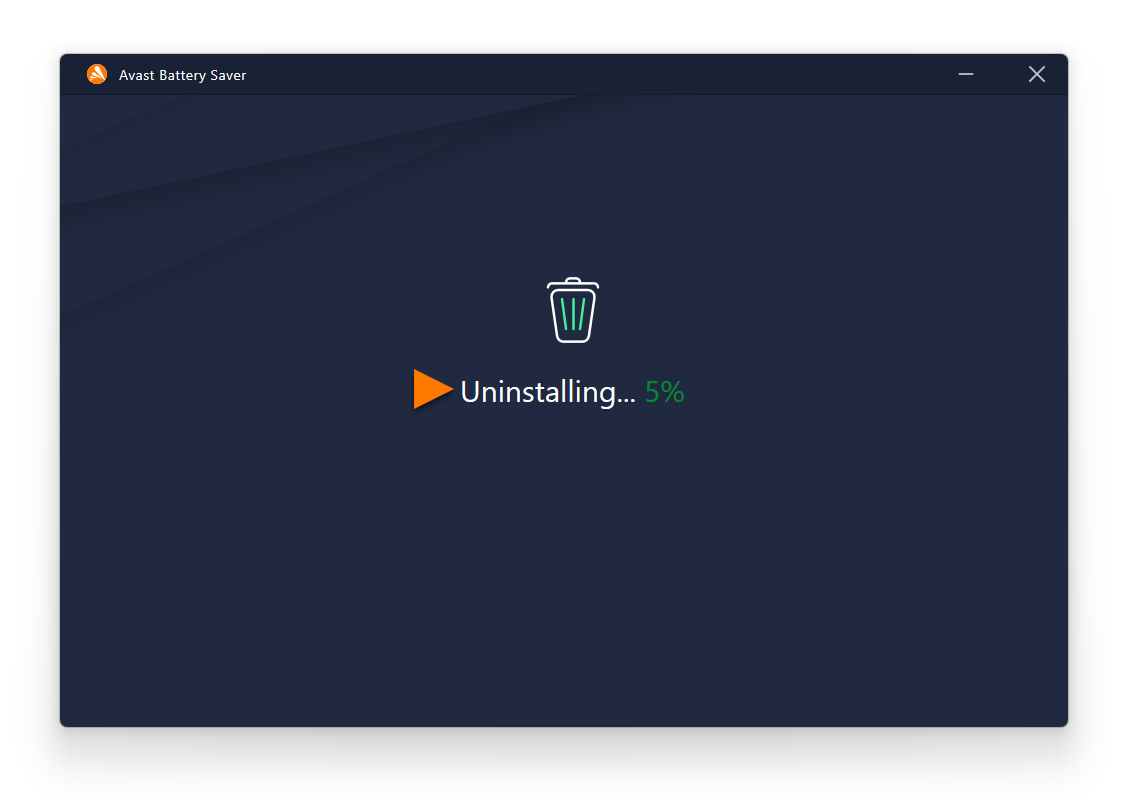
- When the confirmation message appears, click Done, or if prompted, click Restart computer to immediately reboot your laptop and complete uninstallation.
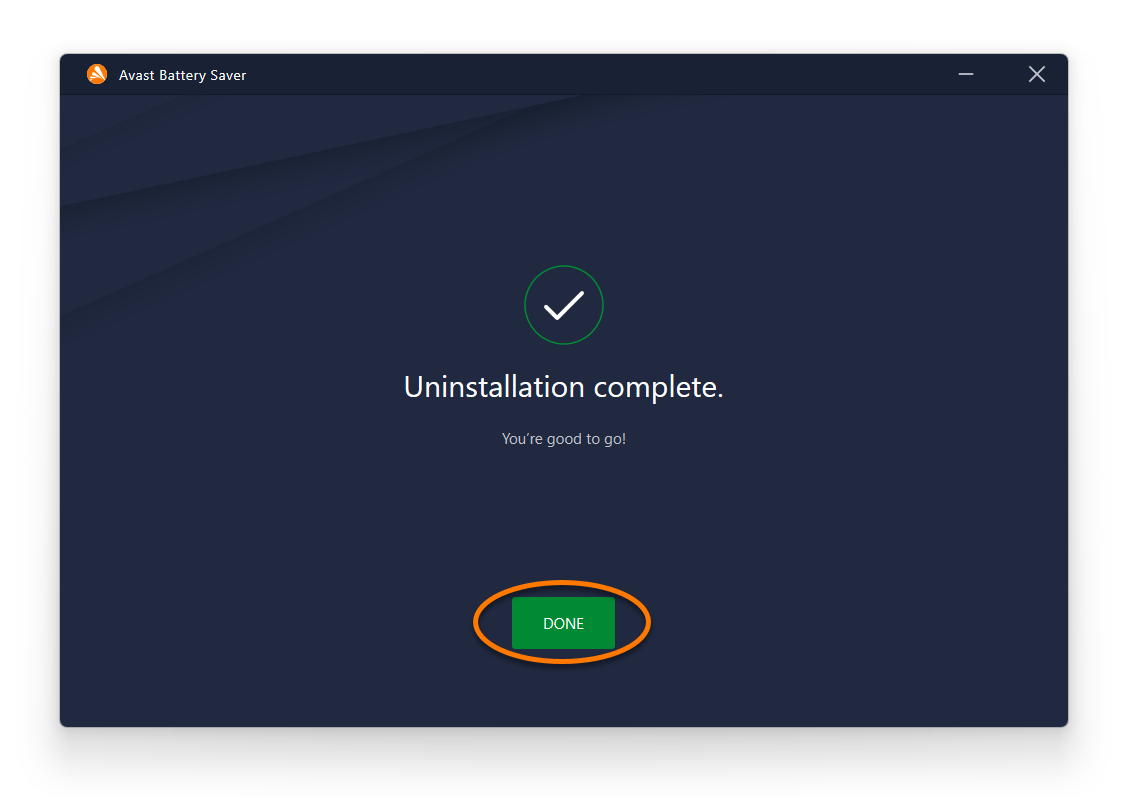
Battery Saver is now uninstalled from your laptop.
Reinstall Avast Battery Saver
If you need to reinstall Battery Saver, refer to the following article for installation instructions:
Troubleshoot without uninstalling
If you are experiencing problems with Battery Saver, we recommend referring to the following information before uninstalling:
Uninstall via Start menu
To uninstall Battery Saver, follow the GIF or the steps below:
To follow the GIF, left-click your mouse when the orange circle appears and right-click your mouse when the blue circle appears.

- Right-click the Windows
 Start icon, then select Apps and Features from the menu that appears.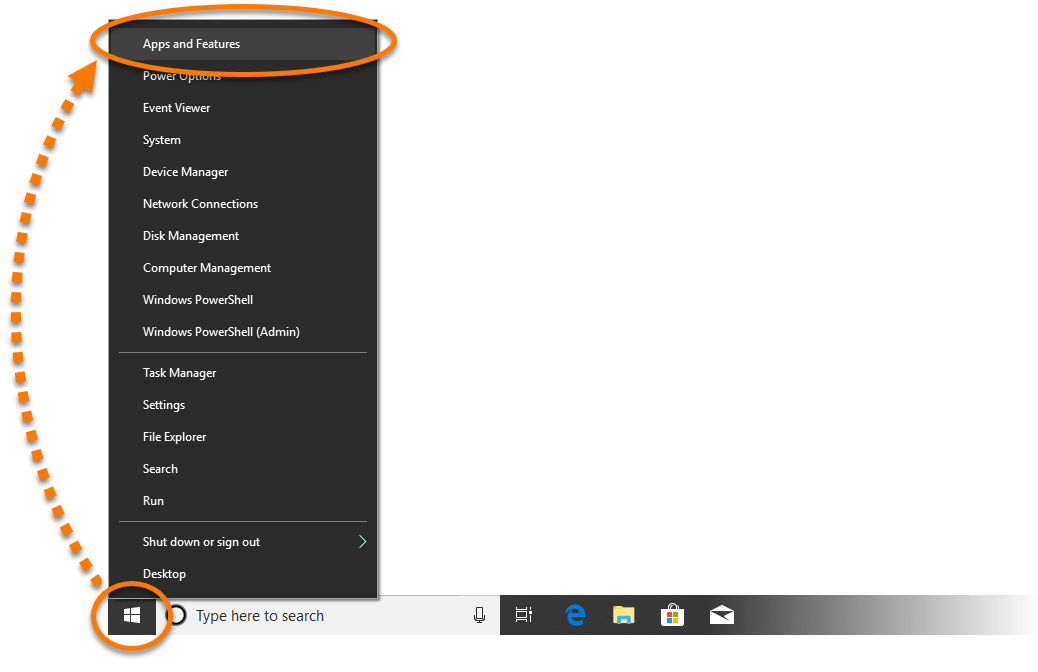
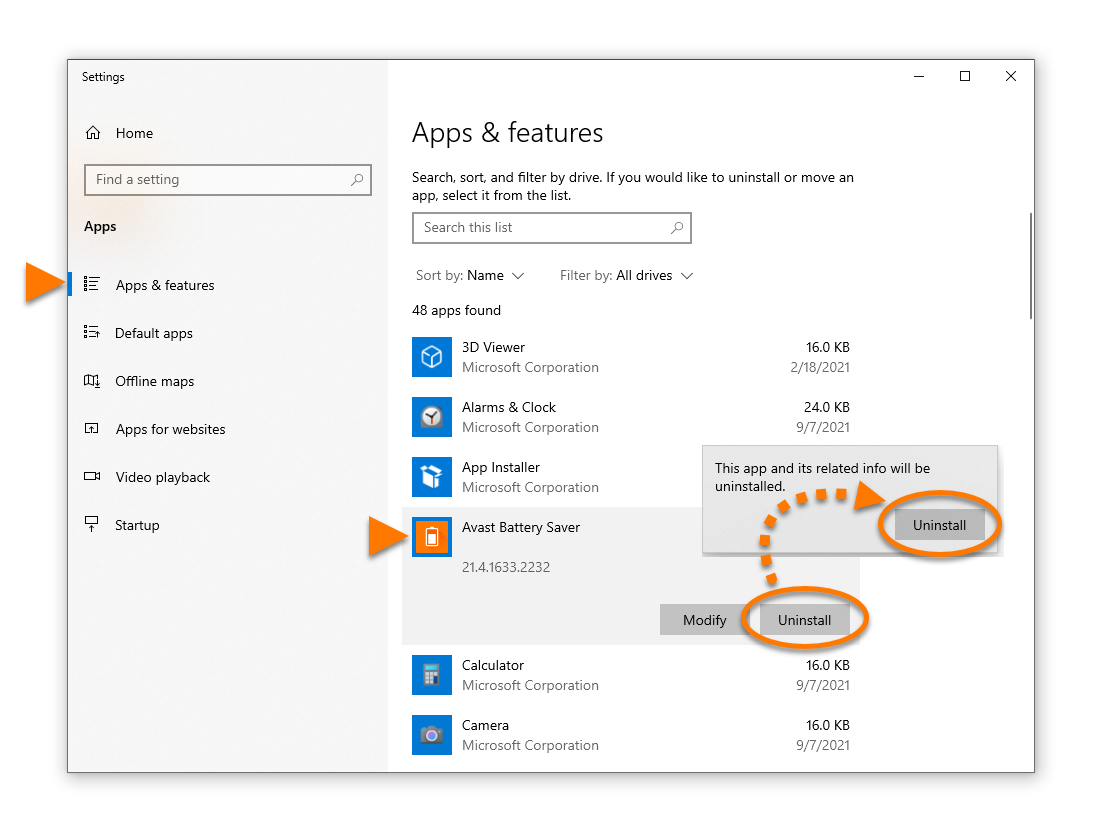
- Ensure that Apps & features is selected in the left panel, then click Avast Battery Saver, and select Uninstall twice.
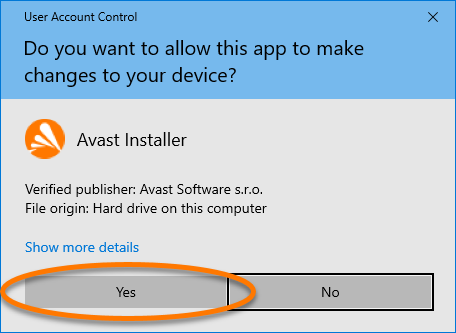
- If prompted for permission by the User Account Control dialog, click Yes.
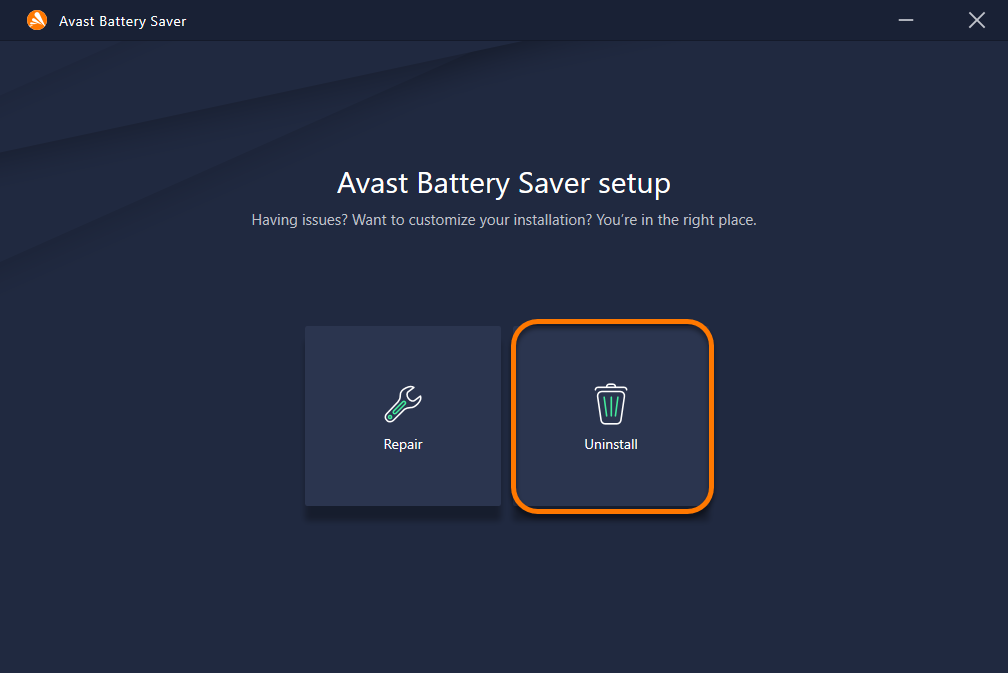
- When the Battery Saver setup window appears, click Uninstall.
- Optionally tick the box next to Delete all log files if you do not plan to reinstall Battery Saver. If you intend to reinstall Battery Saver in the future, we recommend keeping this box unticked so that the log files remain available for troubleshooting purposes.
Click Uninstall to start the uninstallation of Battery Saver. 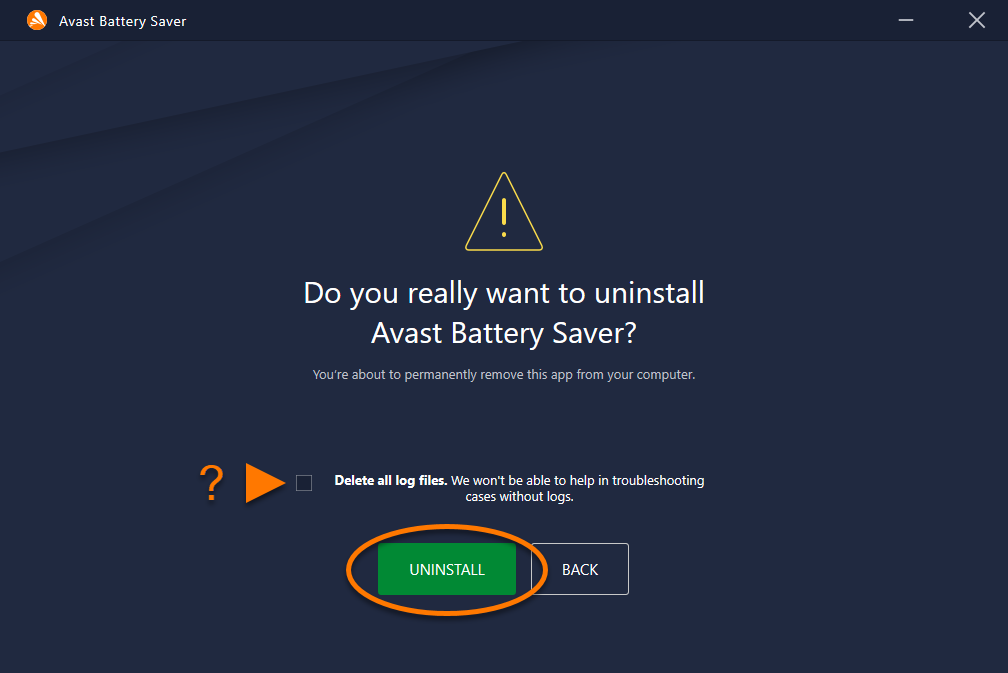
- Wait while the uninstaller removes Battery Saver from your laptop.
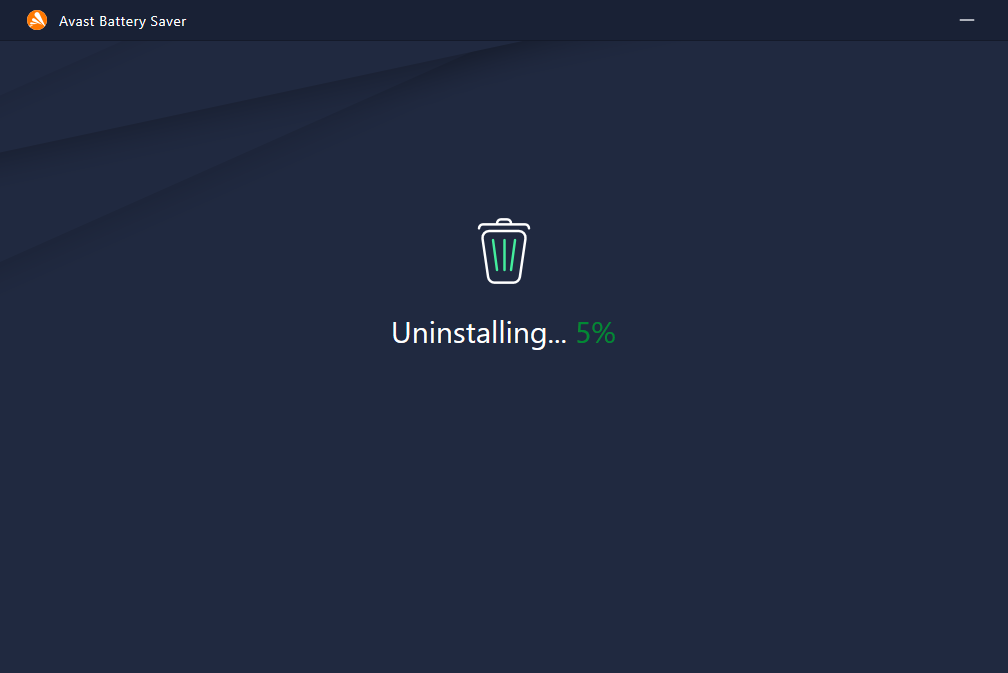
- When the confirmation message appears, click Done, or if prompted, click Restart computer to immediately reboot your laptop and complete uninstallation.
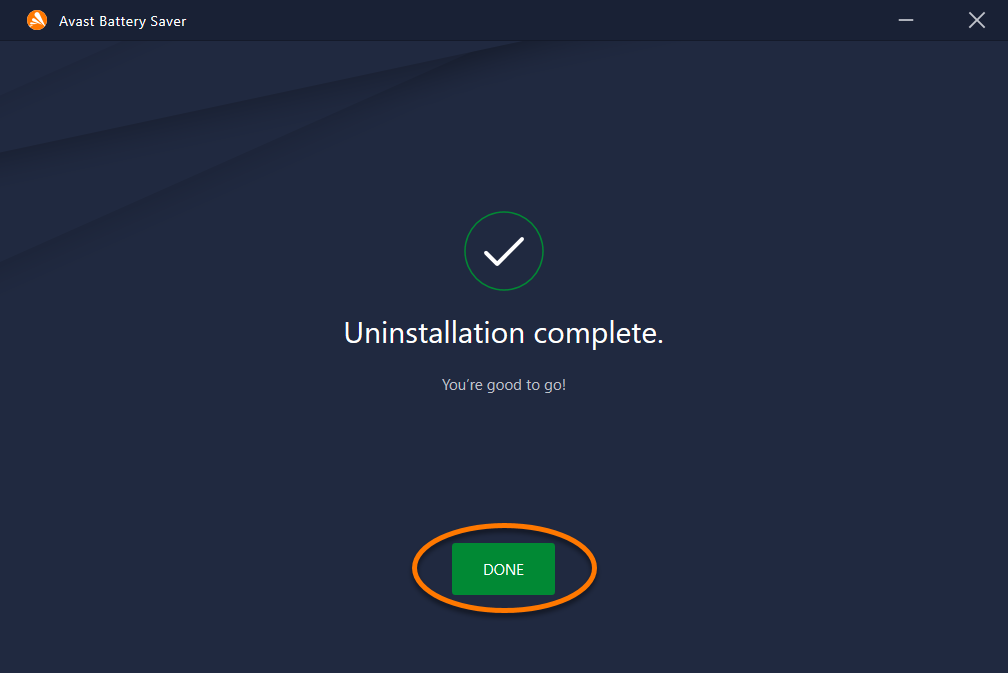
Battery Saver is now uninstalled from your laptop.
Reinstall Avast Battery Saver
If you need to reinstall Battery Saver, refer to the following article for installation instructions:
Troubleshoot without uninstalling
If you are experiencing problems with Battery Saver, we recommend referring to the following information before uninstalling:
Uninstall via Start menu
To uninstall Battery Saver, follow the GIF or the steps below:
To follow the GIF, left-click your mouse when the orange circle appears and right-click your mouse when the blue circle appears.

- On your keyboard, press the Windows
 logo key and
 X key simultaneously. 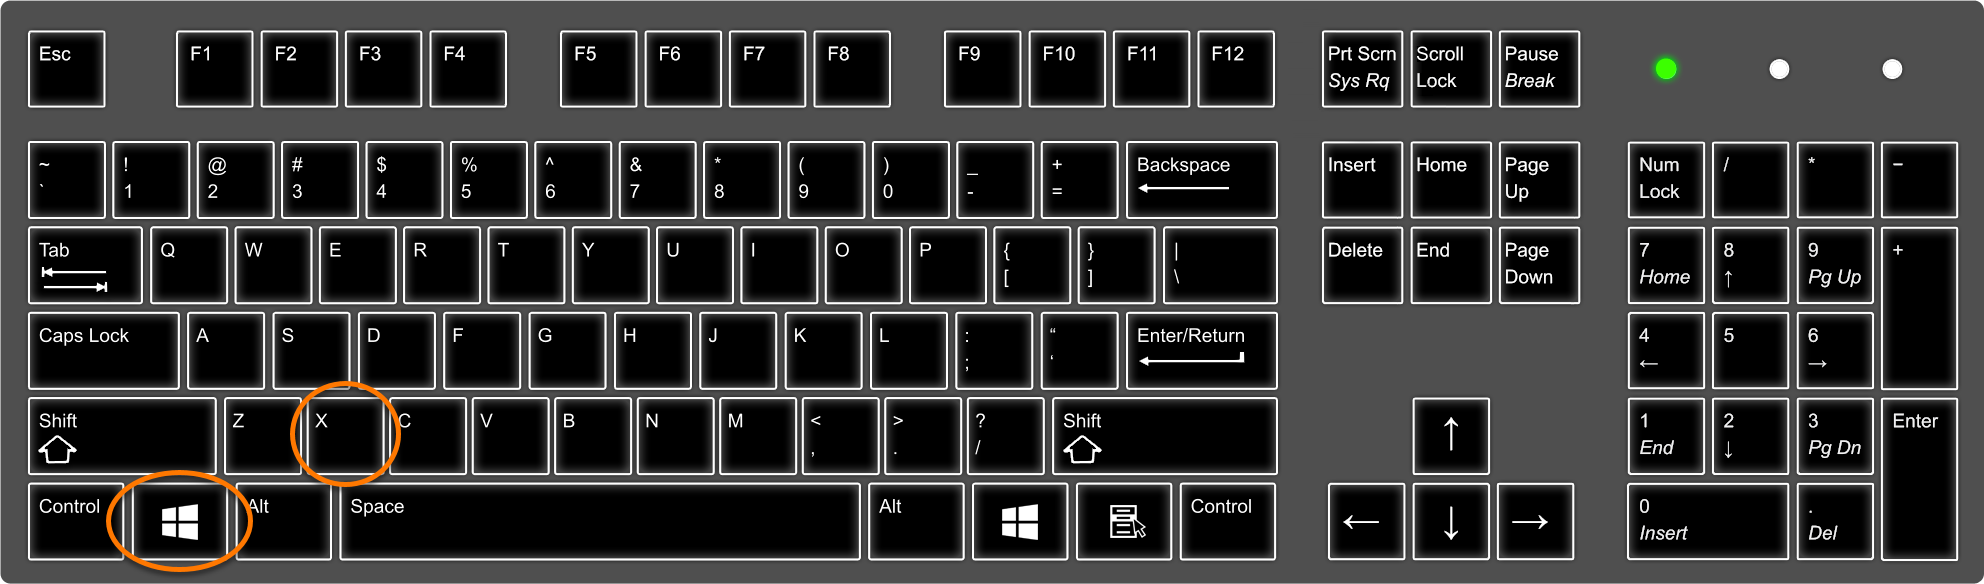
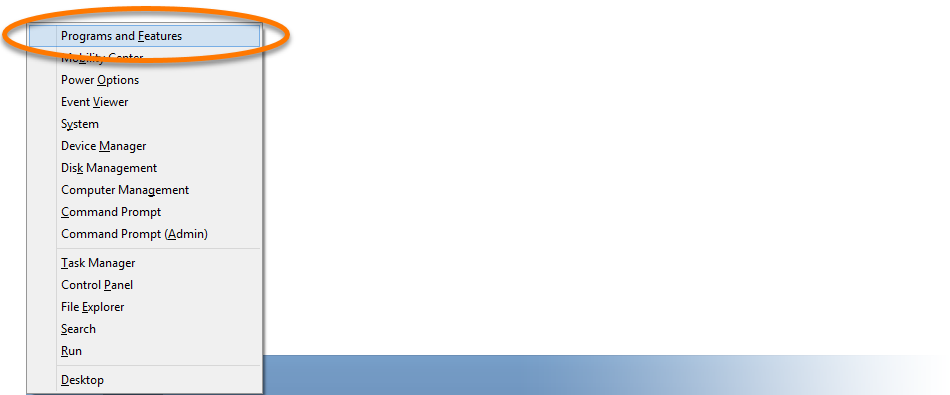
- Select Programs and Features from the menu that appears.
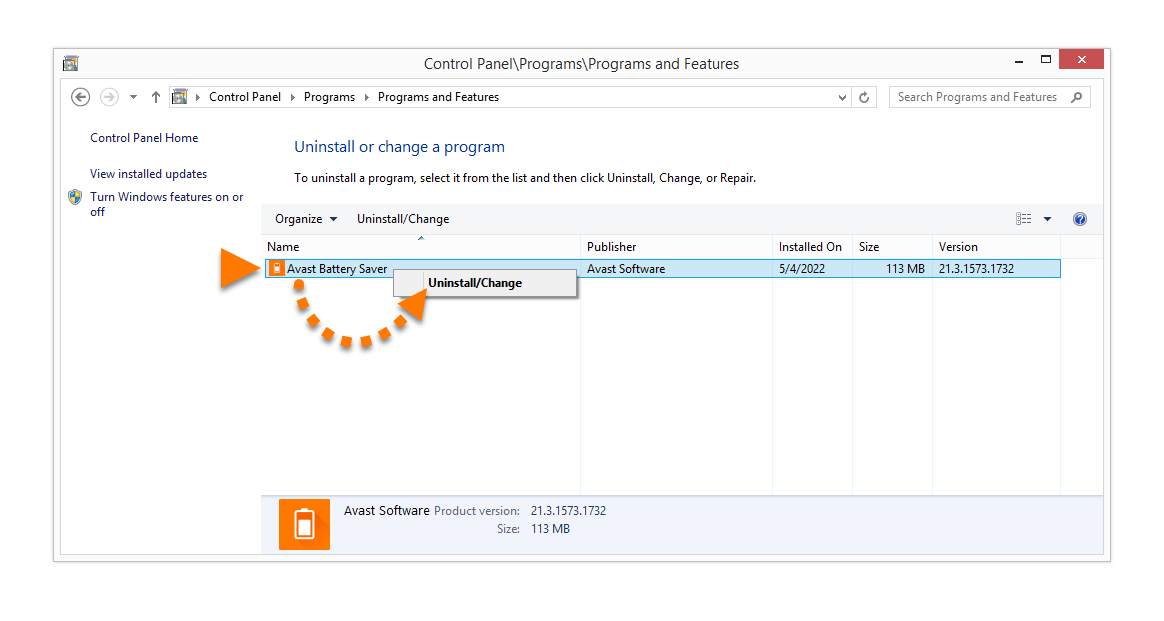
- Right-click Avast Battery Saver, then select Uninstall/Change from the drop-down menu.
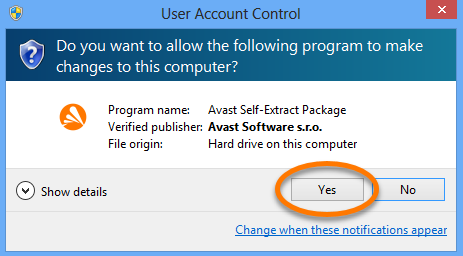
- If prompted for permission by the User Account Control dialog, click Yes.
- When the Battery Saver setup window appears, click Uninstall.
- Optionally tick the box next to Delete all log files if you do not plan to reinstall Battery Saver. If you intend to reinstall Battery Saver in the future, we recommend keeping this box unticked so that the log files remain available for troubleshooting purposes.
Click Uninstall to start the uninstallation of Battery Saver.
- Wait while the uninstaller removes Battery Saver from your laptop.
- When the confirmation message appears, click Done, or if prompted, click Restart computer to immediately reboot your laptop and complete uninstallation.
Battery Saver is now uninstalled from your laptop.
Reinstall Avast Battery Saver
If you need to reinstall Battery Saver, refer to the following article for installation instructions:
Troubleshoot without uninstalling
If you are experiencing problems with Battery Saver, we recommend referring to the following information before uninstalling:
Uninstall via Start menu
To uninstall Battery Saver, follow the GIF or the steps below:
To follow the GIF, left-click your mouse when the orange circle appears and right-click your mouse when the blue circle appears.

- Click the Windows
 Start icon, then select Control Panel.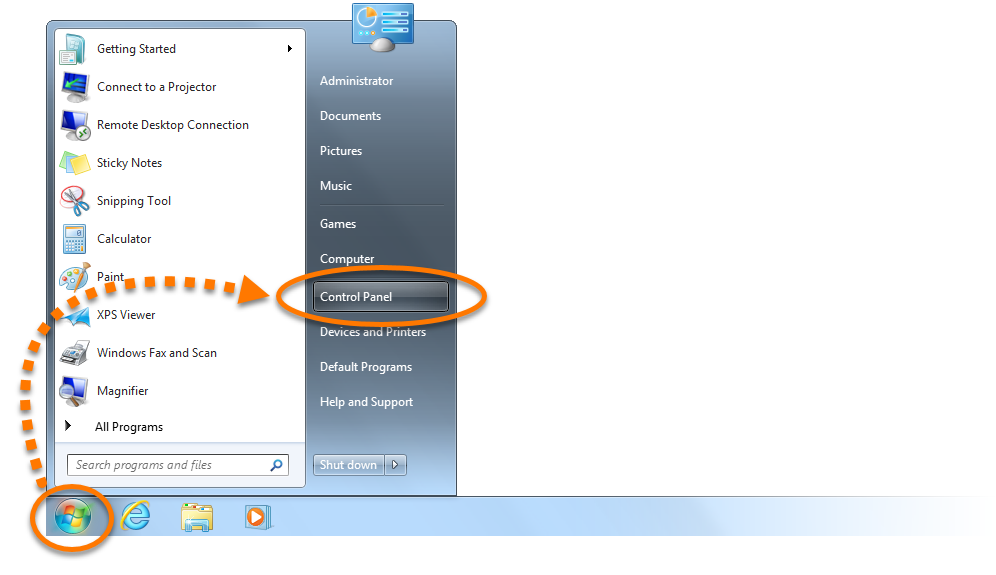
- Follow option A or option B below according to your view:
- Option A (Default category view): Under Programs, click Uninstall a program.
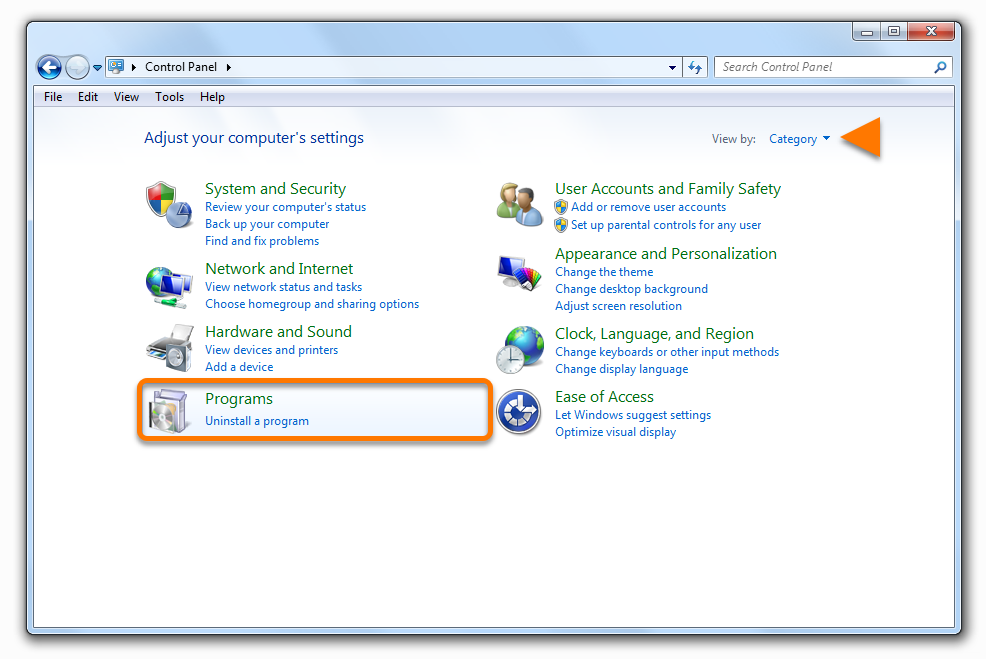
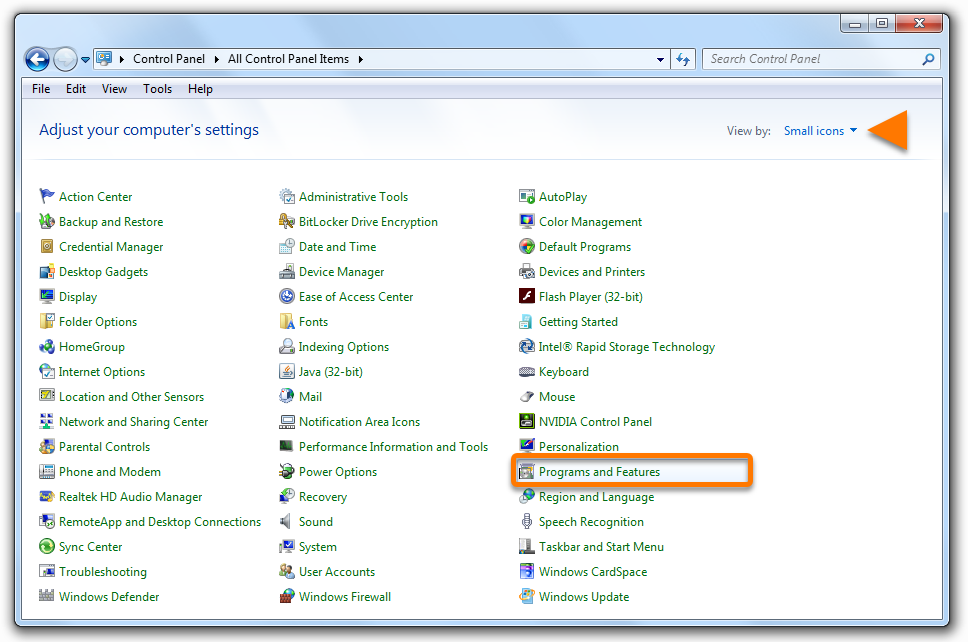
- Option B (Large/small icons view): Click Programs and Features.
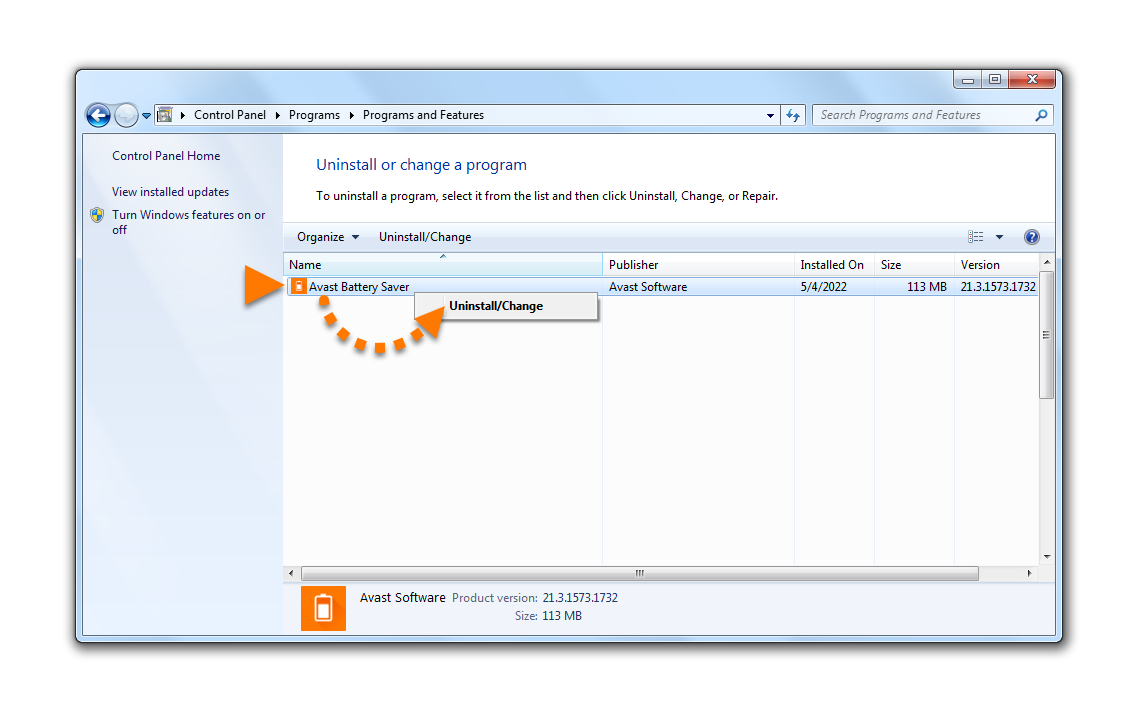
- Right-click Avast Battery Saver, then select Uninstall/Change from the drop-down menu.
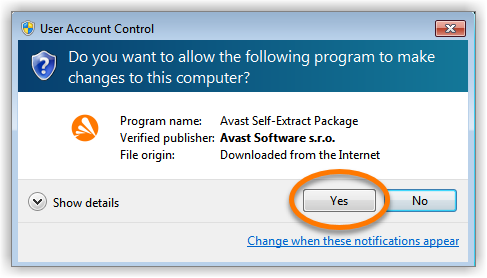
- If prompted for permission by the User Account Control dialog, click Yes.
- When the Battery Saver setup window appears, click Uninstall.
- Optionally tick the box next to Delete all log files if you do not plan to reinstall Battery Saver. If you intend to reinstall Battery Saver in the future, we recommend keeping this box unticked so that the log files remain available for troubleshooting purposes.
Click Uninstall to start the uninstallation of Battery Saver.
- Wait while the uninstaller removes Battery Saver from your laptop.
- When the confirmation message appears, click Done, or if prompted, click Restart computer to immediately reboot your laptop and complete uninstallation.
Battery Saver is now uninstalled from your laptop.
Reinstall Avast Battery Saver
If you need to reinstall Battery Saver, refer to the following article for installation instructions:
Troubleshoot without uninstalling
If you are experiencing problems with Battery Saver, we recommend referring to the following information before uninstalling: