Changing your DNS settings to troubleshoot issues with Avast applications
Android, ChromeOS, iOS, Mac, Windows
Problems with the DNS servers from your internet service provider can compromise the functionality of certain Avast products. You may experience the following issues:
- Avast installation or update repeatedly fails.
- Avast does not accept your valid activation code, so you are unable to activate a paid subscription.
- Avast SecureLine VPN cannot establish an internet connection, or you cannot browse the internet while connected to Avast SecureLine VPN.
- Avast Secure Browser does not allow website access.
To troubleshoot these issues, Avast Support may request that you change your internet connection settings to use DNS servers from a different provider, such as Google, Cisco, Cloudflare, or Quad9.
Change DNS settings
To change your DNS settings on a Windows device, select the relevant tab below according to your Windows version.
- Sign in to Windows as a user with administrator permissions.
For information about user accounts with administrator permissions, refer to the following article: Manage administrative accounts on your Windows device.
- Right-click the Windows
 Start icon and select Settings.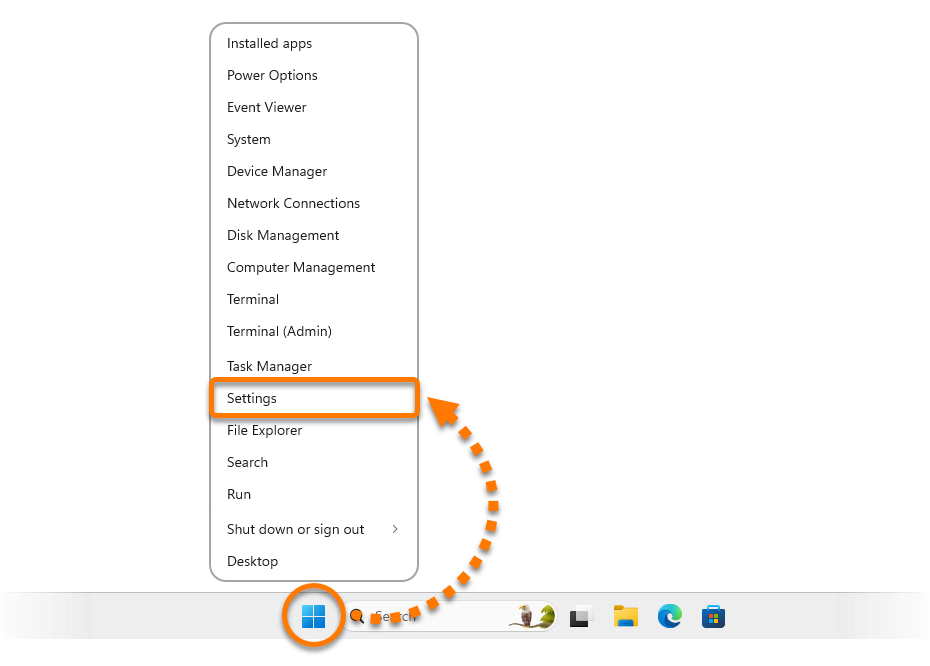
- From the left panel, select Network & internet, then select your network connection (Ethernet or Wi-Fi).
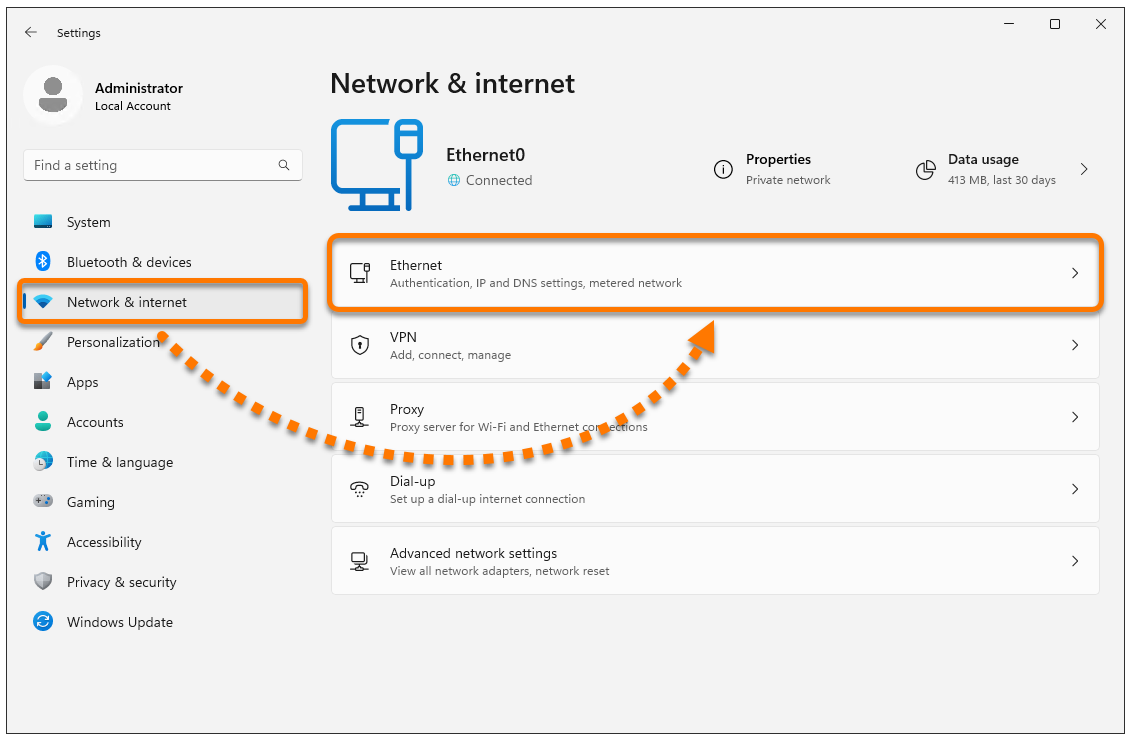
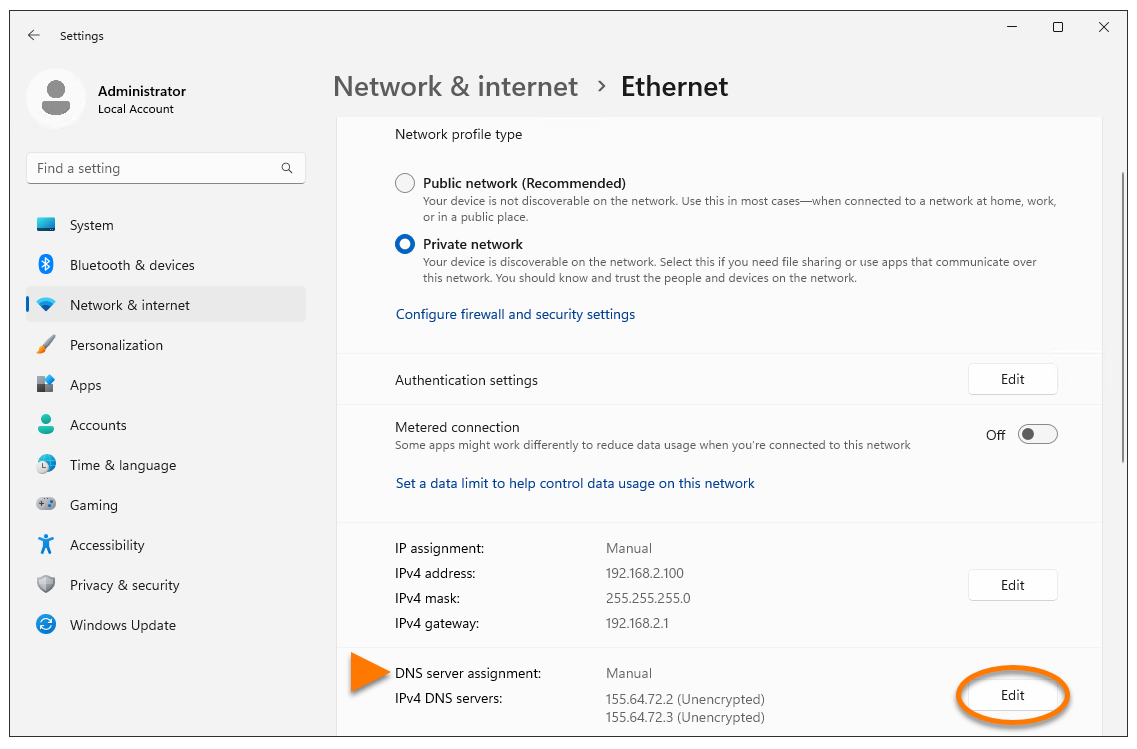
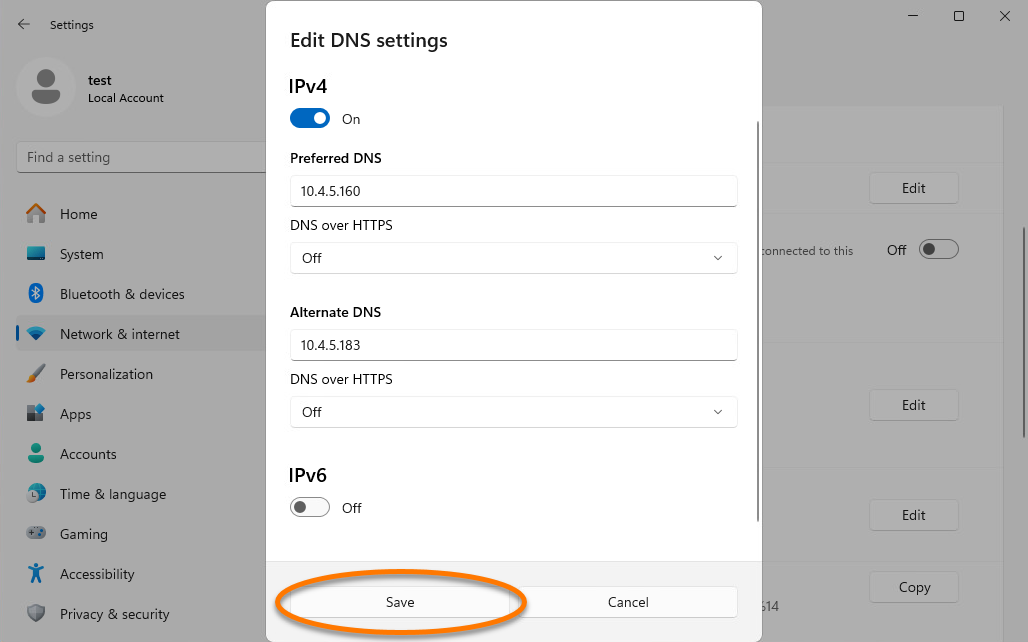
- In the DNS server assignment panel, click Edit.
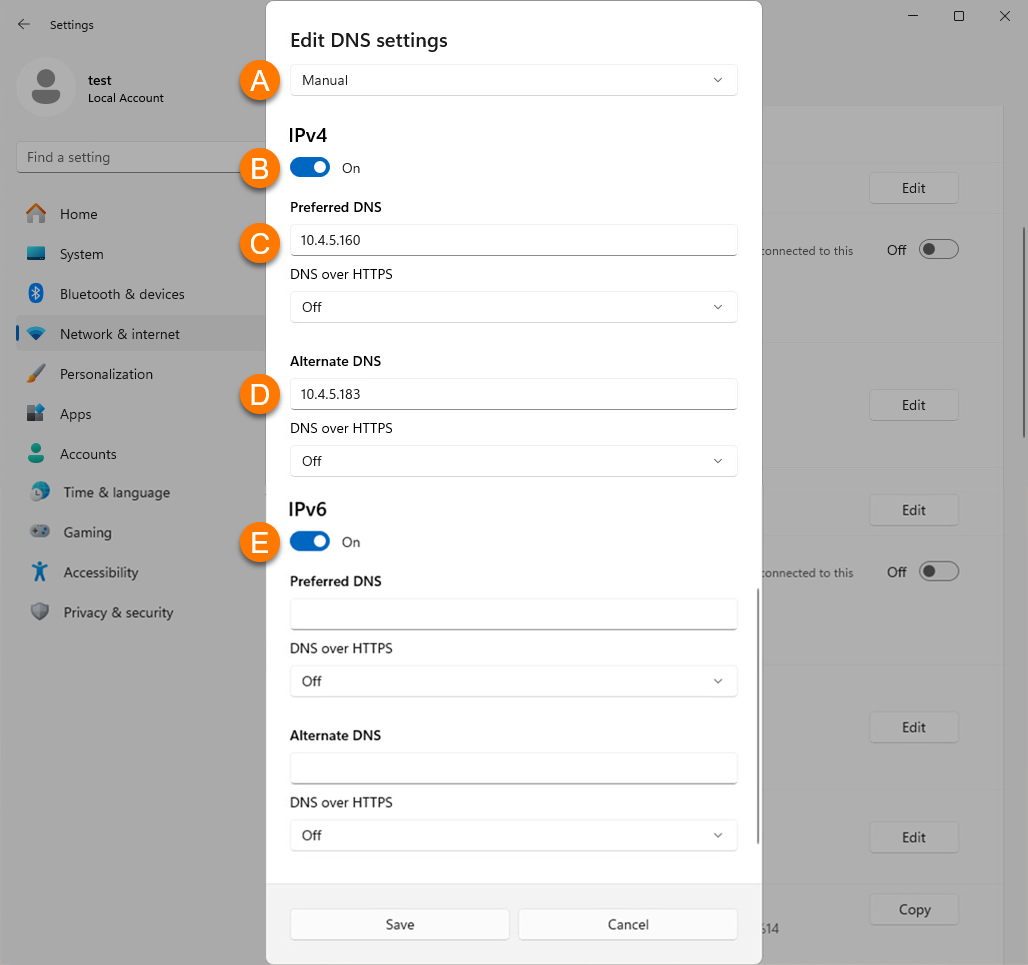
- Adjust the following options:
- From the drop-down menu select Manual.
- Tap the slider to enable IPv4.
- Choose one of the public DNS providers from the IPv4 addresses table below and fill in the Preferred DNS server address field.
- Choose one of the public DNS providers from the IPv4 addresses table below and fill in the Alternate DNS server address field.
- If IPv6 is enabled, fill in the Preferred and Alternate DNS server address fields using the addresses provided in the IPv6 addresses table below.
IPv4 Addresses
IPv6 Addresses
Accordion Title
|
DNS provider
|
Preferred DNS server address
|
Alternate DNS server address
|
|
Google Public DNS
|
2001:4860:4860::8888
|
2001:4860:4860::8844
|
|
Cisco OpenDNS
|
2620:119:35::35
|
2620:119:53::53
|
|
Cloudflare
|
2606:4700:4700::1111
|
1.0.0.1
|
|
Quad9
|
2620:fe::fe
|
2620:fe::9
|
- Click Save.
- Click the Windows
 Start icon and select
  Settings (the gear icon).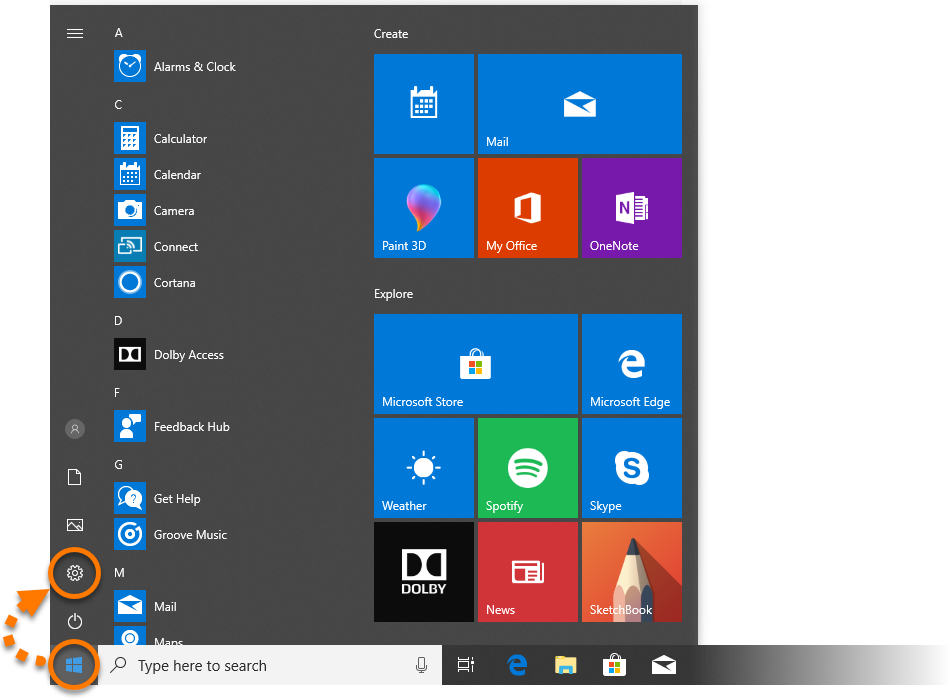
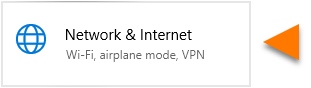
- On the Windows Settings screen, click Network & Internet.
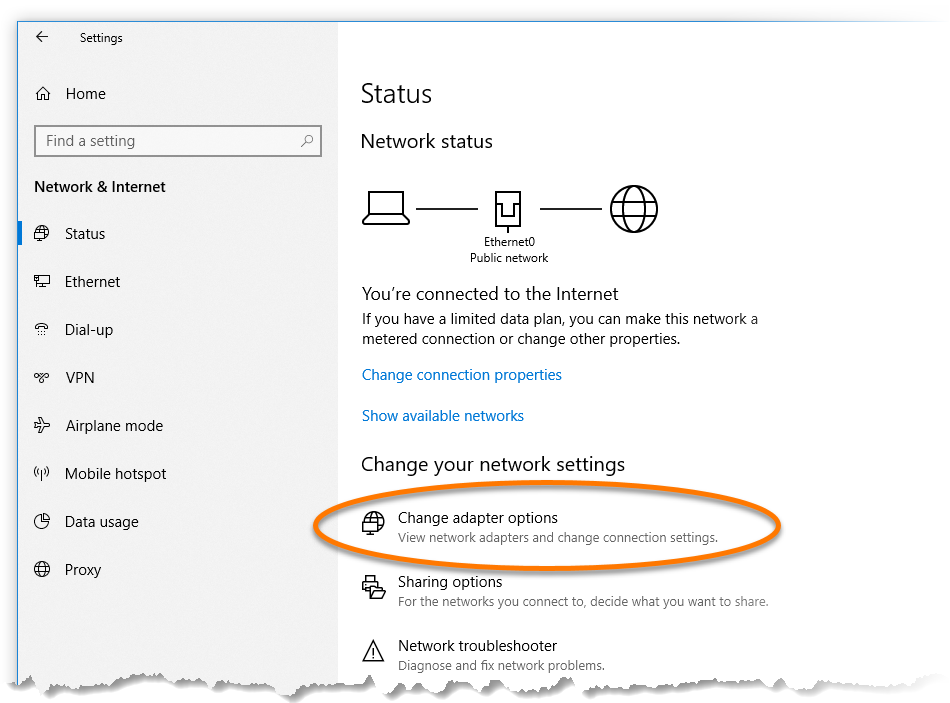
- Under Change your network settings, click Change adapter options.
- On your keyboard, press the Windows logo key and
X key simultaneously. 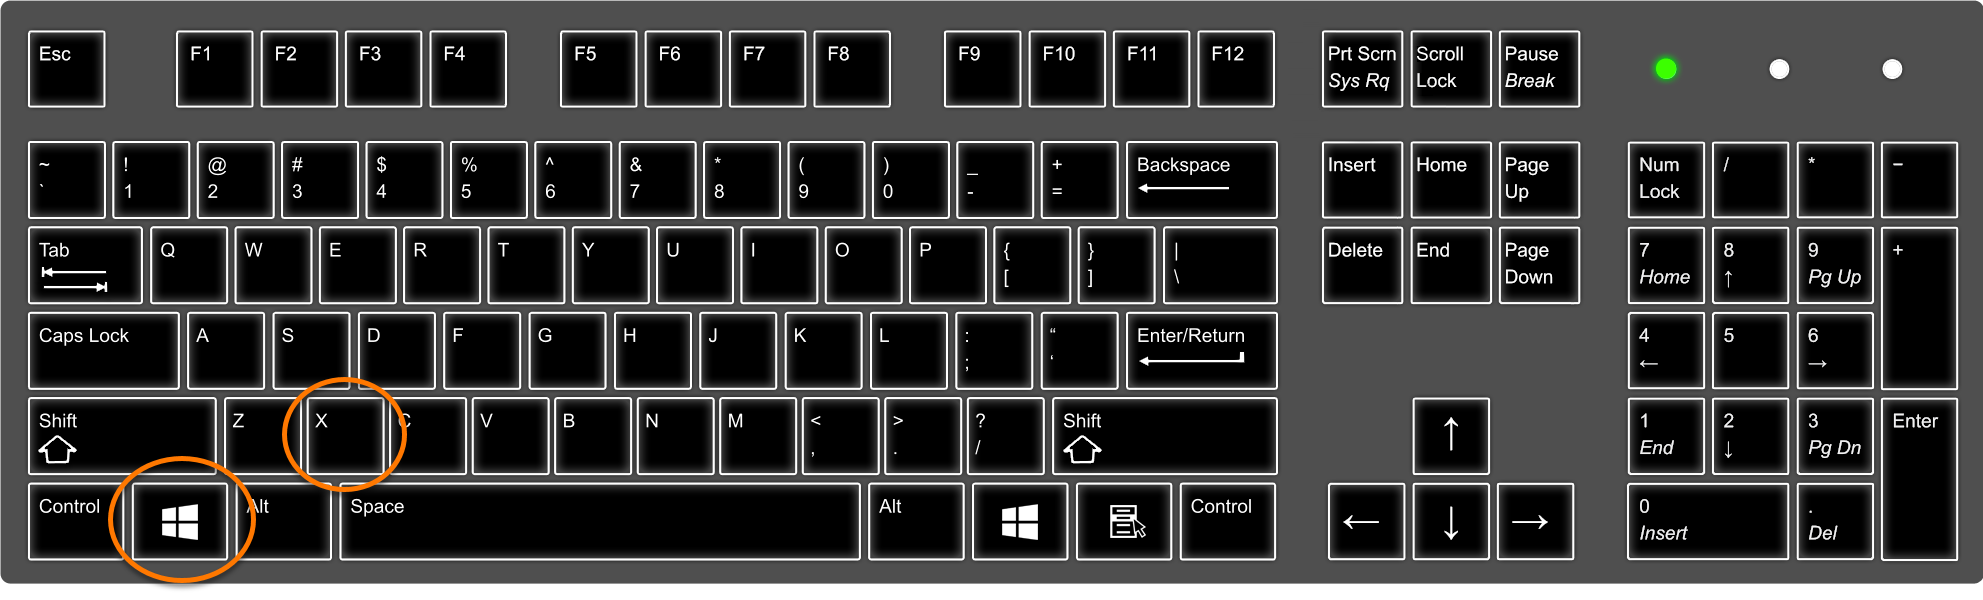
- Select Control Panel from the menu that appears.
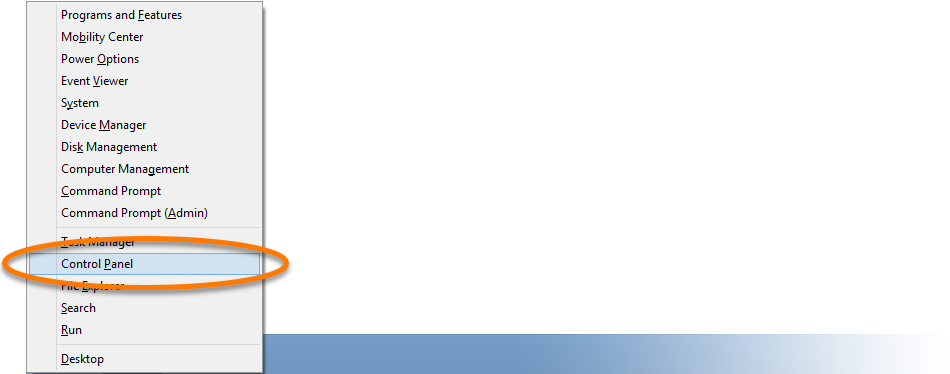
- Follow option A or option B below according to your view:
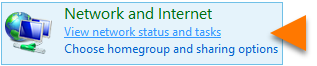
- Default category view: Under Network and Internet, click View network status and tasks.
- Large/small icons view: Click Network and Sharing Center.

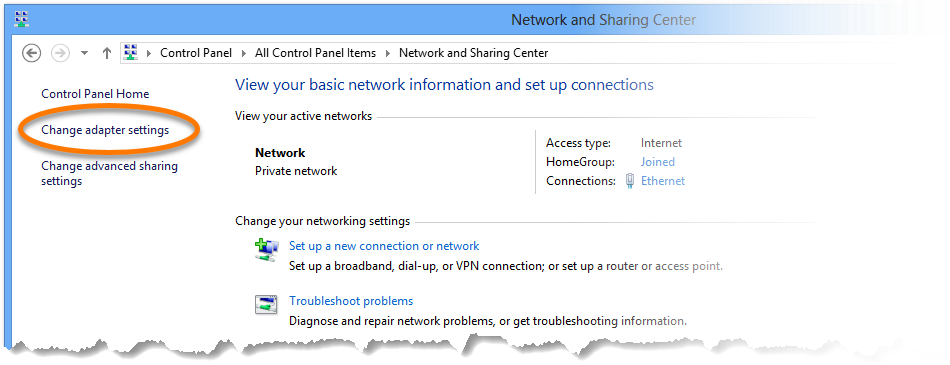
- Select Change adapter settings from the left panel of the Network and Sharing Center window.
- Click the Windows
 Start icon and select Control Panel.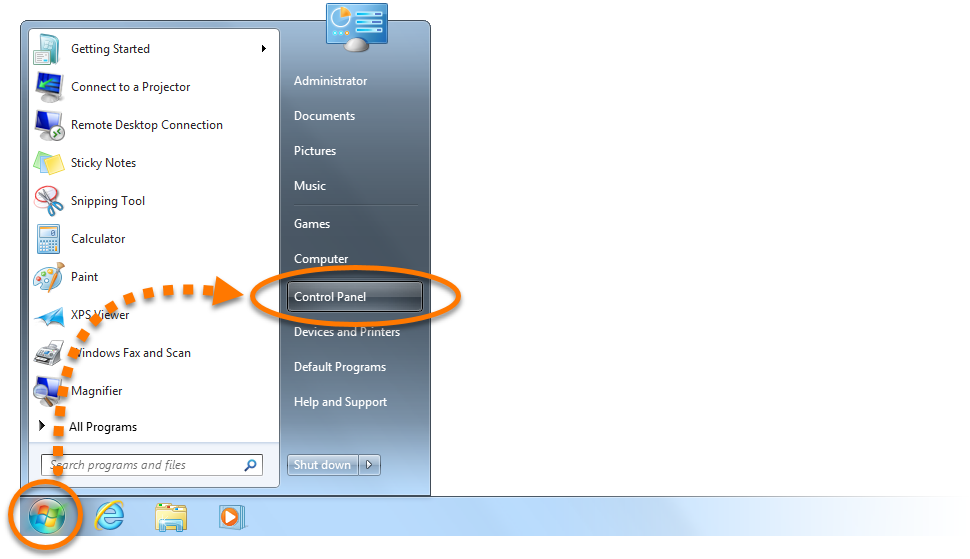
- Follow option A or option B below according to your view:
- Default category view: Under Network and Internet, click View network status and tasks.
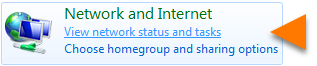
- Large/small icons view: Click Network and Sharing Center.

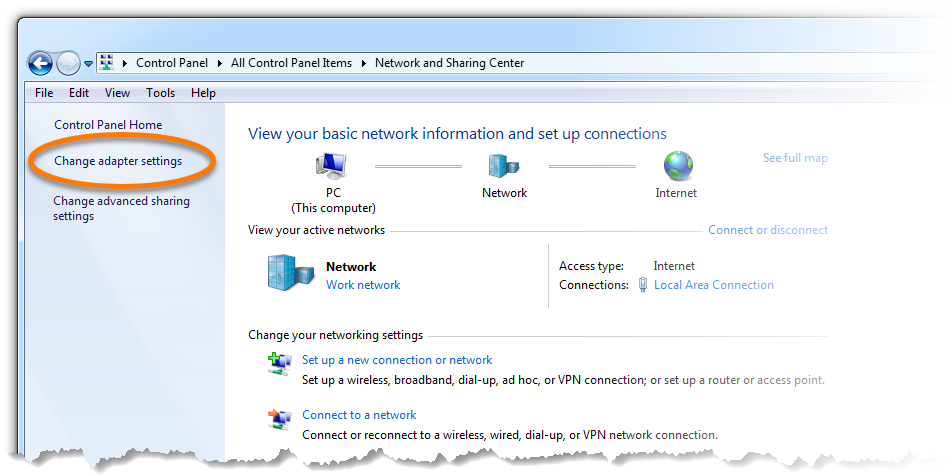
- Select Change adapter settings from the left panel of the Network and Sharing Center window.
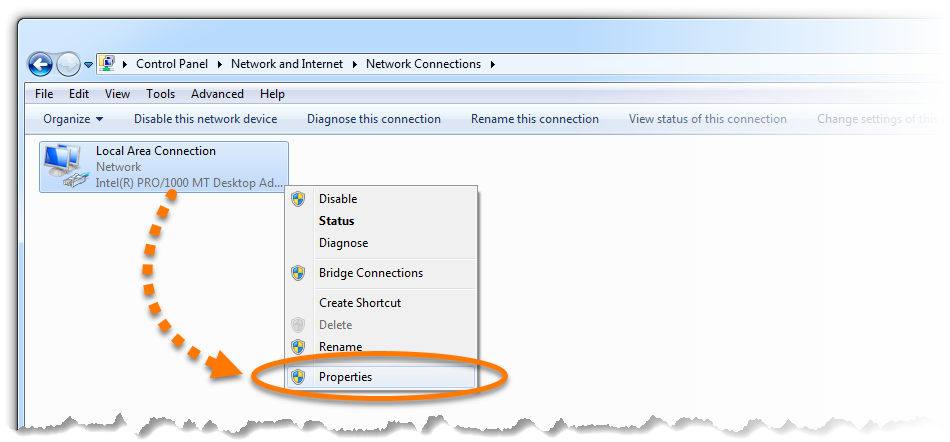
- Based on your current connection type, right-click the relevant Ethernet or Wi-Fi adapter in the Network Connections list, then select Properties from the context menu.

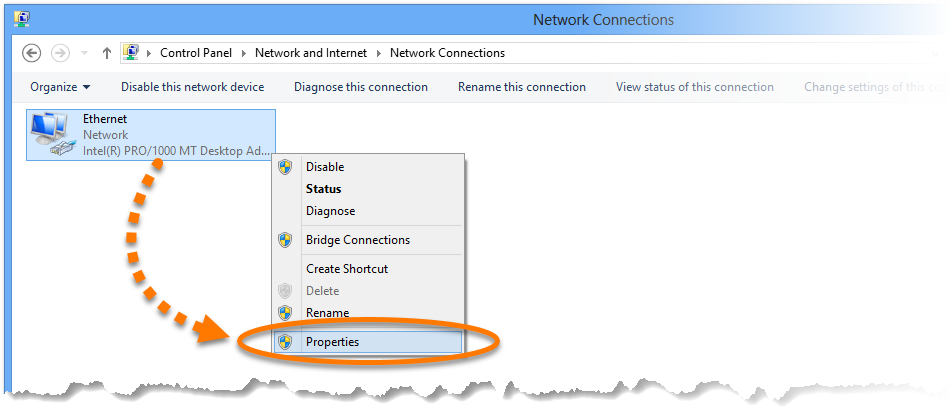
- Based on your current connection type, right-click Local Area Connection or Wireless Network Connection in the Network Connections list, then select Properties from the context menu.
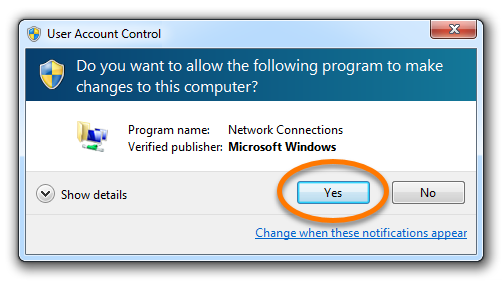
- If prompted by the User Account Control dialog for permission, click Yes.


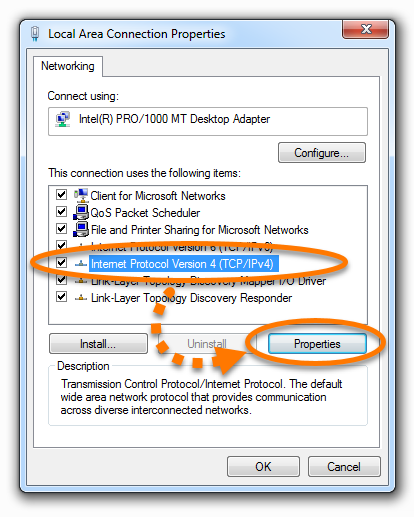
- Select Internet Protocol Version 4 (TCP/IPv4) from the list, then click Properties.


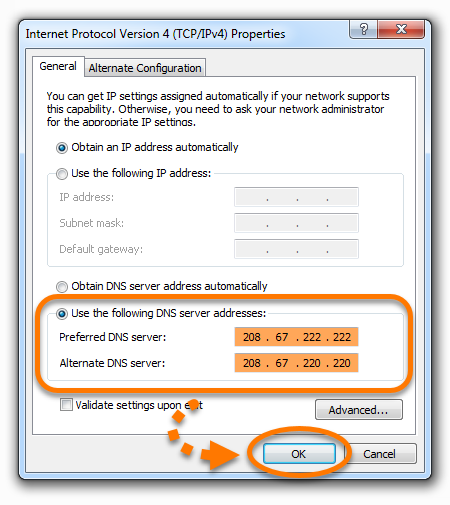
- Select Use the following DNS server addresses, then choose one of the public DNS providers from the table below and enter both IP addresses (preferred and alternate) into the relevant boxes. Click OK to confirm.
Do not change anything in the upper section related to IP address, Subnet mask and Default gateway.


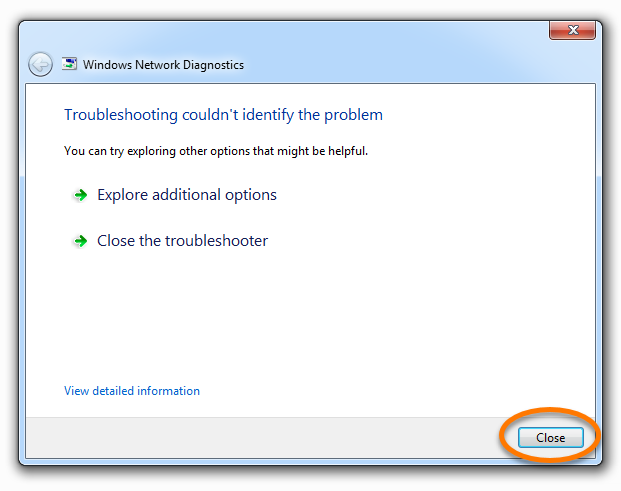
- If the Windows Network Diagnostics window appears, click CancelClose to exit.


- On your keyboard, press the Windows logo key and
R keys simultaneously to run the Windows Services console. 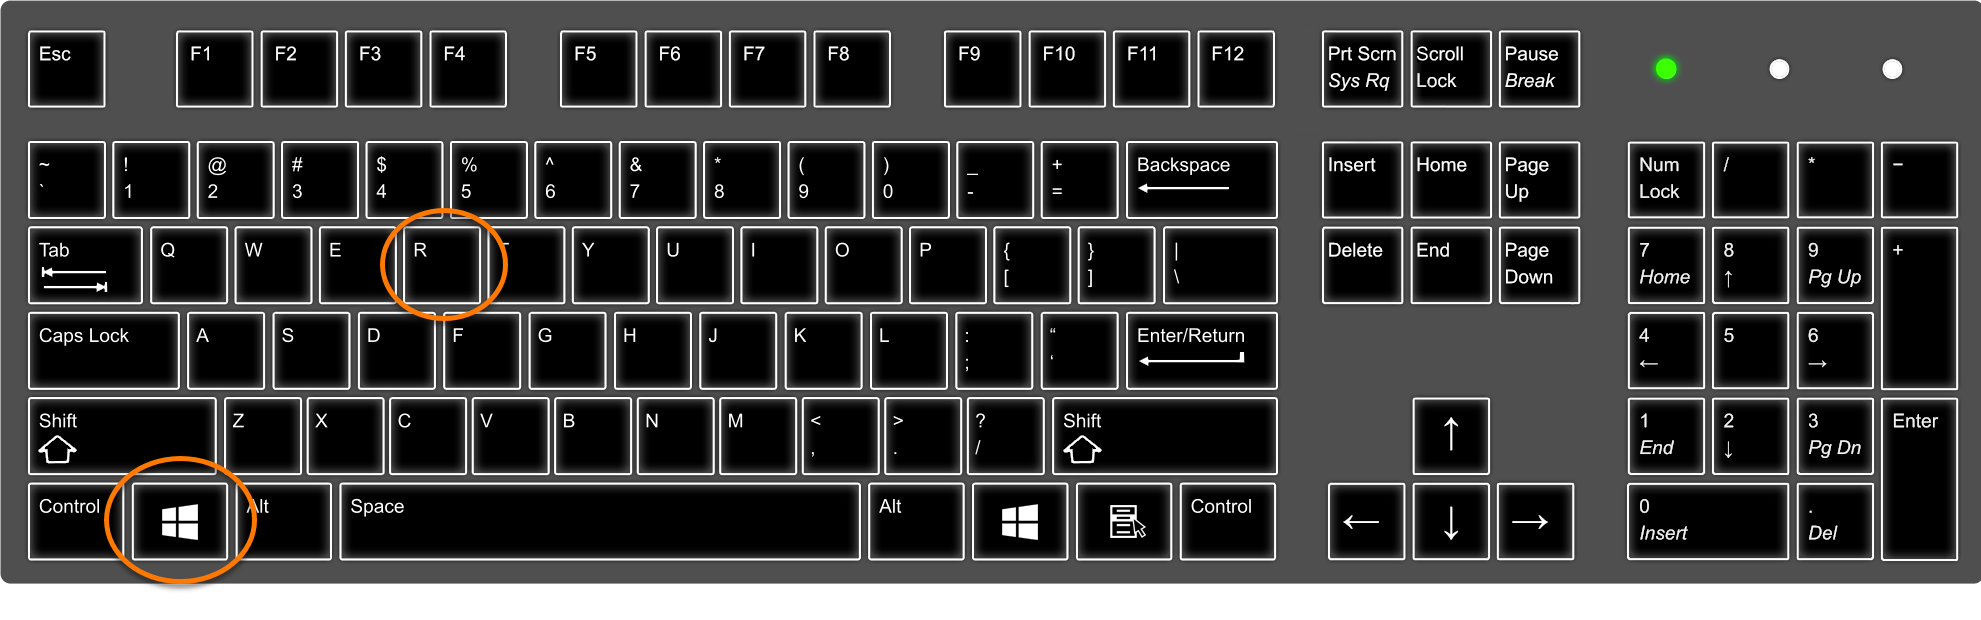
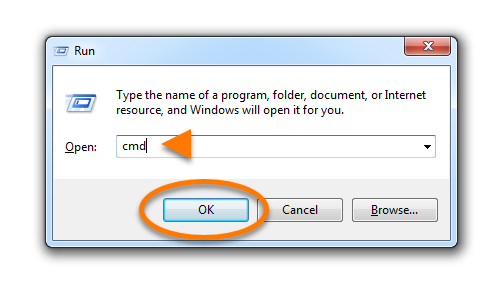
- Enter
cmd into the Open field and click OK. 


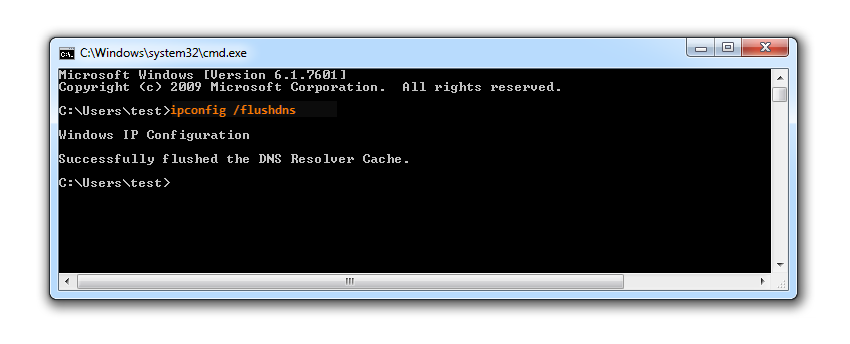
- In the Command Prompt window that appears, enter
ipconfig /flushdns and press Enter on your keyboard. 


Your DNS settings are now changed.