Promotional banner image

IS YOUR COMPUTER SLOW? RUN LIKE NEW

If they are not maintained, computers lose performance over time. Avast Cleanup Premium can help significantly improve the performance of your computer.

New Avast One Email Guard - Getting Started

Windows, Mac

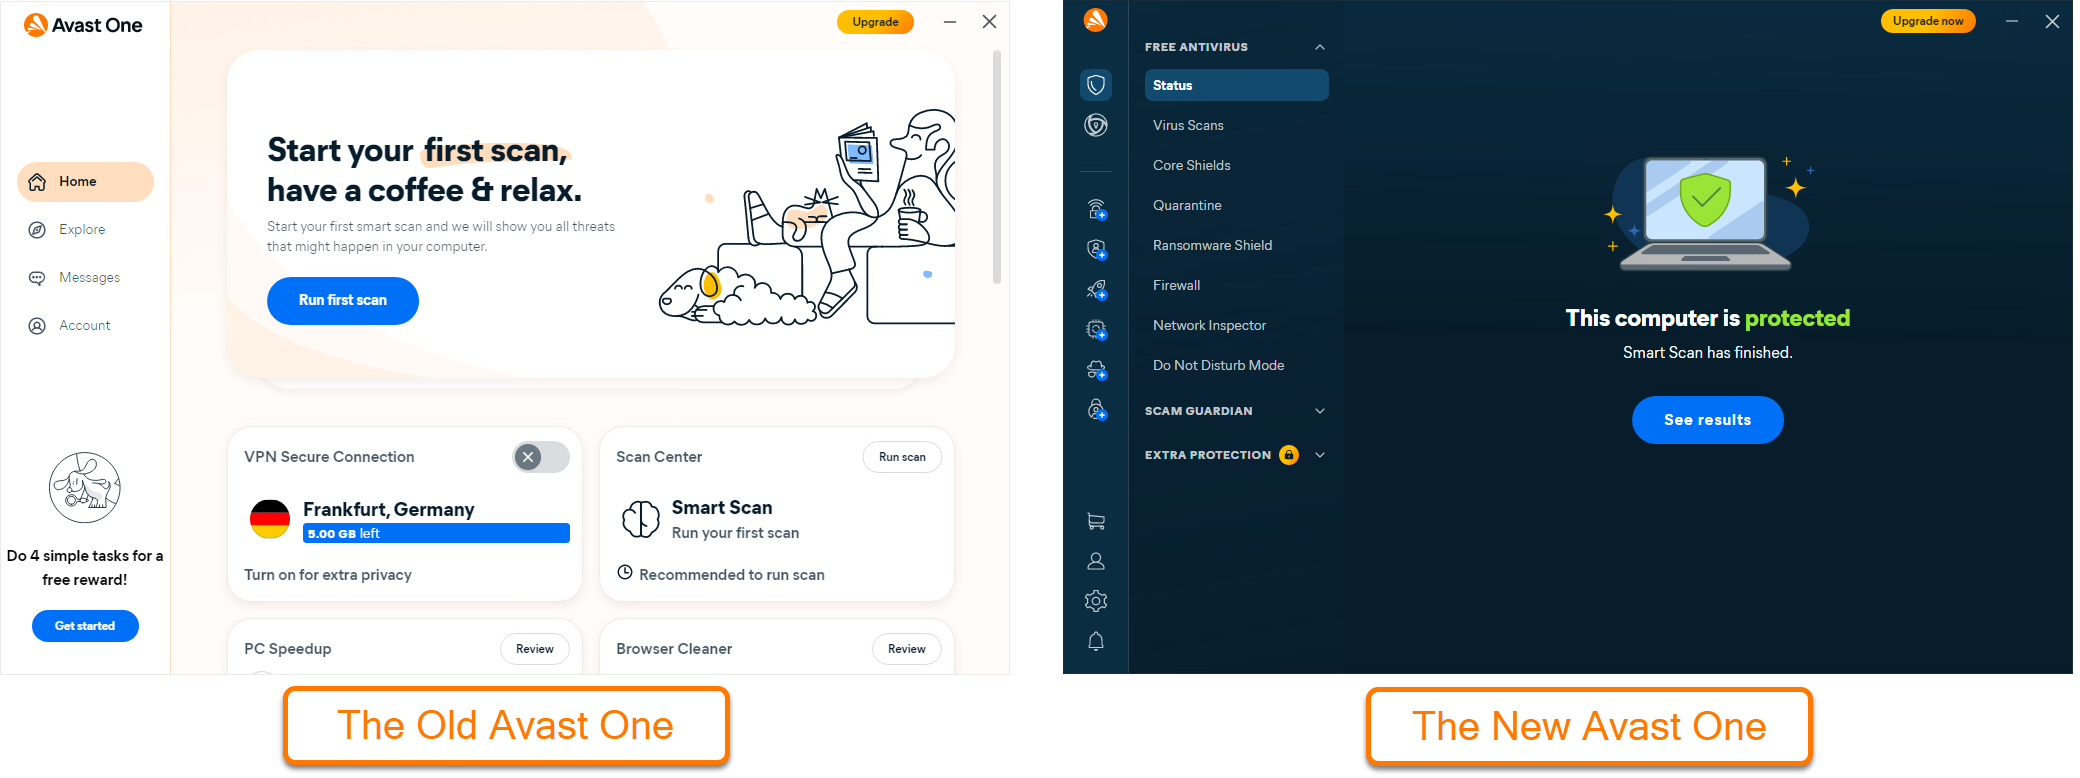
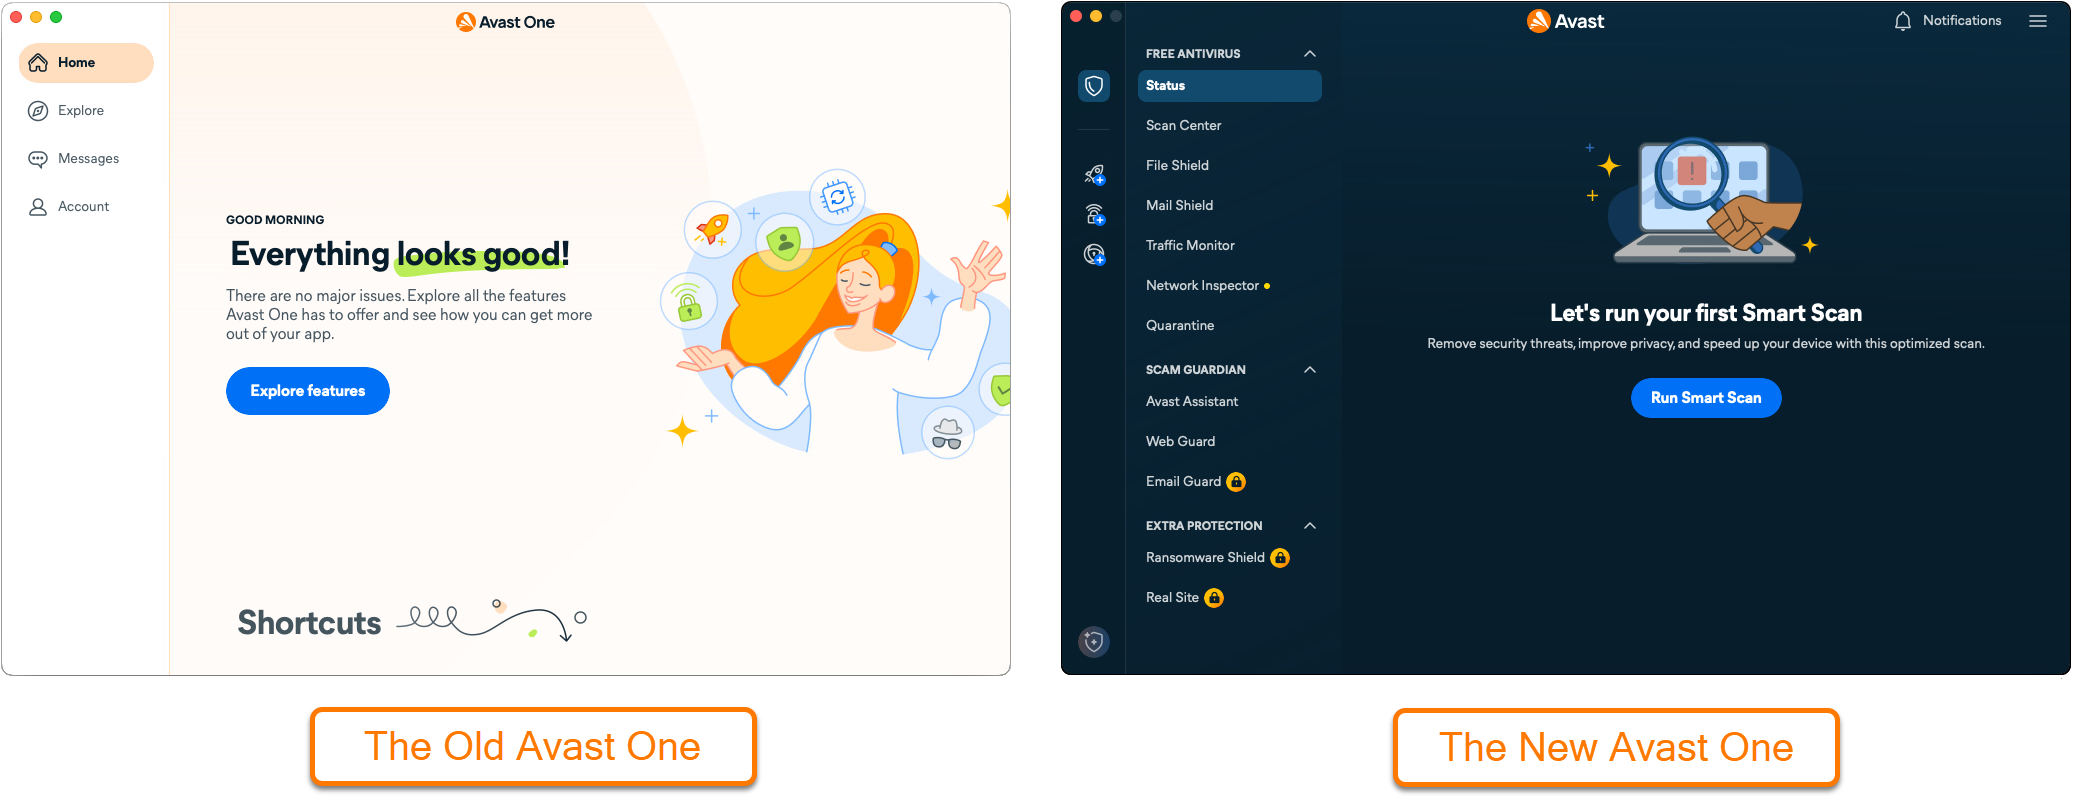
This article is about the Email Guard feature in the new version of Avast One. For information about Email Guardian in the legacy version of Avast One, refer to the following article: Avast One Email Guard - Getting Started.
Protect emails online

To use Email Guard, you need a paid subscription for Avast One.

Email Guard scans incoming emails in up to 5 online email accounts, enhancing your safety when checking emails from any device or browser.

To monitor your email accounts with Email Guard:

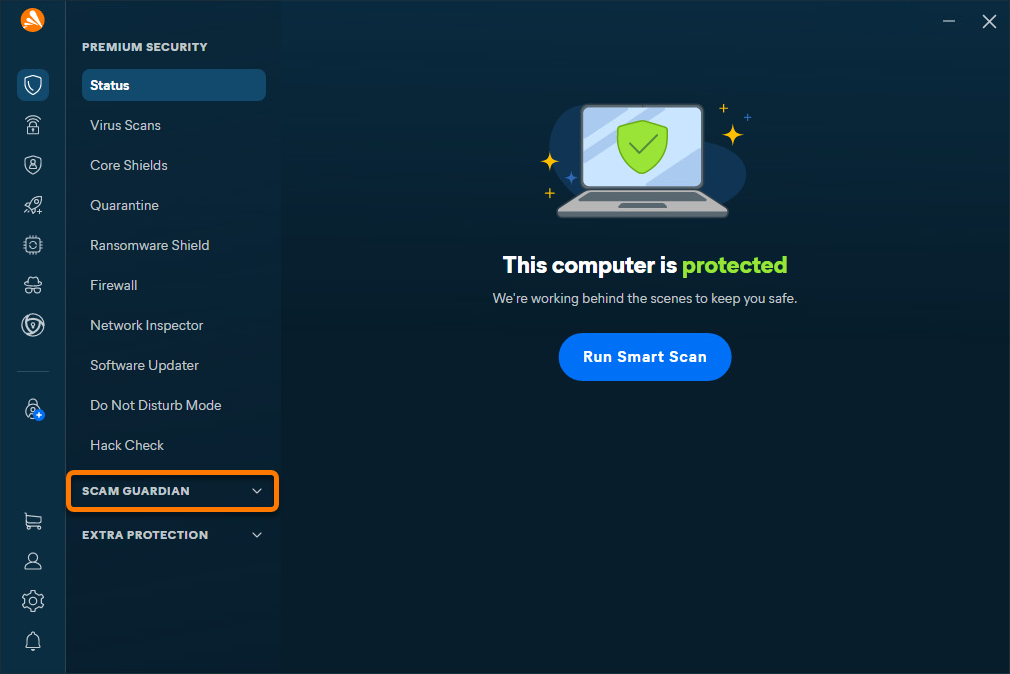
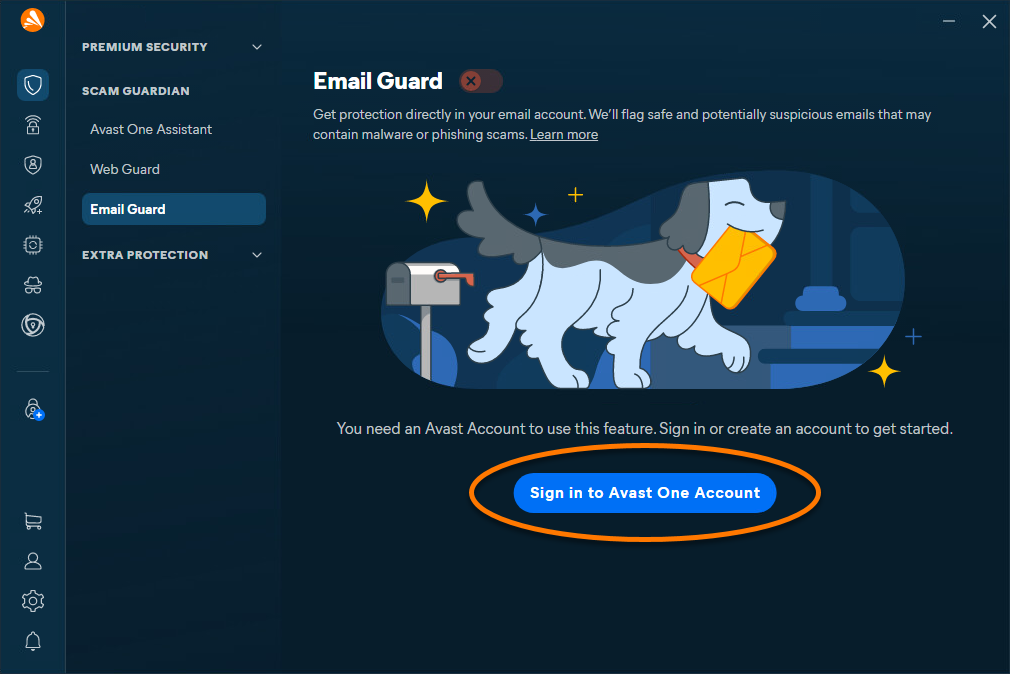
  1. Open Avast One and go to Scam Guardian.
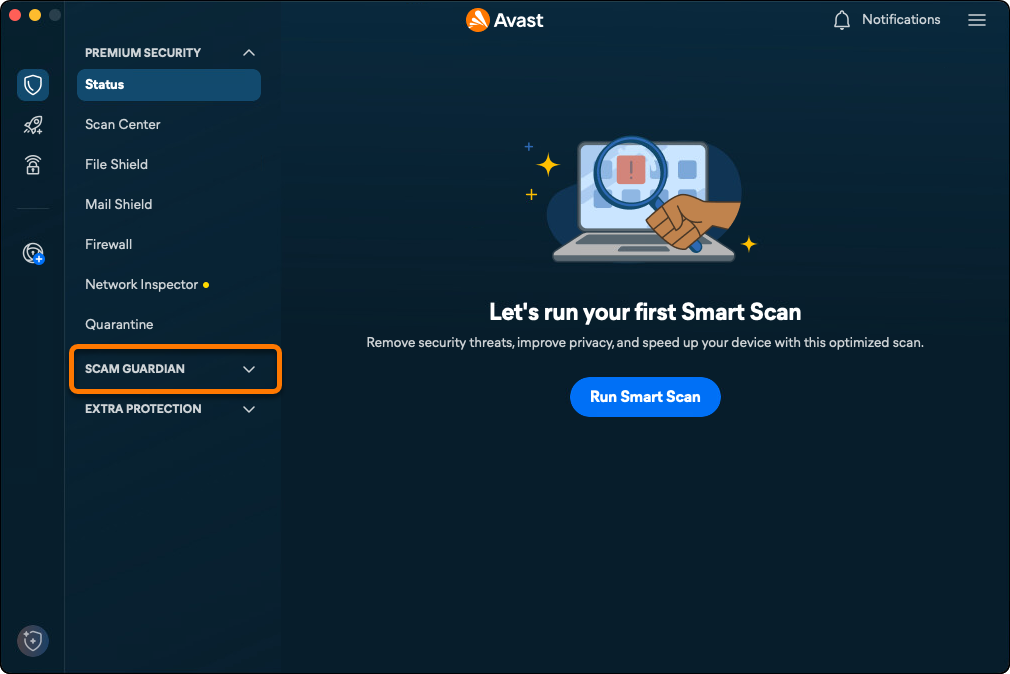
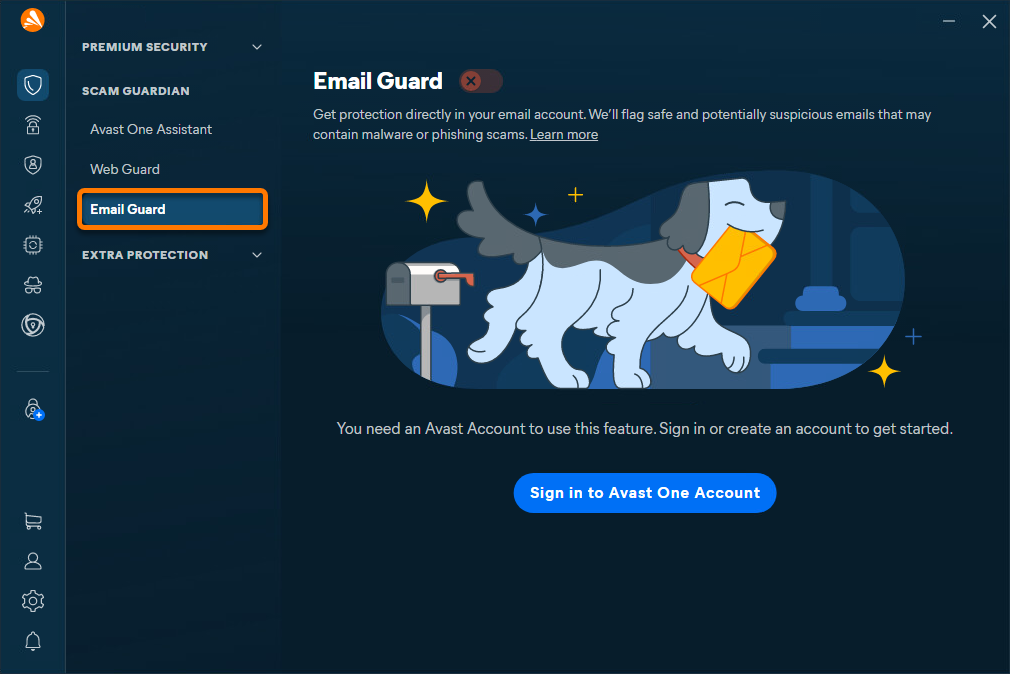
  2. Select Email Guard.
  3. If you are not already signed in, click Sign in to Avast One Account and follow the on-screen instructions.
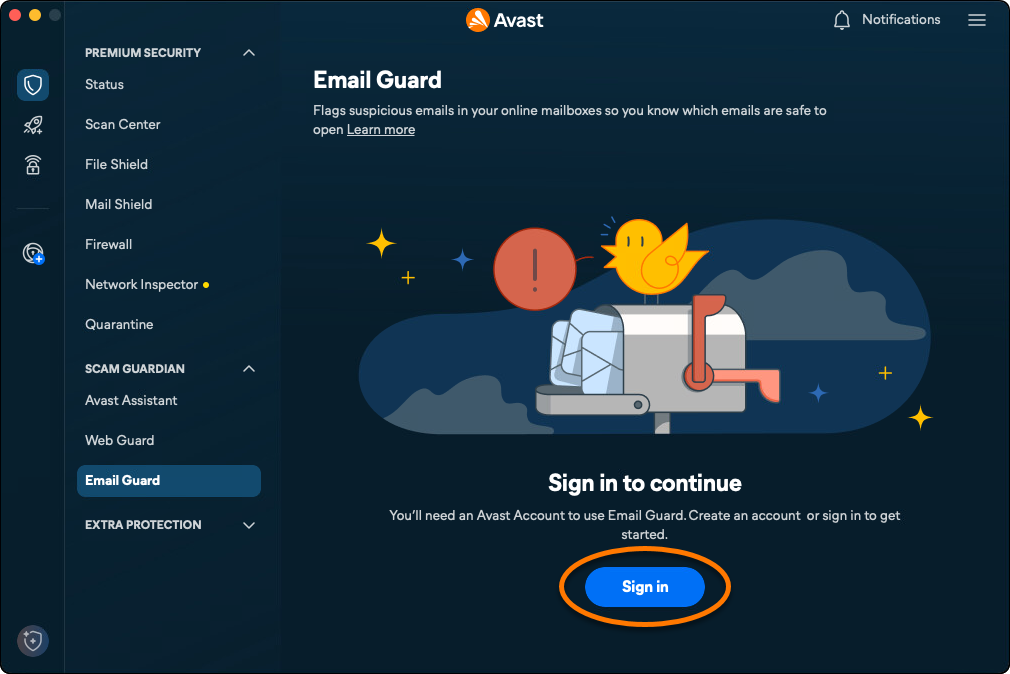
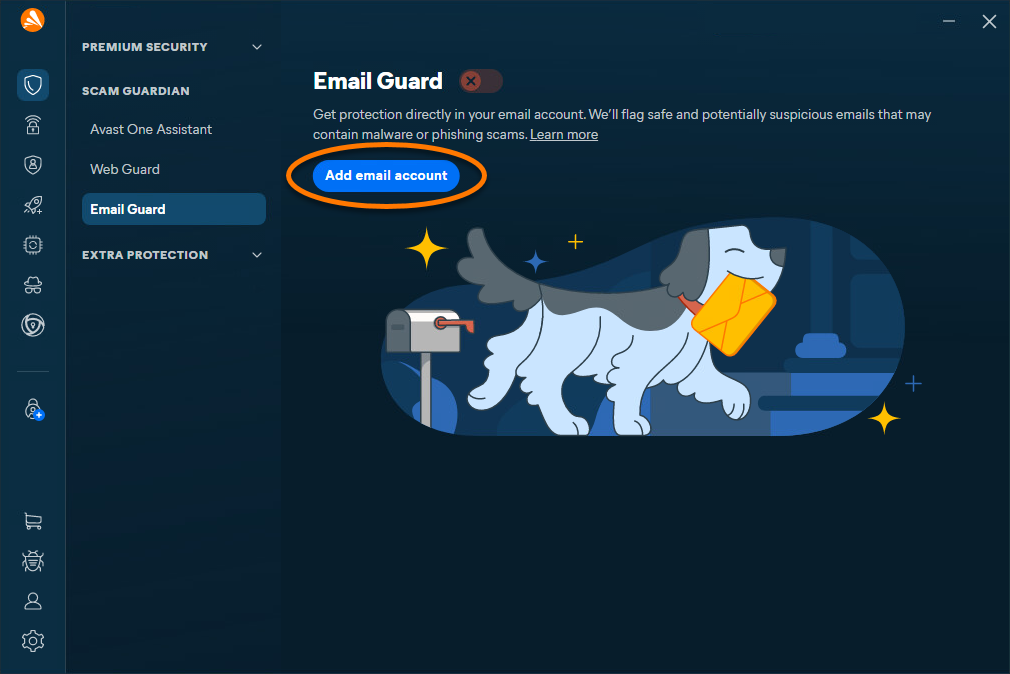
  4. Click Add email account.
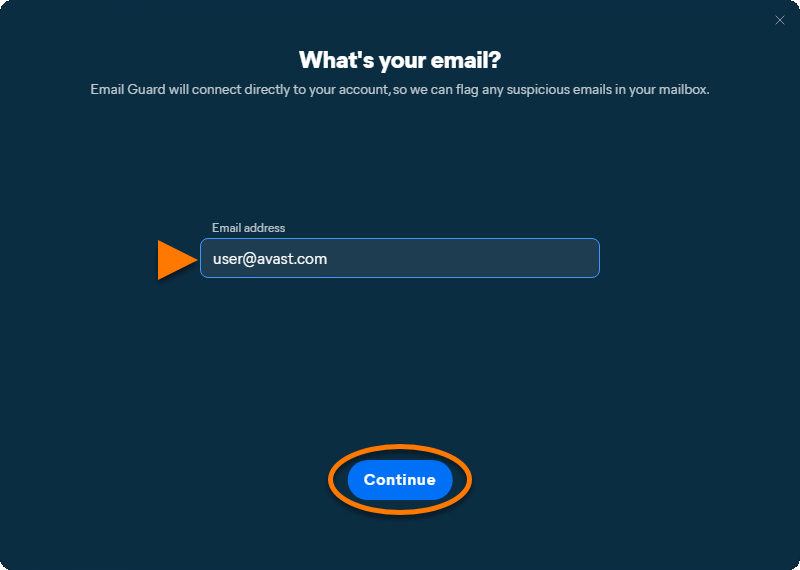
  5. Enter your email address, then click Continue.

    If you see the error message Sorry, we can't connect to that account yet, your email account is currently not compatible with Email Guard. However, we are working on adding supported email providers.
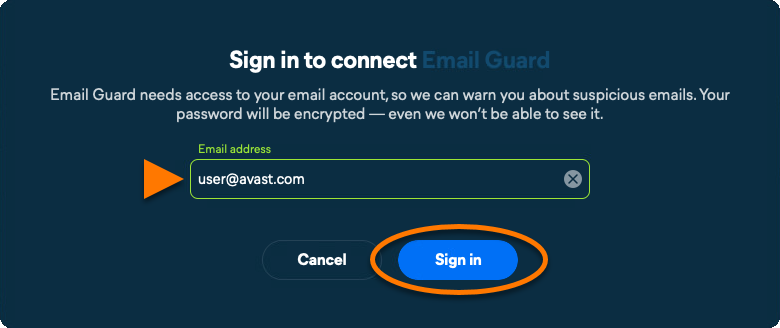

Select the relevant option below for instructions to connect your email account:

Gmail

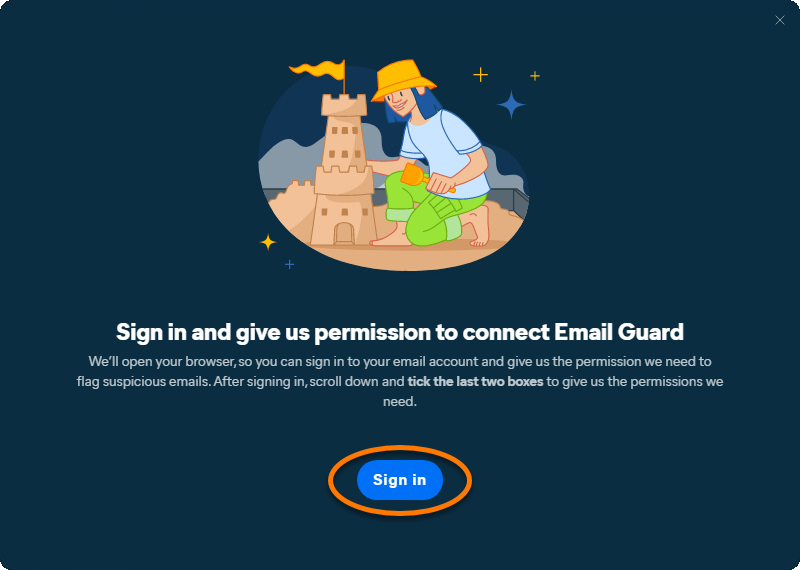
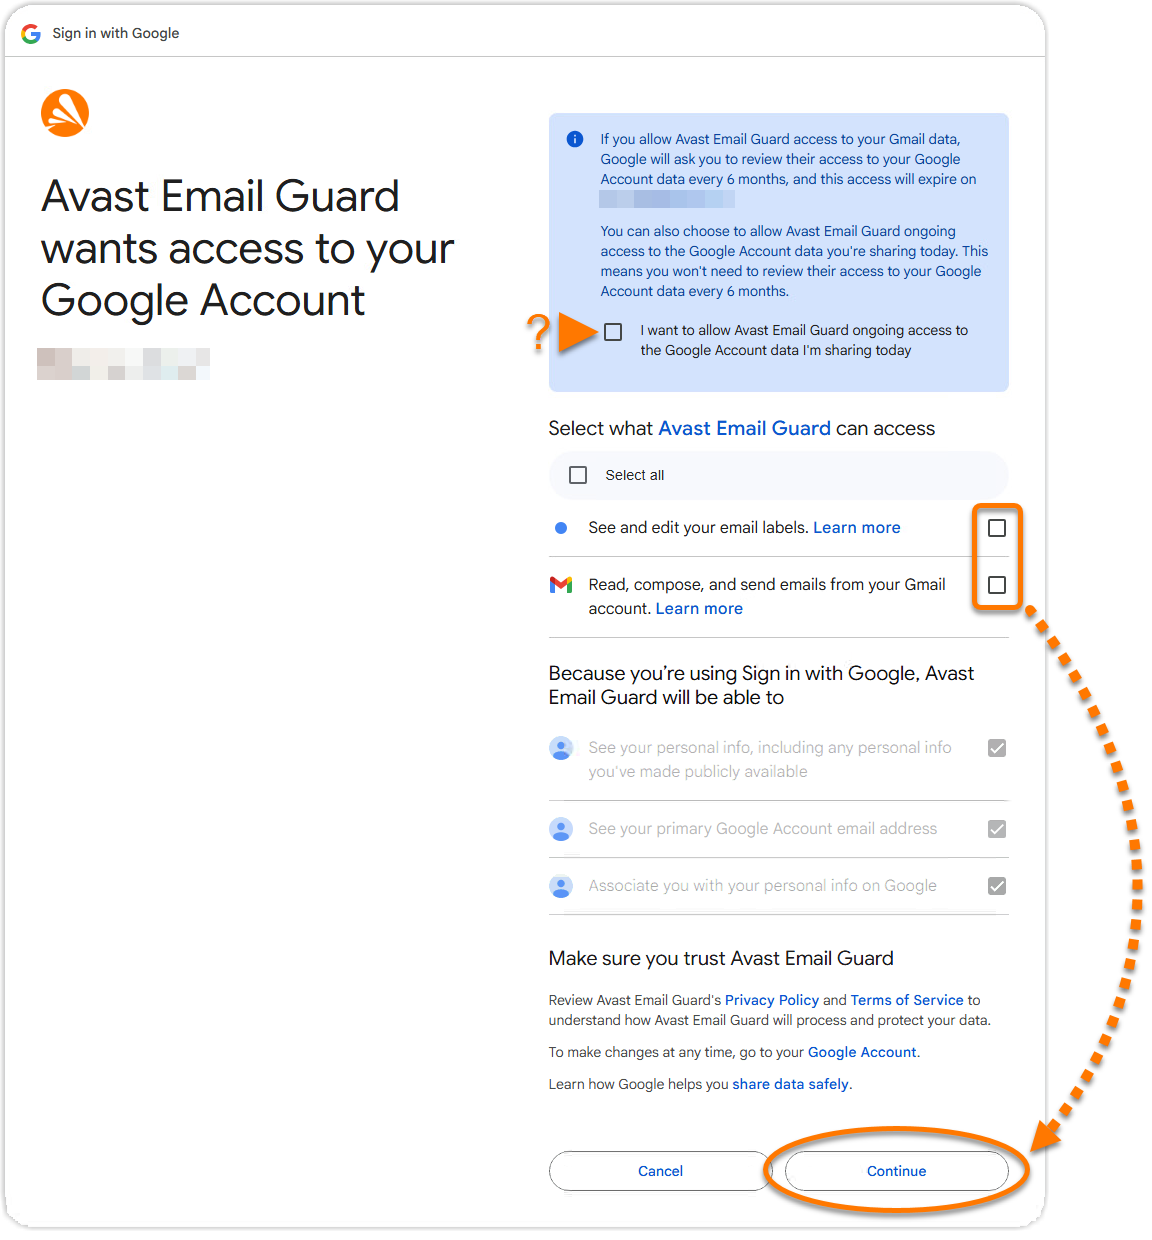
  1. Click Sign in to open Gmail, then sign in to your Gmail account.
  2. To configure your mailbox to work with Email Guard, tick the boxes next to See and edit your email labels and Read, compose, and send emails from your Gmail account, then click Continue.

    The Read, compose, and send emails from your Gmail account permission is a requirement in Google API rules for third-party apps. This permission needs to be granted to check emails for suspicious content and assign a corresponding label.
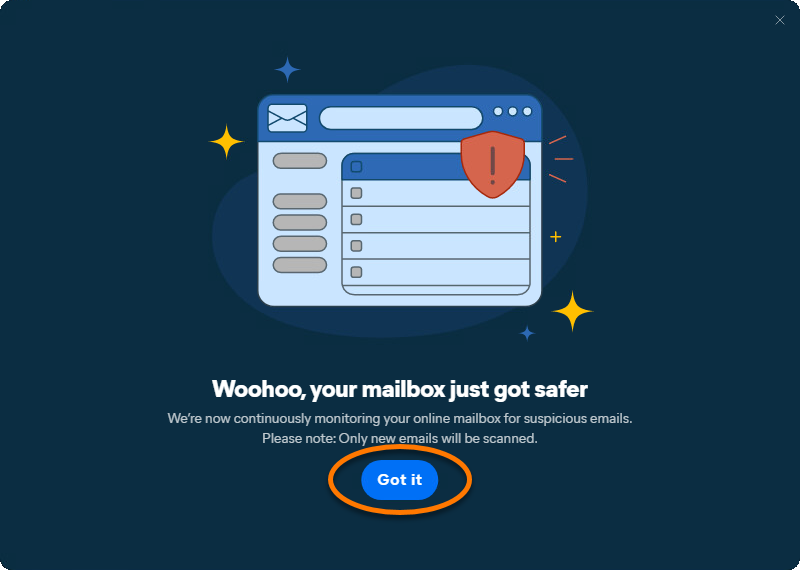
  3. Click Got it.

Google has changed its policies for applications listed under the email reporting and monitoring categories. To protect your account, you need to renew Gmail access every six months.

When your Gmail access expires, you receive an email to the email address that was protected, as well as an alert in the Email Guard section of your Avast Antivirus application. Follow the provided instructions to renew your Gmail access.

Outlook

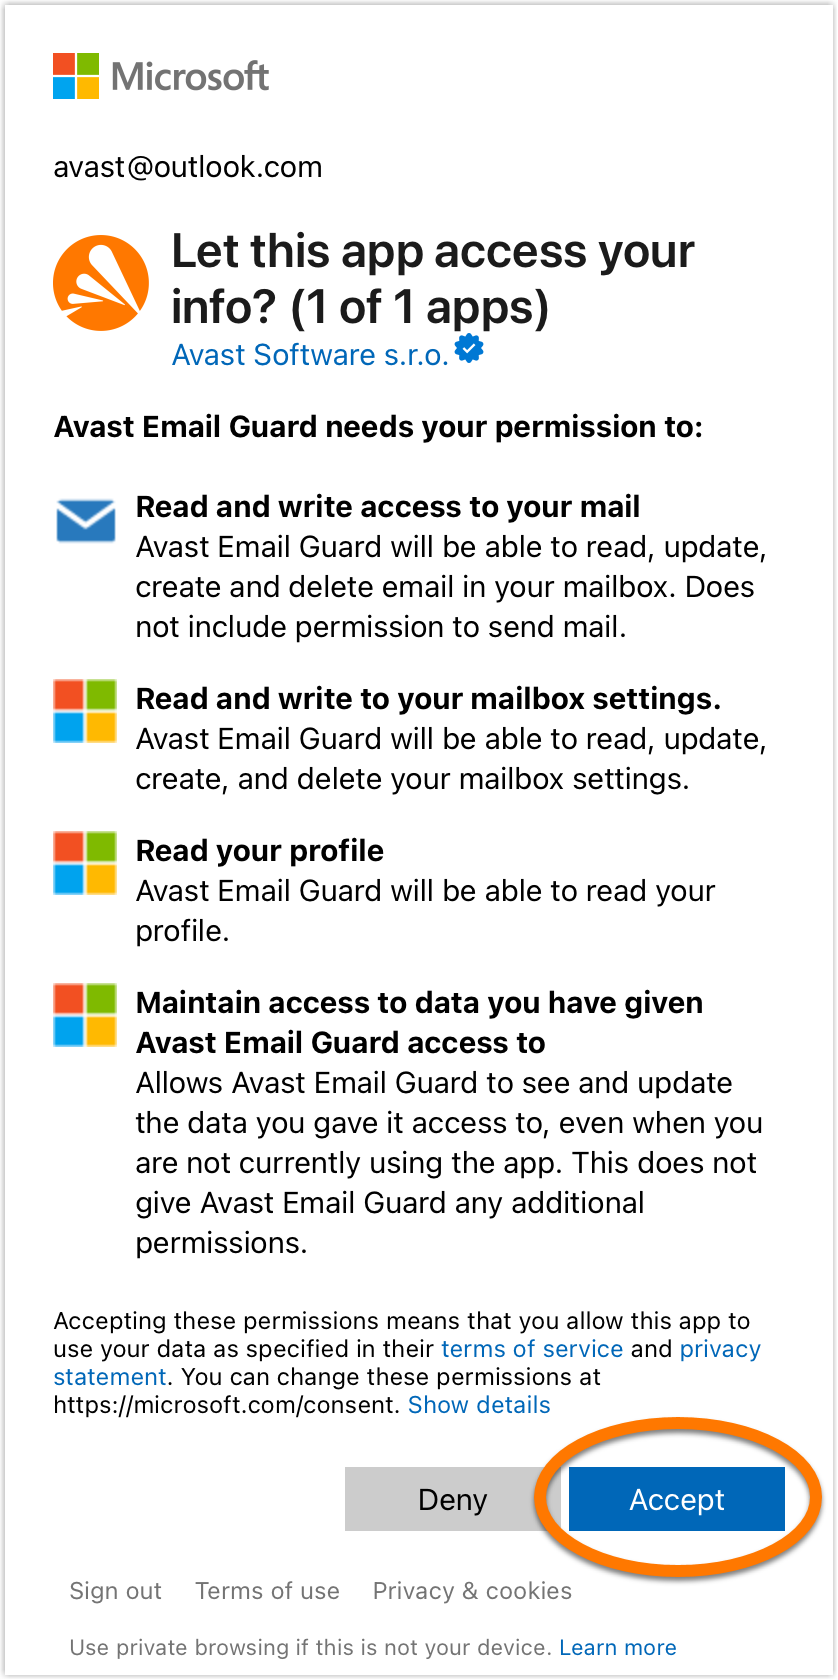
  1. Click Sign in to open Outlook, then sign in to your Outlook account.
  2. Click Accept to give Avast permission to Let this app access your info?.
  3. Click Got it.

Other email providers

Configure your email account

For some email providers, you need to set up your email account to work with Email Guard. If your email provider is listed in the table below, click the relevant link to follow the instructions on your email provider's support website. If you have already set up your email account to work with Email Guard, follow the steps below to complete the process in Avast One.

Email provider

Setup

Instructions

AOL

App-specific password (only needed if two-factor authentication is on)

AOL ▸ Create and manage third-party app passwords

Comcast

Allow access to third-party programs

Comcast ▸ Turn your access to third-party email programs on or off in Xfinity Email

Cox.net

App-specific password (after transitioning to Yahoo.com)

Yahoo ▸ Update your cox.net email settings in Outlook, Mail on Mac and other third-party email clients

GMX

Enable IMAP

GMX ▸ Activate or deactivate POP3 and IMAP

iCloud Mail

App-specific password

Apple ▸ Sign in to apps with your Apple Account using app-specific passwords

Mail.ru

App-specific password

Mail.ru ▸ IMAP, SMTP и POP3 Mail.ru

Seznam

App-specific password

Seznam ▸ IMAP, POP3, SMTP

Web.de

Enable IMAP

Web.de ▸ Serverdaten für IMAP und SMTP

Yahoo

App-specific password

Yahoo ▸ Generate and manage third-party app passwords

Yandex

Enable IMAP

App-specific password

Yandex ▸ Configuring desktop email clients

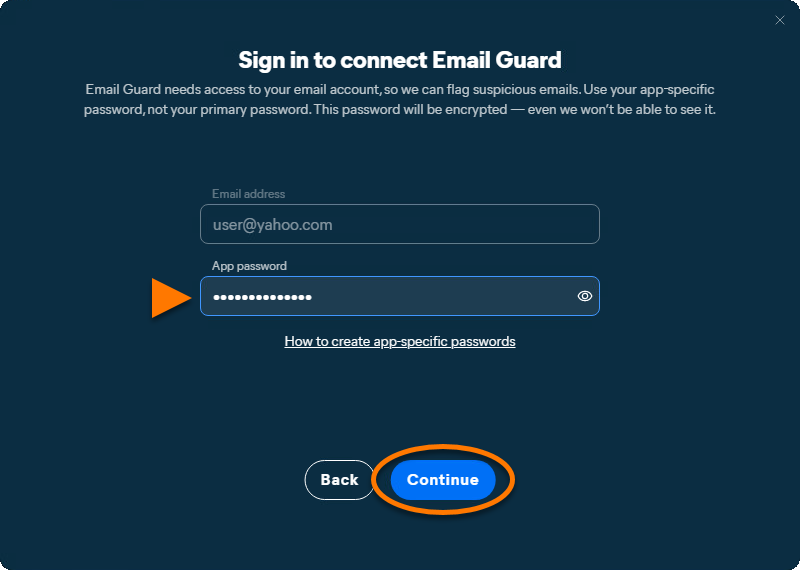
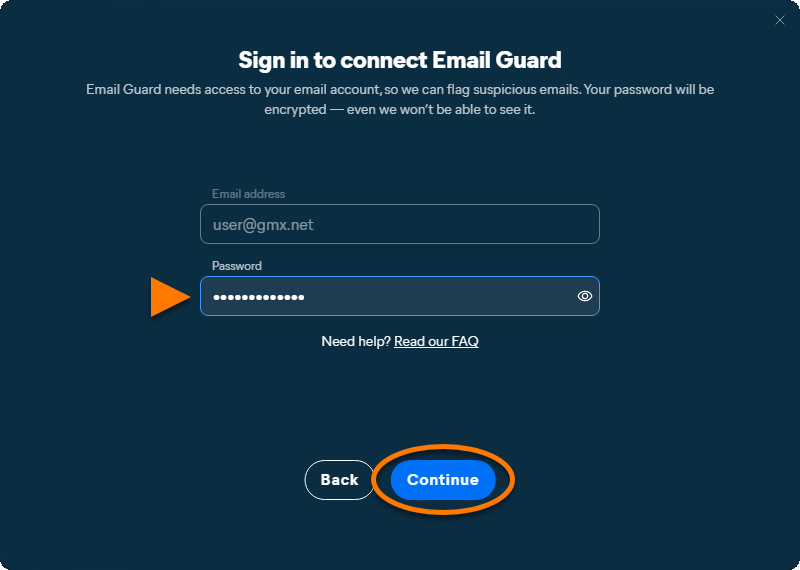
  1. If you have already set up your email account to work with Email Guard, then continue with the relevant screen below according to your email provider's requirements:
    • App password: Enter your app-specific password, then click Continue.
    • Email password: Enter your email password, then click Continue.
    • If you see an error message, click Try again. If the setup continues to fail, click Close, and try again from the beginning using the exact steps in this article. If the set up continues to fail, ensure the email address you are trying to add is compatible with Email Guard, then contact Avast Support for further assistance.

  2. Click Got it.

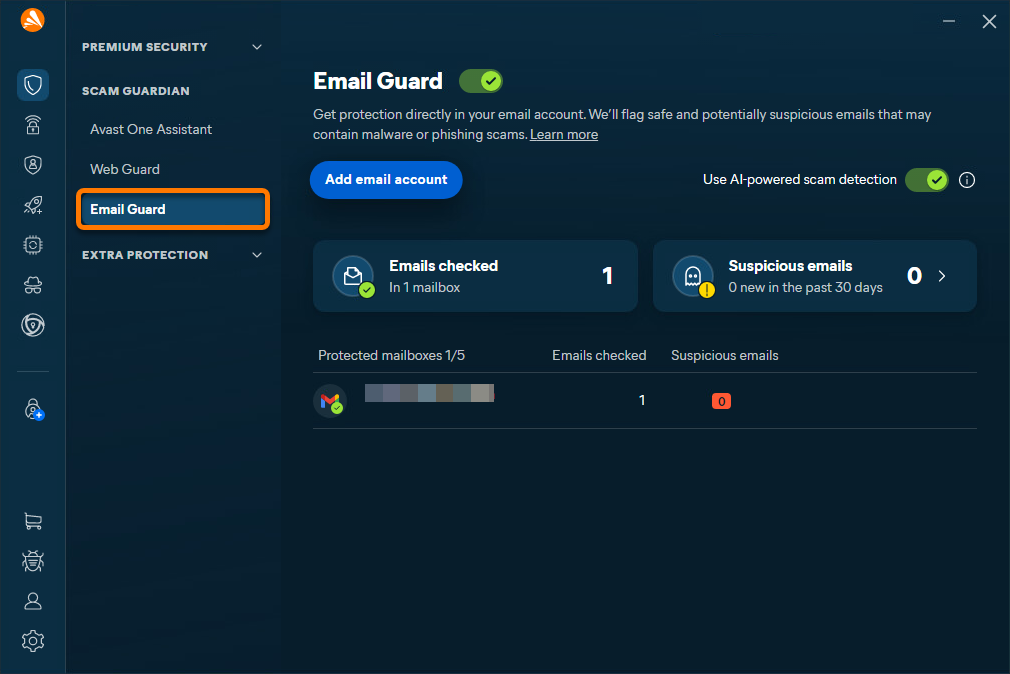
Email Guard is monitoring the email account.

To add additional email accounts, click Add email account on the Email Guard screen and follow the relevant steps in this article. You can add a maximum of 5 email accounts to Email Guard.

Enable AI-powered scam detection

Switch the slider beside Use AI-powered scam detection to allow Email Guard to use AI when checking your emails for threats. Suspicious emails detected by this feature are marked with an Avast: Scam label in your inbox.

Remove an email account

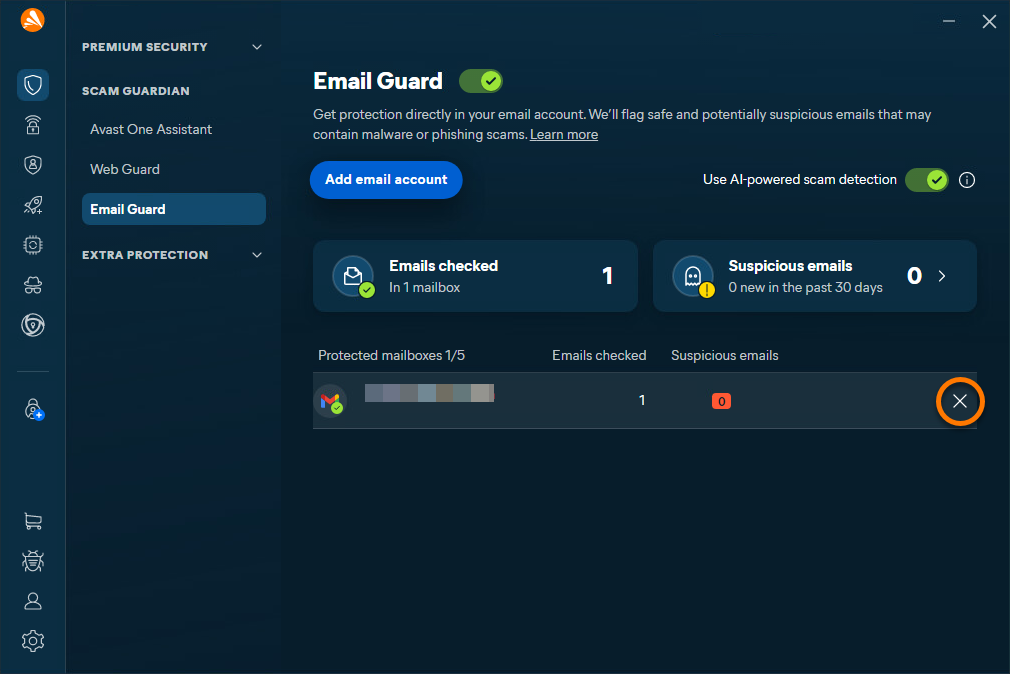
To stop Email Guard from monitoring an email account:

  1. Open Avast One and go to Scam Guardian.
  2. Select Email Guard.
  3. Navigate to the relevant email account panel, hover your cursor over it, and click the X icon.
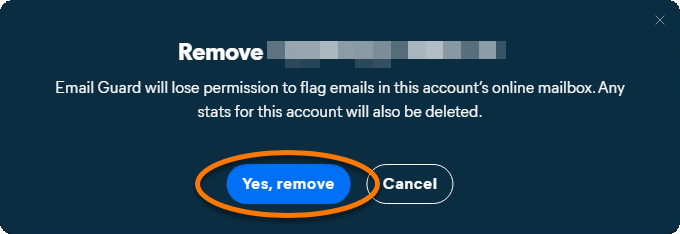
  4. Click Yes, remove.

Your email account is removed from Email Guard and is no longer monitored for malicious or phishing emails.

Protect emails on your device

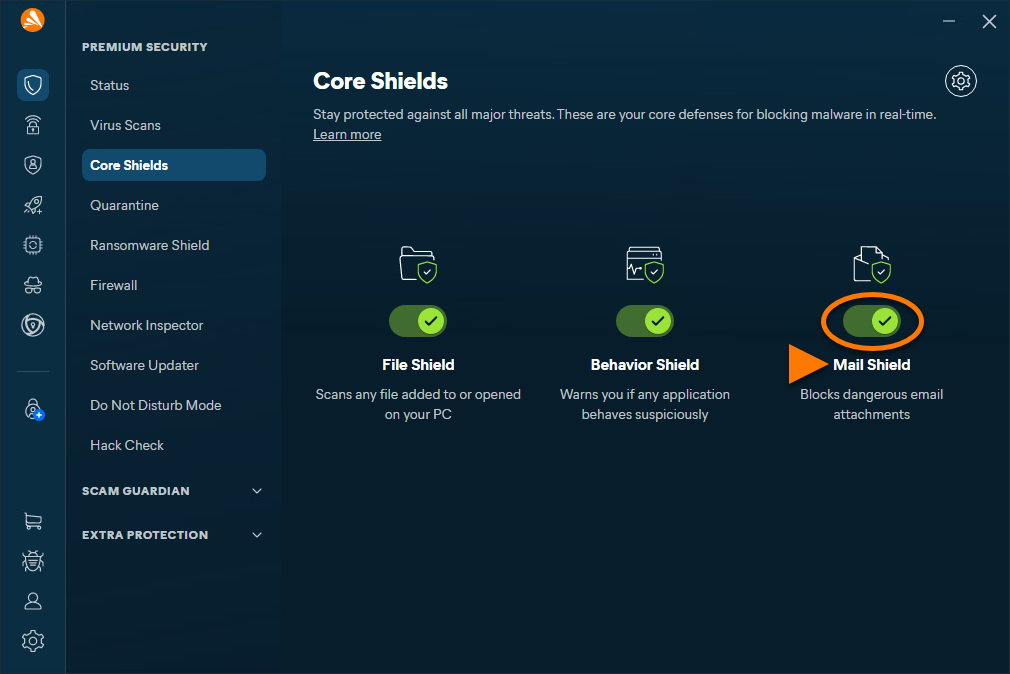
Mail Shield scans for malware in emails sent or received through any email client application installed on your Windows device, including Microsoft Outlook and Mozilla Thunderbird. This feature is enabled by default.

To ensure Mail Shield is monitoring your email client applications:

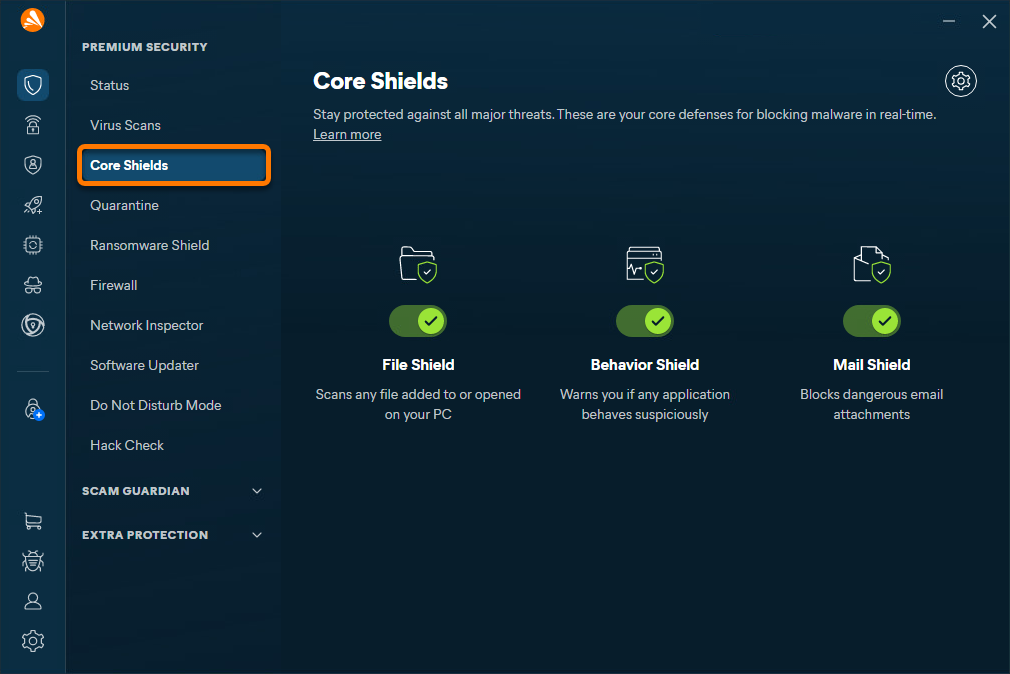
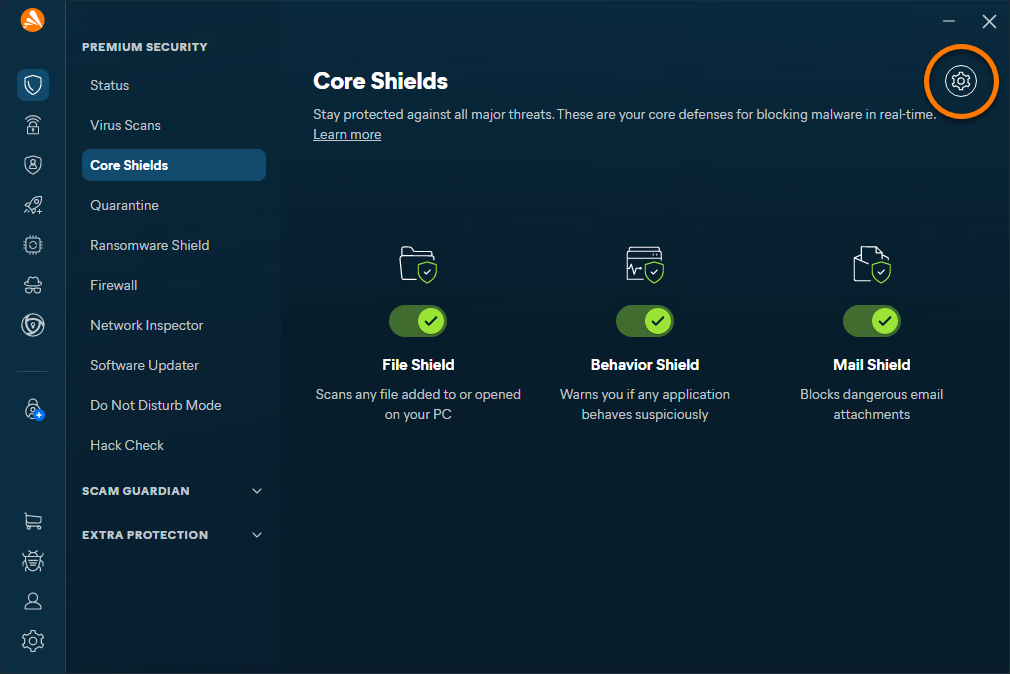
  1. Open Avast One, then select Core Shields.
  2. Ensure the slider above Mail Shield is green (ON).
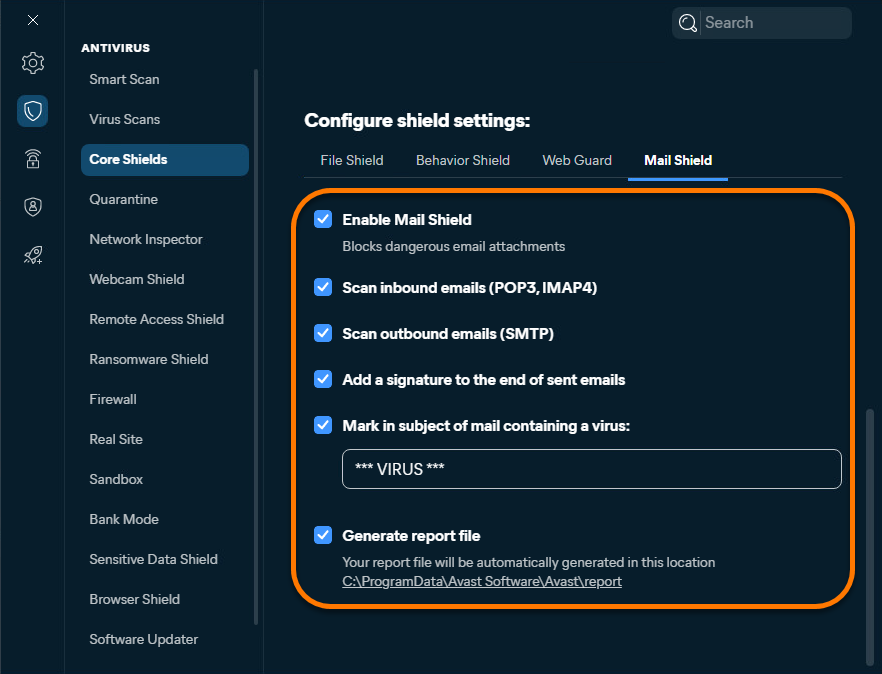
  3. To optionally configure Mail Shield settings, select Settings (the gear icon).
  4. Configure the Mail Shield settings according to your preferences:
    • Enable or disable Mail Shield.
    • Scan your inbound and/or outbound emails.
    • Add an Avast signature to the end of sent emails.
    • Set the text that appears in the subject of suspicious emails.
    • Generate a report file.

Further recommendations

For more information about Email Guard, refer to the following article:

This article is about the Email Guard feature in the new version of Avast One. For information about Email Guardian in the legacy version of Avast One, refer to the following article: Avast One Email Guard - Getting Started.

Protect emails online

To use Email Guard, you need a paid subscription for Avast One.

Email Guard scans incoming emails in up to 5 online email accounts, enhancing your safety when checking emails from any device or browser.

To monitor your email accounts with Email Guard:

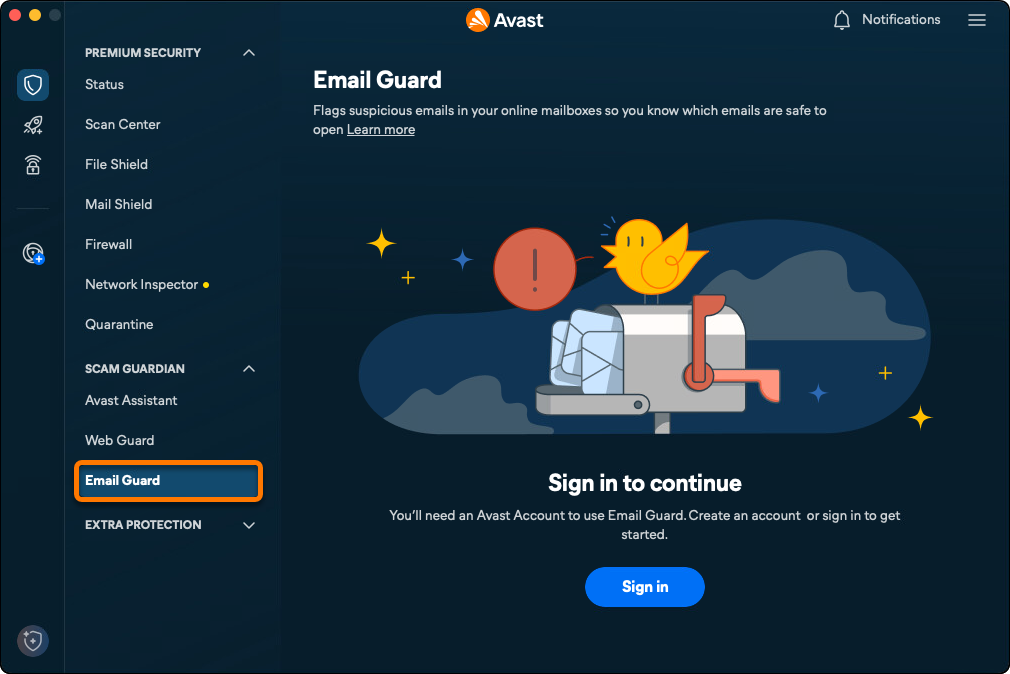
  1. Open Avast One and go to Scam Guardian.
  2. Select Email Guard.
  3. If you are not already signed in, click Sign in and follow the on-screen instructions.
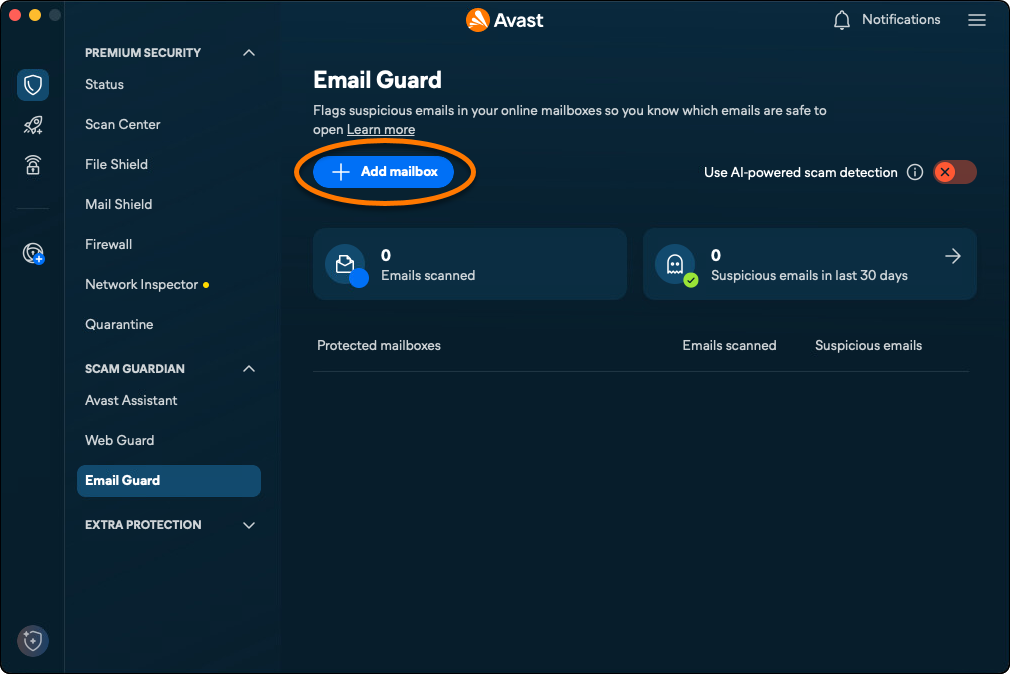
  4. Click Add mailbox.
  5. Enter your email address, then click Sign in.

    If you see the error message Sorry, we can't connect to that account yet, your email account is currently not compatible with Email Guard. However, we are working on adding supported email providers.


Select the relevant option below for instructions to connect your email account:

Gmail

  1. Sign in to your Gmail email account.
  2. To configure your mailbox to work with Email Guard, tick the boxes next to See and edit your email labels and Read, compose, and send emails from your Gmail account, then click Continue.

    The Read, compose, and send emails from your Gmail account permission is a requirement in Google API rules for third-party apps. This permission needs to be granted to check emails for suspicious content and assign a corresponding label.

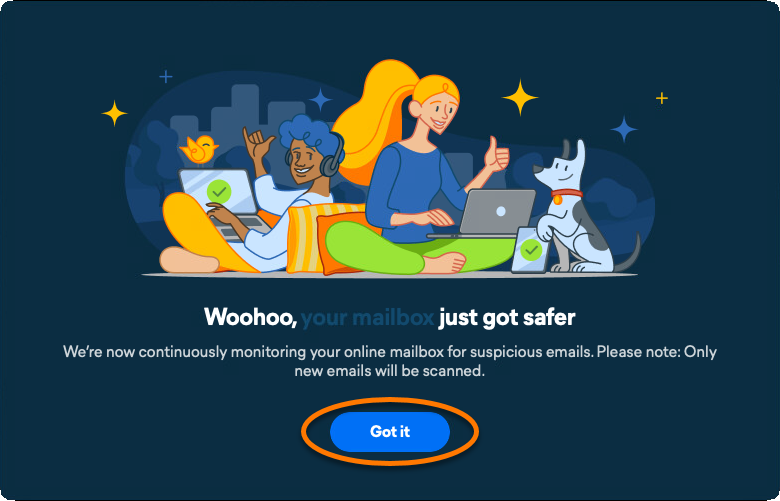
  3. Click Got it.

Google has changed its policies for applications listed under the email reporting and monitoring categories. To protect your account, you need to renew Gmail access every six months.

When your Gmail access expires, you receive an email to the email address that was protected, as well as an alert in the Email Guard section of your Avast Antivirus application. Follow the provided instructions to renew your Gmail access.

Outlook

  1. Sign in to your Outlook email account.
  2. Click Accept to give Avast permission to Let this app access your info?.
  3. Click Got it.

Other email providers

Configure your email account

For some email providers, you need to set up your email account to work with Email Guard. If your email provider is listed in the table below, click the relevant link to follow the instructions on your email provider's support website. If you have already set up your email account to work with Email Guard, follow the steps below to complete the process in Avast One.

Email provider

Setup

Instructions

AOL

App-specific password (only needed if two-factor authentication is on)

AOL ▸ Create and manage third-party app passwords

Comcast

Allow access to third-party programs

Comcast ▸ Turn your access to third-party email programs on or off in Xfinity Email

Cox.net

App-specific password (after transitioning to Yahoo.com)

Yahoo ▸ Update your cox.net email settings in Outlook, Mail on Mac and other third-party email clients

GMX

Enable IMAP

GMX ▸ Activate or deactivate POP3 and IMAP

iCloud Mail

App-specific password

Apple ▸ Sign in to apps with your Apple Account using app-specific passwords

Mail.ru

App-specific password

Mail.ru ▸ IMAP, SMTP и POP3 Mail.ru

Seznam

App-specific password

Seznam ▸ IMAP, POP3, SMTP

Web.de

Enable IMAP

Web.de ▸ Serverdaten für IMAP und SMTP

Yahoo

App-specific password

Yahoo ▸ Generate and manage third-party app passwords

Yandex

Enable IMAP

App-specific password

Yandex ▸ Configuring desktop email clients

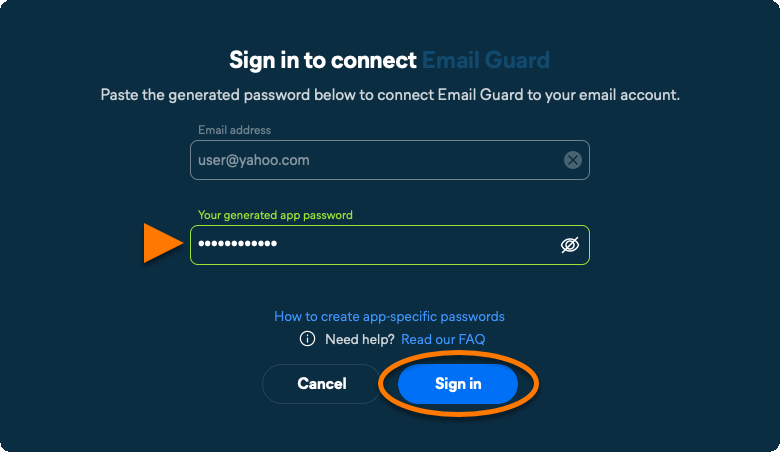
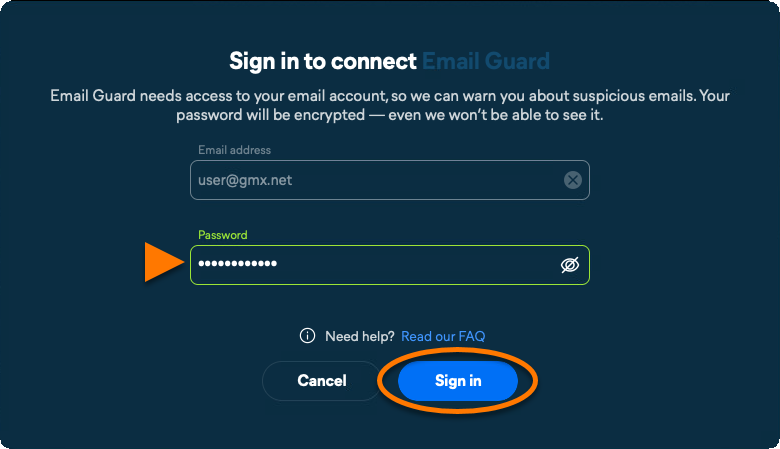
  1. If you have already set up your email account to work with Email Guard, then continue with the relevant screen below according to your email provider's requirements:
    • App password: Enter your app-specific password, then click Sign in.
    • Email password: Enter your email password, then click Sign in.
    • If you see an error message, click Try again. If the setup continues to fail, click Close, and try again from the beginning using the exact steps in this article. If the set up continues to fail, ensure the email address you are trying to add is compatible with Email Guard, then contact Avast Support for further assistance.

  2. Click Got it.

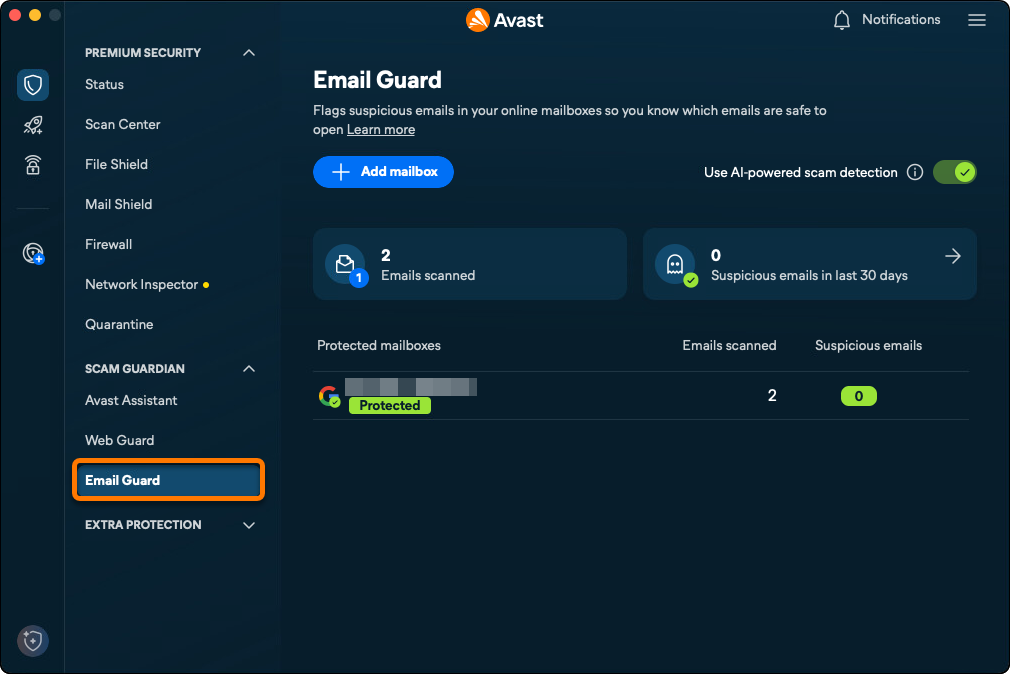
Email Guard is monitoring the email account.

To add additional email accounts, click Add email account on the Email Guard screen and follow the relevant steps in this article. You can add a maximum of 5 email accounts to Email Guard.

Enable AI-powered scam detection

Switch the slider beside Use AI-powered scam detection to allow Email Guard to use AI when checking your emails for threats. Suspicious emails detected by this feature are marked with an Avast: Scam label in your inbox.

Remove an email account

To stop Email Guard from monitoring an email account:

  1. Open Avast One and go to Scam Guardian.
  2. Select Email Guard.
  3. Navigate to the relevant email account panel, hover your cursor over it, and click the X icon.
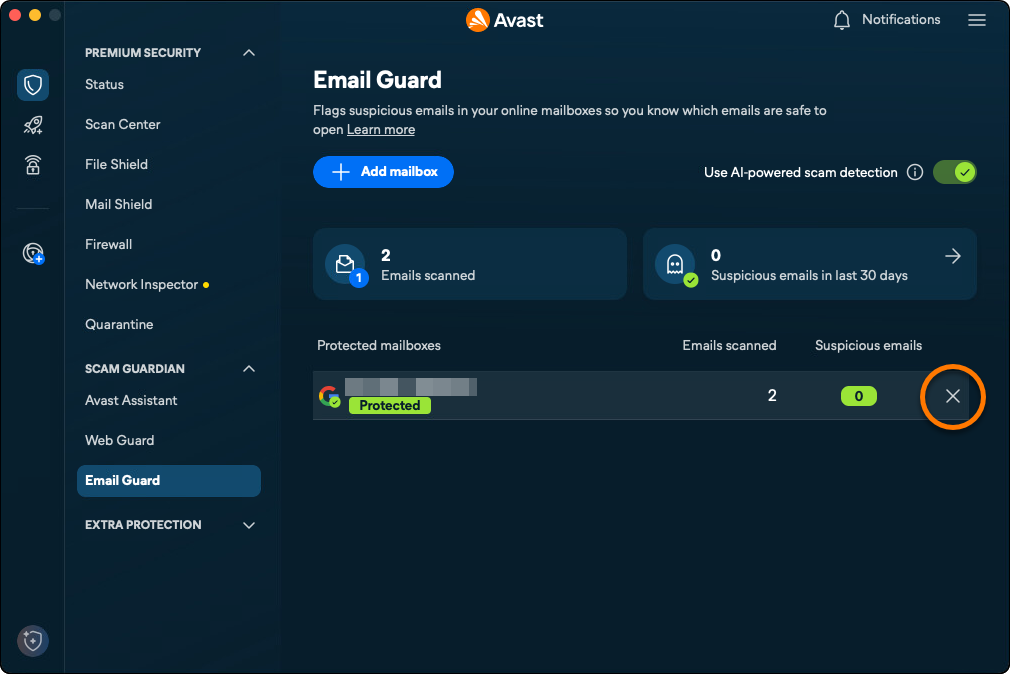
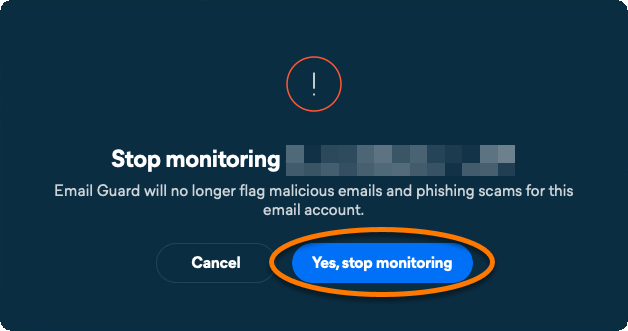
  4. Click Yes, stop monitoring.

Your email account is removed from Email Guard and is no longer monitored for malicious or phishing emails.

Protect emails on your device

Mail Shield scans for malware in emails sent or received through any email client application installed on your Mac, including Apple Mail or Microsoft Outlook. This feature is enabled by default.

To ensure Mail Shield is monitoring your email client applications:

  1. Open Avast One, then select Mail Shield.
  2. Ensure the slider above Mail Shield is green (ON).
  3. To optionally configure Mail Shield settings, select Settings (the gear icon).
  4. Ensure the Settings tab is selected, then use the sliders to configure the Mail Shield settings according to your preferences:
    • Receive notifications about attempts to install potentially unwanted programs and tools.
    • Scan secure connections.
    • Choose between weekly summary reports or immediate detection alerts.

Add exceptions

You can add domains which will be excepted from Email Guard scans. This applies only for protection of mail applications installed on this Mac.

  1. Open Avast One, then select Mail Shield.
  2. Select Settings (the gear icon).
  3. Select the Exceptions tab and click Add exceptions.
  4. Enter the domain name you do not want to scan and choose the relevant protocols. Click Add.

To remove a server from the exception list, hover your cursor over the relevant item and click the X icon.

Further recommendations

For more information about Email Guard, refer to the following article:

DocID: use-avast-one-email-guardLast modified: 09/03/2026

Was this article helpful?

Promotional banner image

Keep your online identity private!

Browse like no one’s watching with Avast anti-tracking software.

Need more help?

Contact us
Avast account
Visit our forums
Visit academy