
- Open Avast Antivirus and select Protection ▸ Virus Scans.
- Select the Rescue Disk tab.
- Tick Use UEFI boot file for modern PCs to run Rescue Disk on a modern PC with UEFI (Unified Extensible Firmware Interface). For an older PC with BIOS (Basic Input/Output System), untick this box.
The first consumer PCs with UEFI were manufactured after the year 2005. Refer to the manufacturer's support documentation to determine whether the infected PC is using the modern UEFI or older BIOS. If you cannot find out this information, create both Rescue Disk variants and try to boot up the PC with each of them until it successfully starts the main Rescue Disk menu.
- Insert an empty USB drive into your PC's USB port, then select Create on USB.
- In the dialog that appears, select your USB drive. A progress screen appears as Rescue Disk is created.
- When Rescue Disk is finished loading onto your USB drive, click OK.
- Select Create ISO file.
- Select a location to save the Rescue Disk ISO file, then click Save. A progress screen appears as the Rescue Disk ISO file is created.
- When Rescue Disk is finished creating the ISO file, click Open folder with ISO file.
- On the same PC, insert a blank recordable DVD into the DVD-writer.
- In the open folder, right-click the created ISO file, and select Burn disc image (on Windows 11, select Show more options ▸ Burn disc image).
- Ensure the DVD-writer with inserted DVD is selected next to Disc burner, then click Burn. A progress screen appears as the DVD is recorded with the ISO file.
- When the recording process is completed, click Close.
IS YOUR COMPUTER SLOW? RUN LIKE NEW
If they are not maintained, computers lose performance over time. Avast Cleanup Premium can help significantly improve the performance of your computer.
Scan your PC for viruses using Rescue Disk in Avast Antivirus
Windows
If you suspect your PC is infected with malware and all other Antivirus scans (including Boot-Time scan) were unable to resolve the issue, you can use Rescue Disk. Rescue Disk scans your PC when your system is not running. This method increases your chances of detecting and removing malware because the malware is unable to counteract.
Rescue Disk cannot be used on devices with ARM processors.
Follow the instructions in this article to create and use Rescue Disk.
Create a Rescue Disk
To create a Rescue Disk on a blank USB drive or DVD you need:
- Another malware-free Windows PC with Avast Antivirus installed. Refer to the relevant article below for installation instructions: AND
- An empty USB drive with a capacity of 2 GB or higher.
OR - A blank recordable DVD; PC with DVD-writer; and burning software that can write from ISO file format (such as the built-in Windows Disc Image Burner).
Your preferred bootable drive:
- Open Avast Antivirus and select Protection ▸ Virus Scans.
- Select the Rescue Disk tab.
- Tick Use UEFI boot file for modern PCs to run Rescue Disk on a modern PC with UEFI (Unified Extensible Firmware Interface). For an older PC with BIOS (Basic Input/Output System), untick this box.
The first consumer PCs with UEFI were manufactured after the year 2005. Refer to the manufacturer's support documentation to determine whether the infected PC is using the modern UEFI or older BIOS. If you cannot find out this information, create both Rescue Disk variants and try to boot up the PC with each of them until it successfully starts the main Rescue Disk menu.
- Insert an empty USB drive into your PC's USB port, then select Create on USB.
- In the dialog that appears, select your USB drive. A progress screen appears as Rescue Disk is created.
- When Rescue Disk is finished loading onto your USB drive, click OK.
- Select Create ISO file.
- Select a location to save the Rescue Disk ISO file, then click Save. A progress screen appears as the Rescue Disk ISO file is created.
- When Rescue Disk is finished creating the ISO file, click Open folder with ISO file.
- On the same PC, insert a blank recordable DVD into the DVD-writer.
- In the open folder, right-click the created ISO file, and select Burn disc image (on Windows 11, select Show more options ▸ Burn disc image).
- Ensure the DVD-writer with inserted DVD is selected next to Disc burner, then click Burn. A progress screen appears as the DVD is recorded with the ISO file.
- When the recording process is completed, click Close.
- Open Avast Antivirus and select Protection ▸ Virus Scans.
- Select the Rescue Disk tab.
- Tick Use UEFI boot file for modern PCs to run Rescue Disk on a modern PC with UEFI (Unified Extensible Firmware Interface). For an older PC with BIOS (Basic Input/Output System), untick this box.
The first consumer PCs with UEFI were manufactured after the year 2005. Refer to the manufacturer's support documentation to determine whether the infected PC is using the modern UEFI or older BIOS. If you cannot find out this information, create both Rescue Disk variants and try to boot up the PC with each of them until it successfully starts the main Rescue Disk menu.
- Insert an empty USB drive into your PC's USB port, then select Create on USB.
- In the dialog that appears, select your USB drive. A progress screen appears as Rescue Disk is created.
- When Rescue Disk is finished loading onto your USB drive, click OK.
- Select Create ISO file.
- Select a location to save the Rescue Disk ISO file, then click Save. A progress screen appears as the Rescue Disk ISO file is created.
- When Rescue Disk is finished creating the ISO file, click Open folder with ISO file.
- On the same PC, insert a blank recordable DVD into the DVD-writer.
- In the open folder, right-click the created ISO file, and select Burn disc image (on Windows 11, select Show more options ▸ Burn disc image).
- Ensure the DVD-writer with inserted DVD is selected next to Disc burner, then click Burn. A progress screen appears as the DVD is recorded with the ISO file.
- When the recording process is completed, click Close.
- Open Avast Antivirus and select Protection ▸ Virus Scans.
- Select the Rescue Disk tab.
- Tick Use UEFI boot file for modern PCs to run Rescue Disk on a modern PC with UEFI (Unified Extensible Firmware Interface). For an older PC with BIOS (Basic Input/Output System), untick this box.
The first consumer PCs with UEFI were manufactured after the year 2005. Refer to the manufacturer's support documentation to determine whether the infected PC is using the modern UEFI or older BIOS. If you cannot find out this information, create both Rescue Disk variants and try to boot up the PC with each of them until it successfully starts the main Rescue Disk menu.
- Insert an empty USB drive into your PC's USB port, then select Create on USB.
- In the dialog that appears, select your USB drive. A progress screen appears as Rescue Disk is created.
- When Rescue Disk is finished loading onto your USB drive, click OK.
- Select Create ISO file.
- Select a location to save the Rescue Disk ISO file, then click Save. A progress screen appears as the Rescue Disk ISO file is created.
- When Rescue Disk is finished creating the ISO file, click Open folder with ISO file.
- On the same PC, insert a blank recordable DVD into the DVD-writer.
- In the open folder, right-click the created ISO file, and select Burn disc image (on Windows 11, select Show more options ▸ Burn disc image).
- Ensure the DVD-writer with inserted DVD is selected next to Disc burner, then click Burn. A progress screen appears as the DVD is recorded with the ISO file.
- When the recording process is completed, click Close.
Scan your PC for viruses
When Rescue Disk starts on your PC, you can begin to scan for malware:
- Click the
 AvastPE Antivirus tile on the main Rescue Disk menu.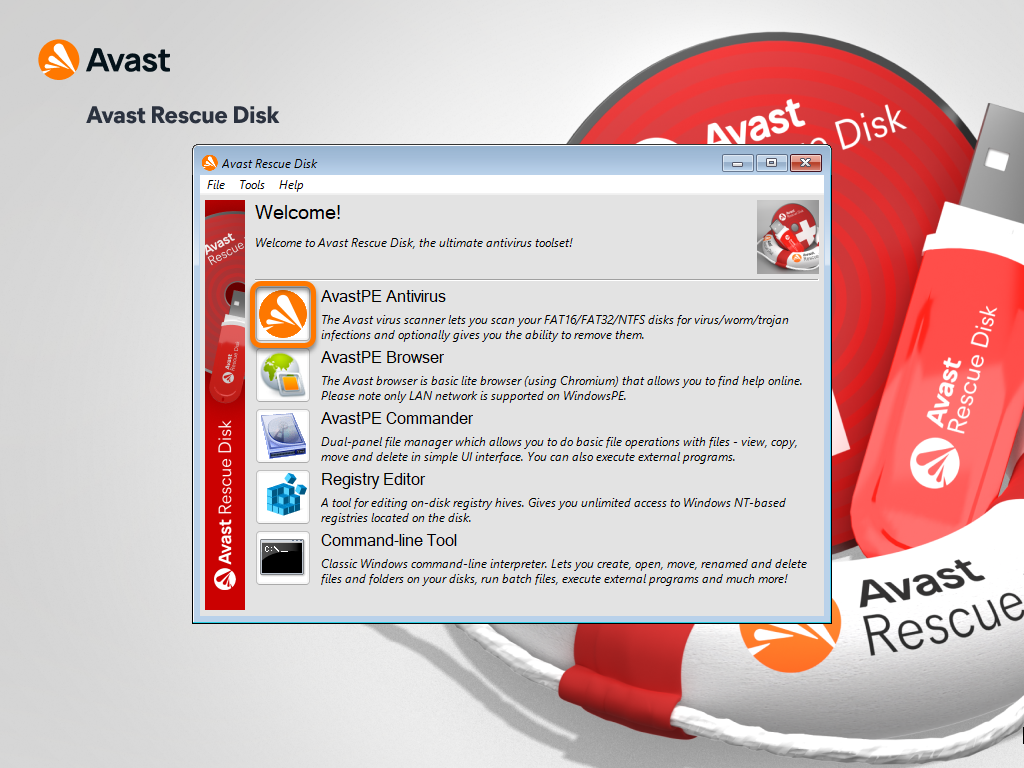
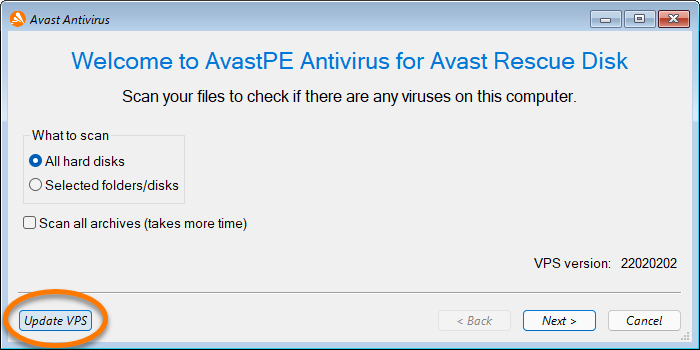
- If your PC is connected to the internet, click Update VPS to ensure that Rescue Disk still uses the latest database of known virus definitions.
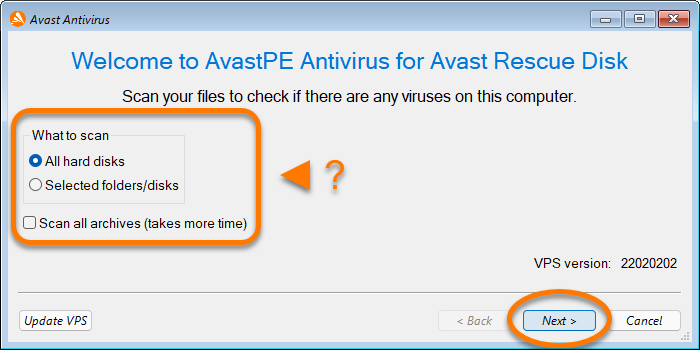
- Select an option:
- All hard disks: Scans the entire PC.
- Selected folders/disks: Scans only specific folders or disks on the PC. Click Next to select the folders or disks to scan.
Then click Next to start scanning your PC.Optionally, tick Scan all archives to also scan compressed files (RAR, ZIP, etc).
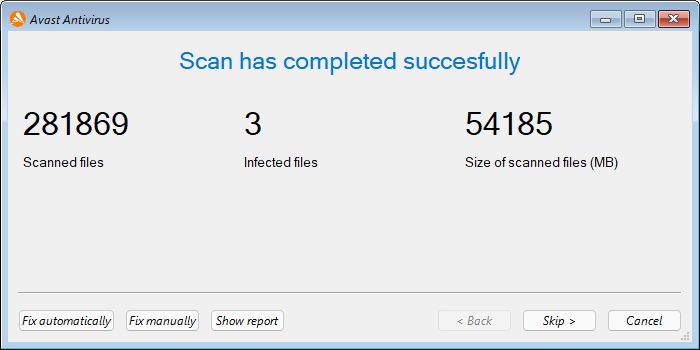
- When the scan is finished, review the scan report and results screen for any found threats.
Refer to the section below for instructions to repair or delete any infected files.
Repair or delete infected files
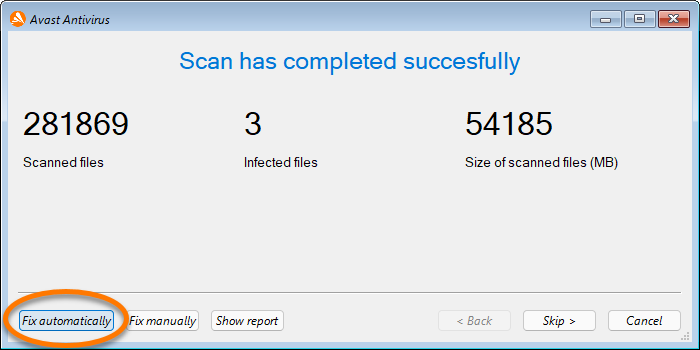
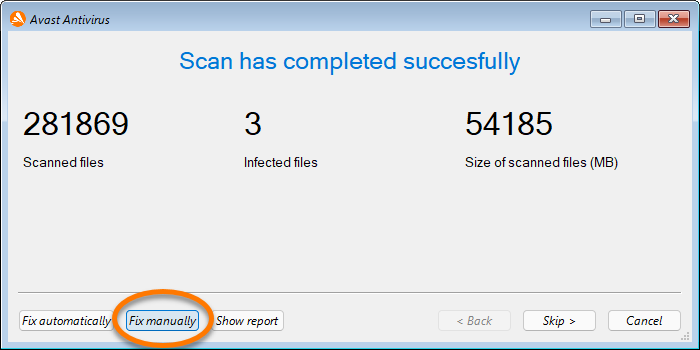
After scanning your PC, Rescue Disk notifies you of the results. If any threats are found, you can select Fix automatically or Fix manually.
Your preferred action:
- Click Fix automatically on the results screen. Rescue Disk attempts to remove the malicious code from all infected files, while keeping the rest of each file intact. If it fails to repair any files, the files are automatically deleted from your PC.
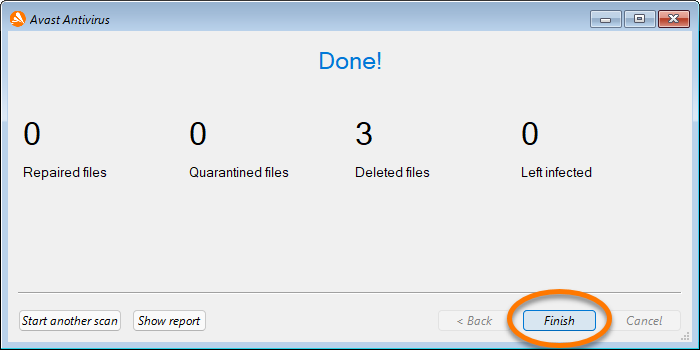
- When the selected action is completed, click Finish.
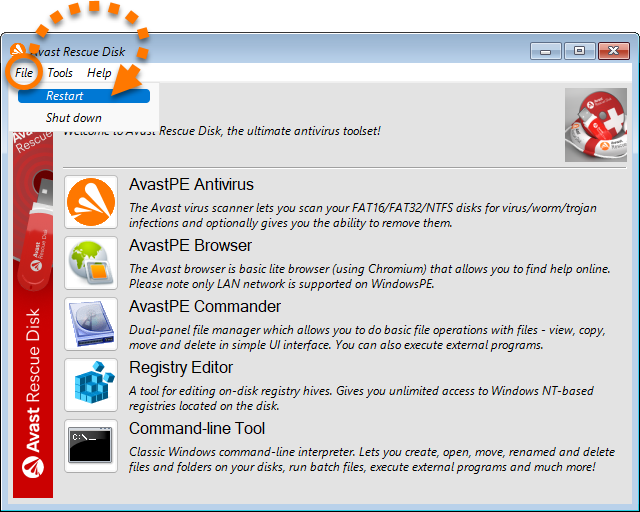
- In the main Rescue Disk menu, select File ▸ Restart.
- Click Fix manually on the results screen.
- Tick the box next to the files you want to apply an action to, then select an action:
- Fix automatically: Removes only the malicious code from the selected files, while keeping the rest of each file intact. Threats that cannot be repaired are automatically deleted.
- Repair selected: Removes only the malicious code from the selected files, while keeping the rest of each file intact. Threats that cannot be repaired need to be manually deleted.
- Delete selected: Permanently deletes the selected files from your PC.
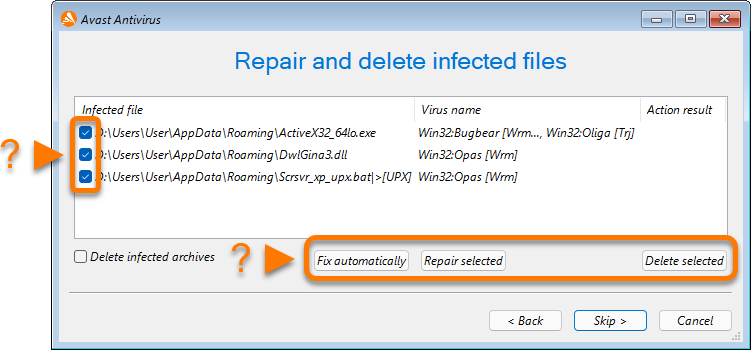
- When the selected action is completed, click Skip, then click Finish.

- In the main Rescue Disk menu, select File ▸ Restart.
When your PC restarts, you can remove the USB drive/DVD containing Rescue Disk.
Further recommendations
For more information about virus scans, refer to the following articles:
DocID: antivirus-rescue-disk-scanLast modified: 07/28/2026
Was this article helpful?

Keep your online identity private!
Browse like no one’s watching with Avast anti-tracking software.
Need more help?
Contact us
Avast account
Visit our forums
Visit academy