
- Click the Windows
 Start button, start typing
 gpedit.mscto open the search bar, then select Edit group policy.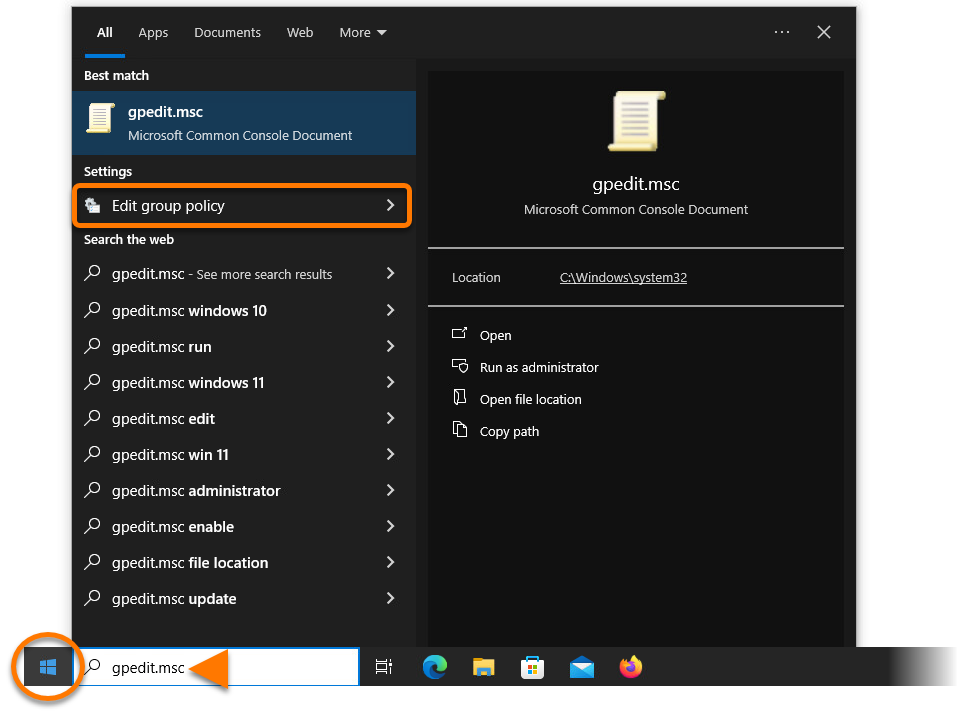
- In the Local Group Policy Editor window under Computer Configuration, select Administrative Templates ▸ Network ▸ DNS Client.
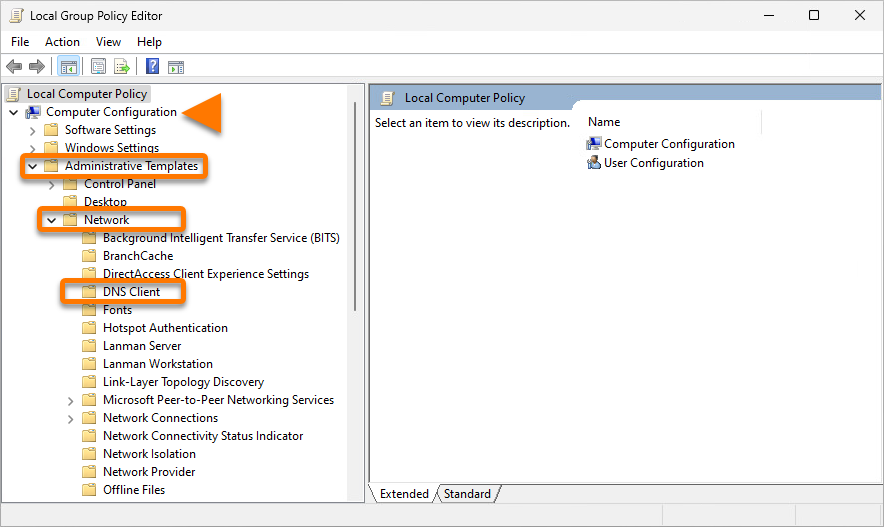
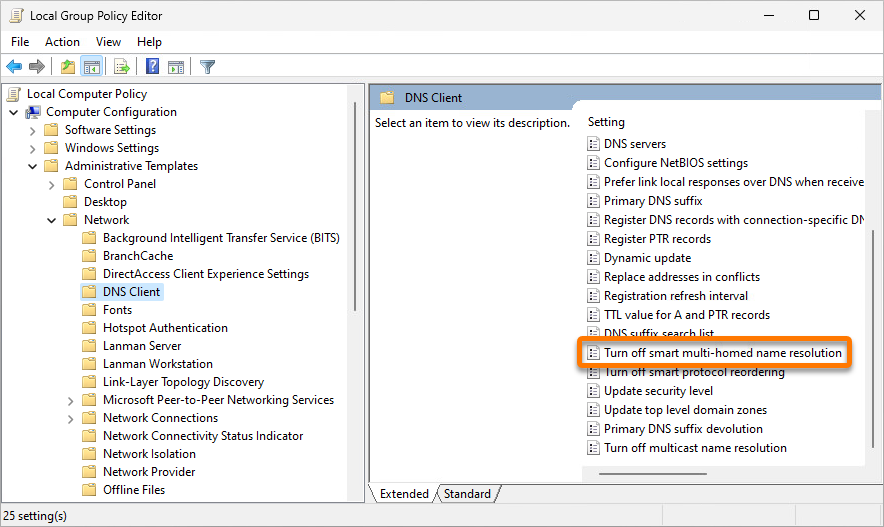
- Double-click Turn off smart multi-homed name resolution.
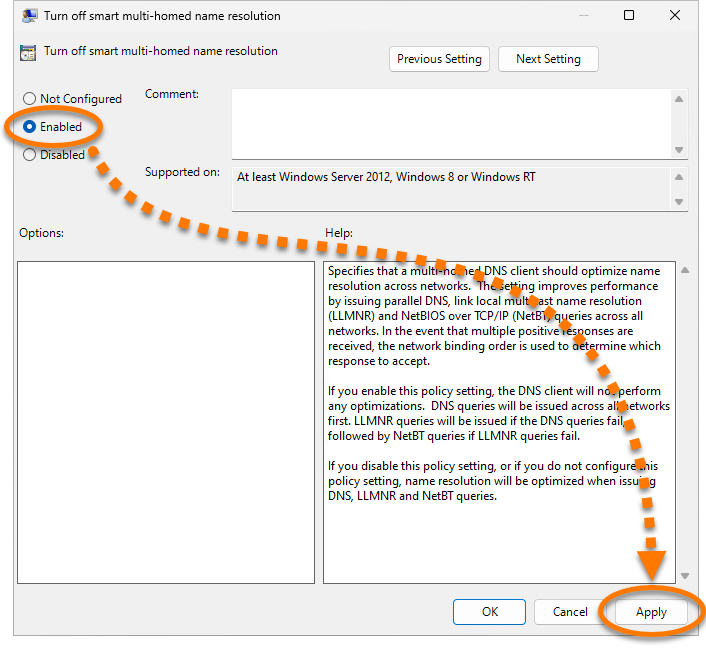
- Select Enabled, then click Apply.
IS YOUR COMPUTER SLOW? RUN LIKE NEW
If they are not maintained, computers lose performance over time. Avast Cleanup Premium can help significantly improve the performance of your computer.
Preventing DNS leaks in Avast SecureLine VPN
Windows
Domain Name System (DNS) leaks can sometimes still occur even when you are using Avast SecureLine VPN. You can prevent DNS leaks using one of the methods below:
The steps in this article do not apply for systems running Windows Vista or Windows XP. If you experience DNS leak issues on these operating systems, we recommended you upgrade to a more recent version of Windows.
Use Avast Antivirus
The latest version of Avast Antivirus actively prevents DNS leaks on IPv4 for Windows 11, Windows 10, Windows 8 / 8.1, and Windows 7 (Service Pack 1 with Convenient Rollup Update).
If you already use a version of Avast Antivirus, ensure that your application is up-to-date. For instructions, refer to the following article:
Otherwise, you can install Avast Free Antivirus. For instructions, refer to the following article:
Manage Windows settings
If you do not want to use Avast Antivirus, we recommend disabling the "smart multi-homed name resolution" setting in Microsoft Windows 8 and higher to prevent DNS leaks. This setting is intended to optimize DNS queries and improve performance. However, when enabled, it can leave you vulnerable to DNS hijacking and DNS leaks.
- Click the Windows
 Start button, start typing
 gpedit.mscto open the search bar, then select Edit group policy.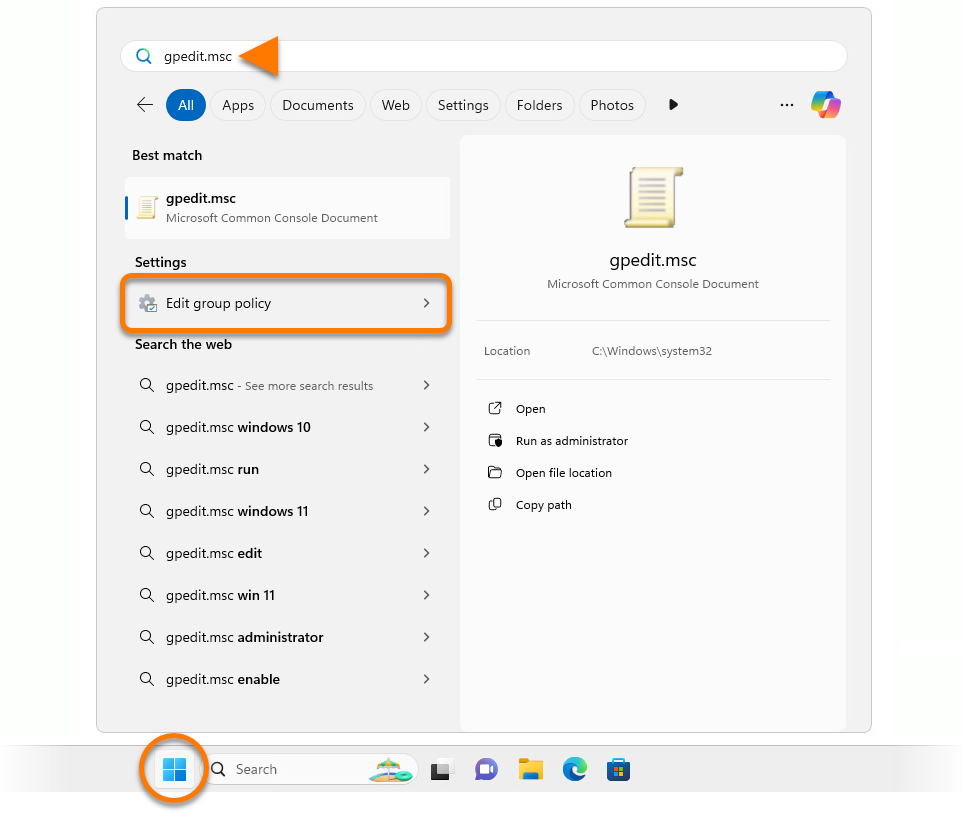
- In the Local Group Policy Editor window under Computer Configuration, select Administrative Templates ▸ Network ▸ DNS Client.
- Double-click Turn off smart multi-homed name resolution.
- Select Enabled, then click Apply.
- Press the
 Win
Win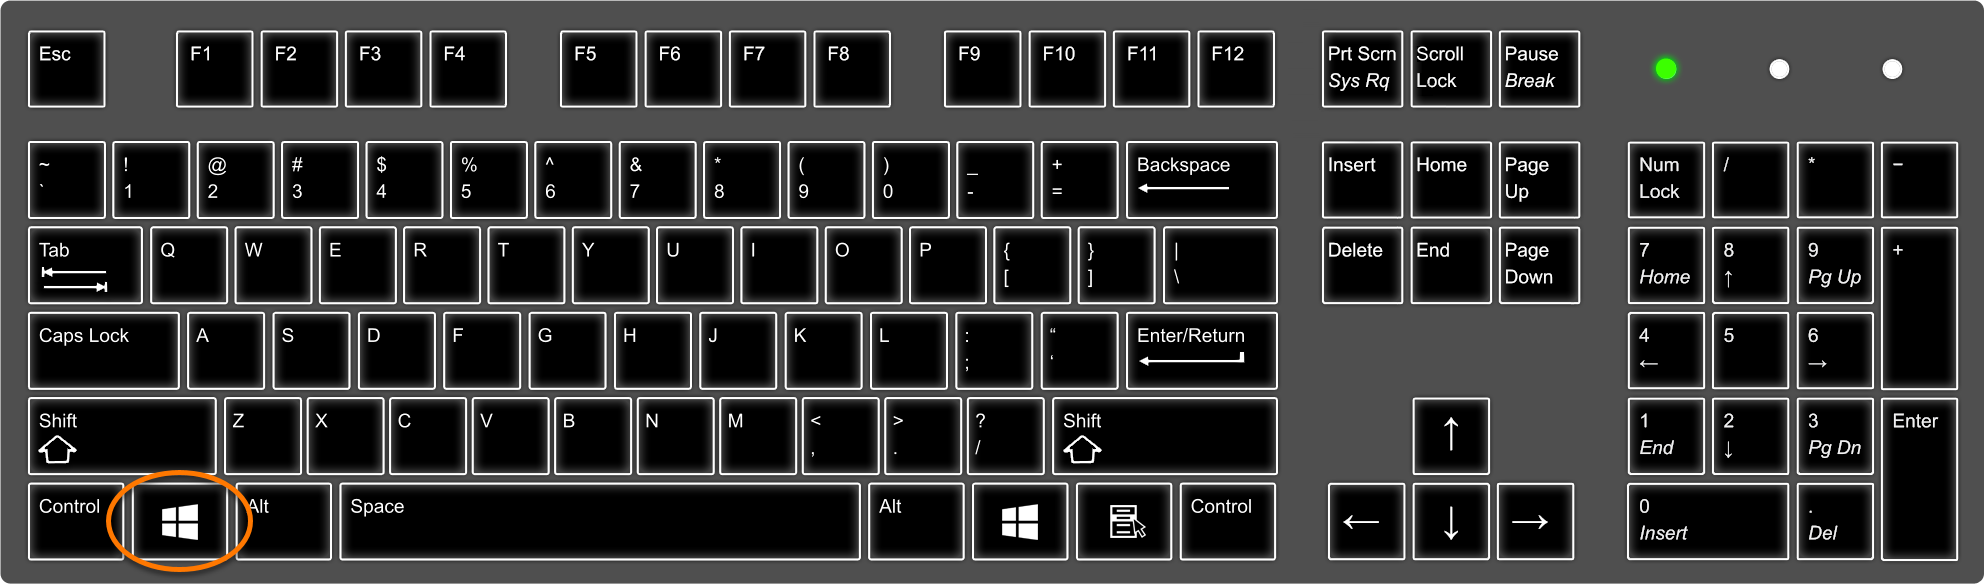
- Type
gpedit.mscin the search bar, and select gpedit.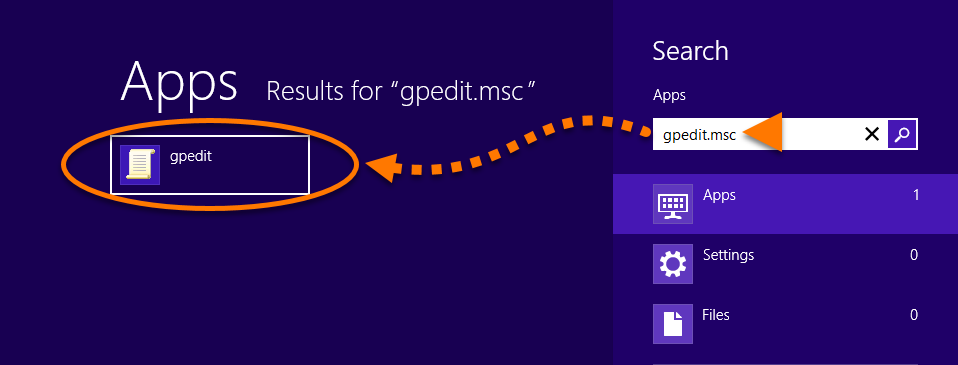
- In the Local Group Policy Editor window under Computer Configuration, select Administrative Templates ▸ Network ▸ DNS Client.
- Double-click Turn off smart multi-homed name resolution.
- Select Enabled, then click Apply.
- In the Local Group Policy Editor window under Computer Configuration, select Administrative Templates ▸ Network ▸ DNS Client.
- Double-click Turn off smart multi-homed name resolution.
- Select Enabled, then click Apply.
DocID: prevent-secureline-vpn-dns-leakLast modified: 09/03/2026
Was this article helpful?

Keep your online identity private!
Browse like no one’s watching with Avast anti-tracking software.
Need more help?
Contact us
Avast account
Visit our forums
Visit academy