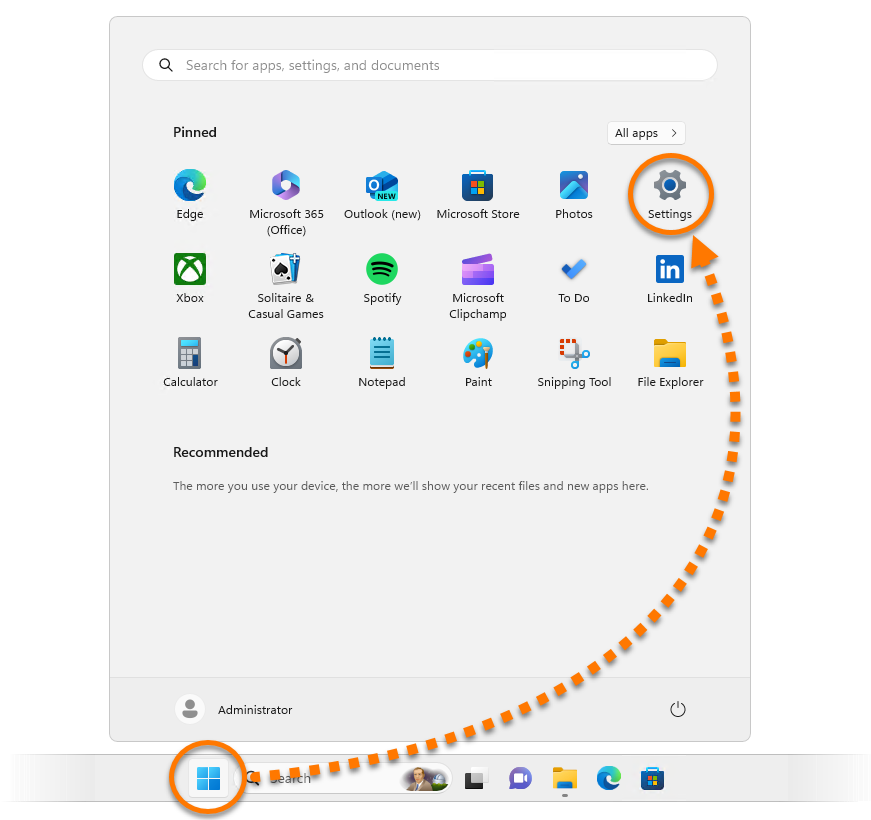
Start button and select
 Settings (the gear icon).
The steps to enable Network Level Authentication vary according to your version of Windows 10. Follow the relevant steps below:
Later versions of Windows 10
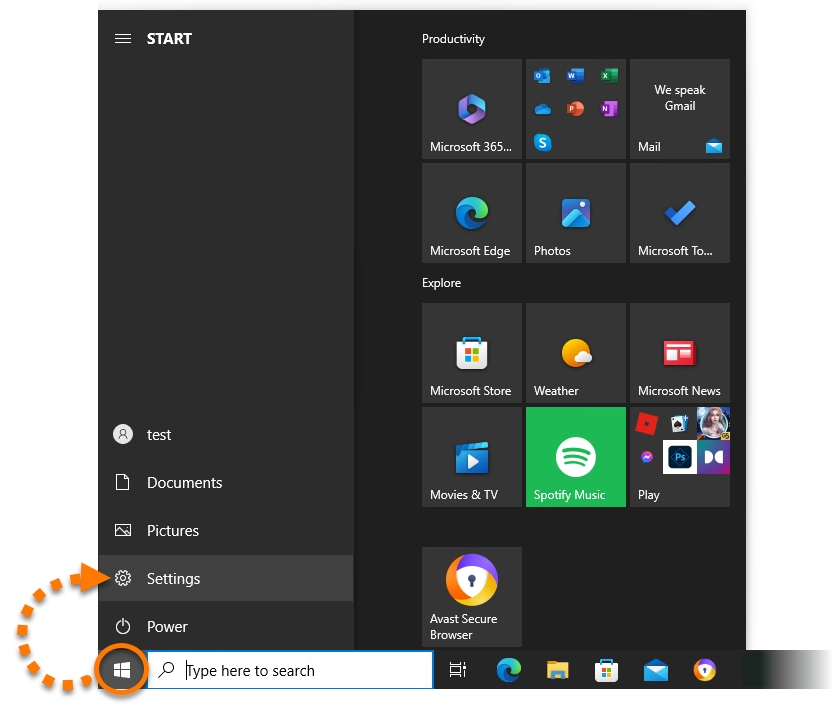
- Click the Windows
 Start button and select
 Settings (the gear icon).
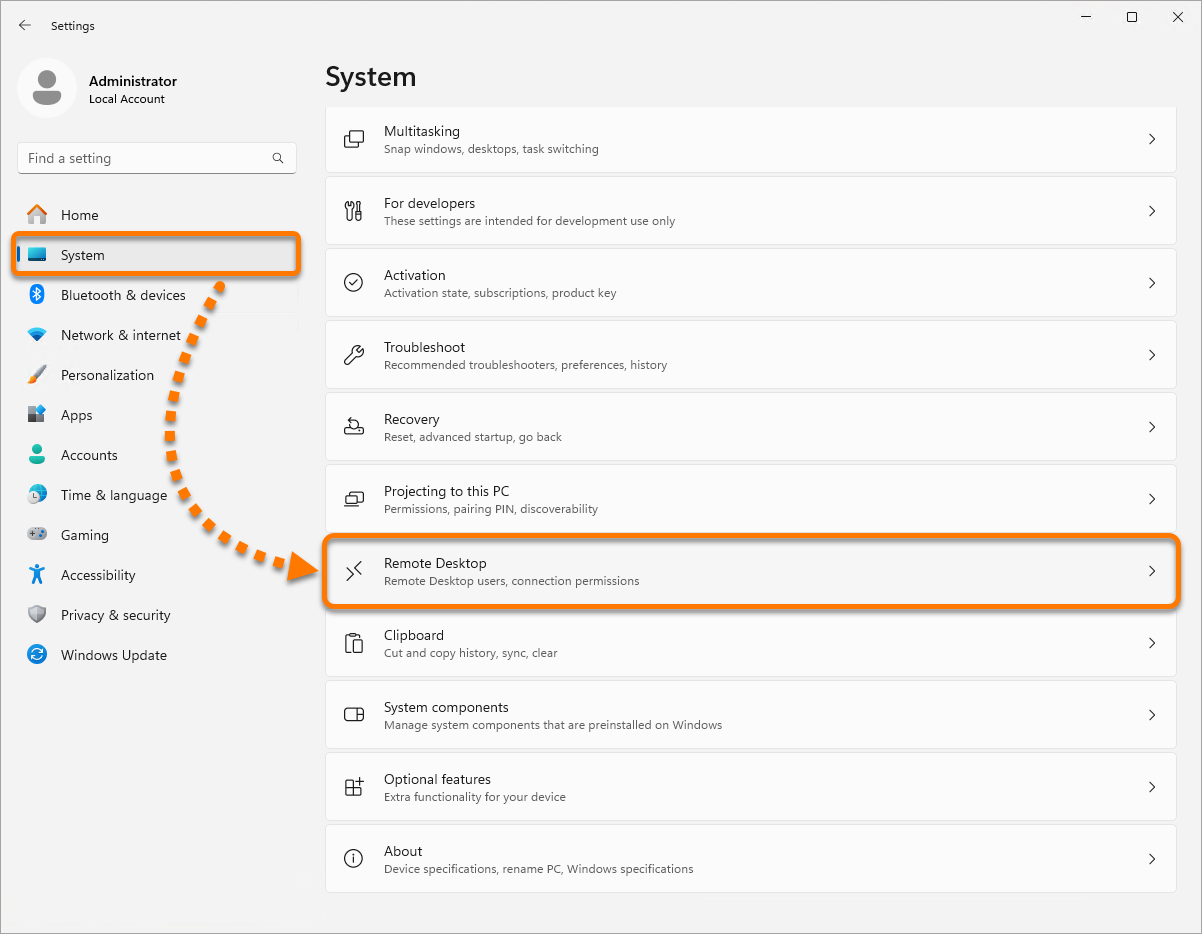
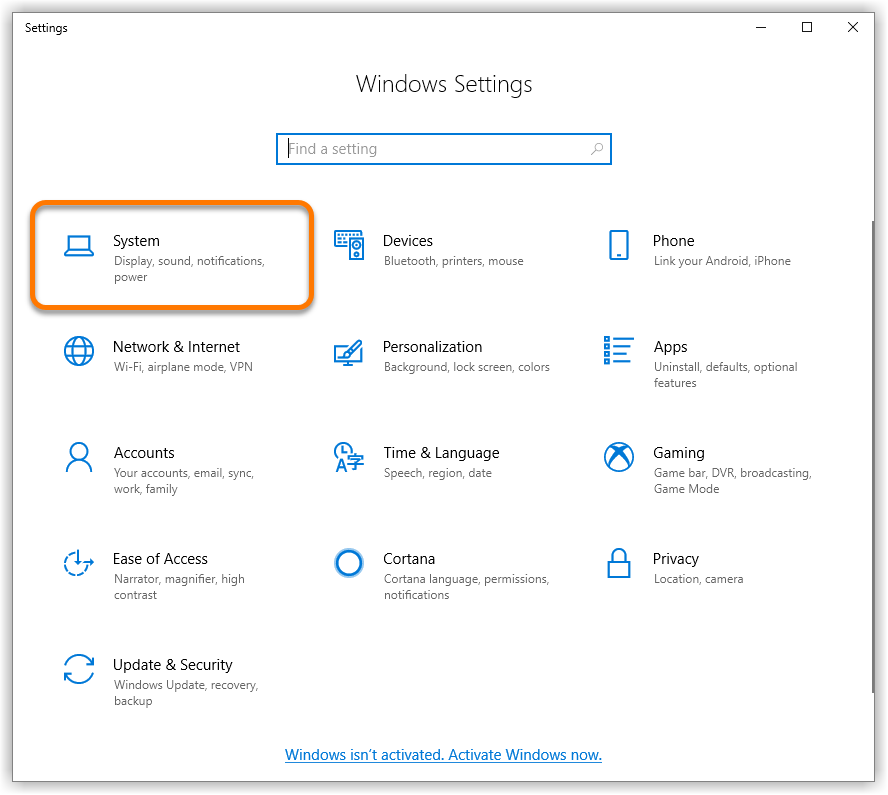
- Select the System tile.
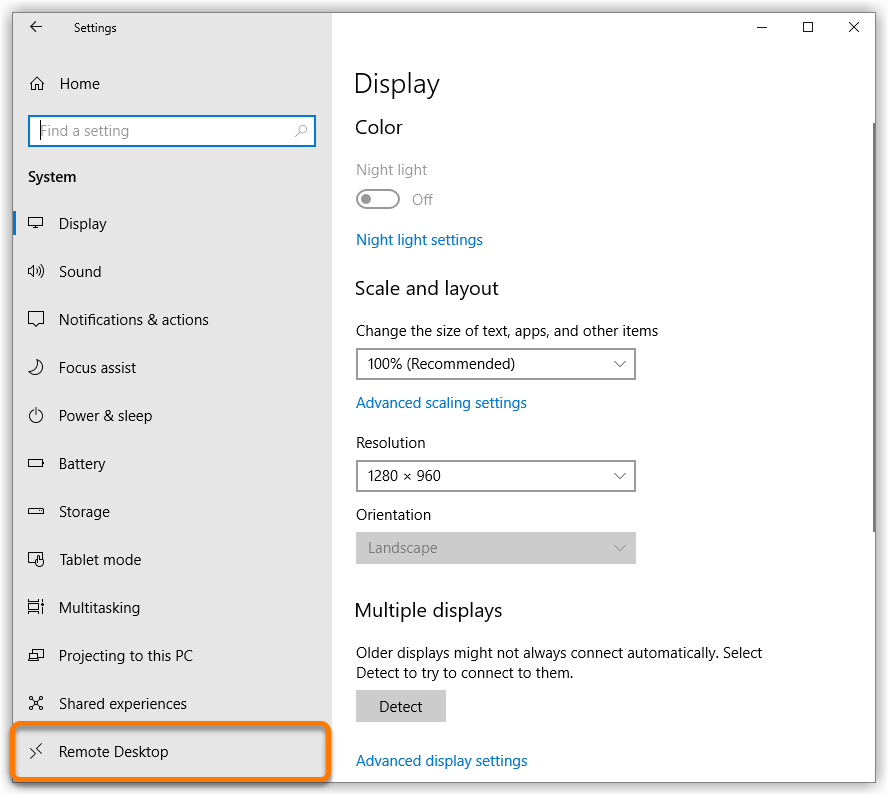
- Click Remote Desktop in the left panel.
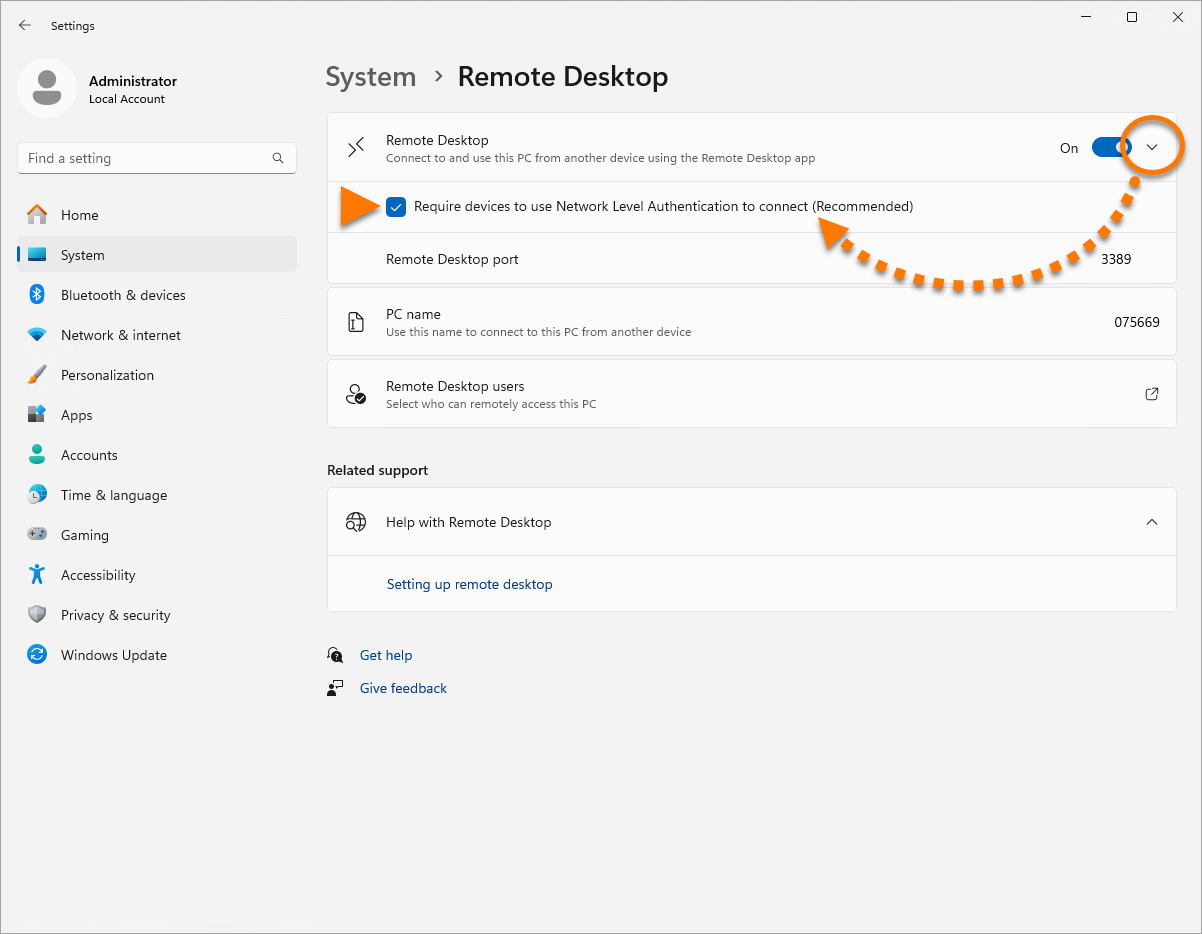
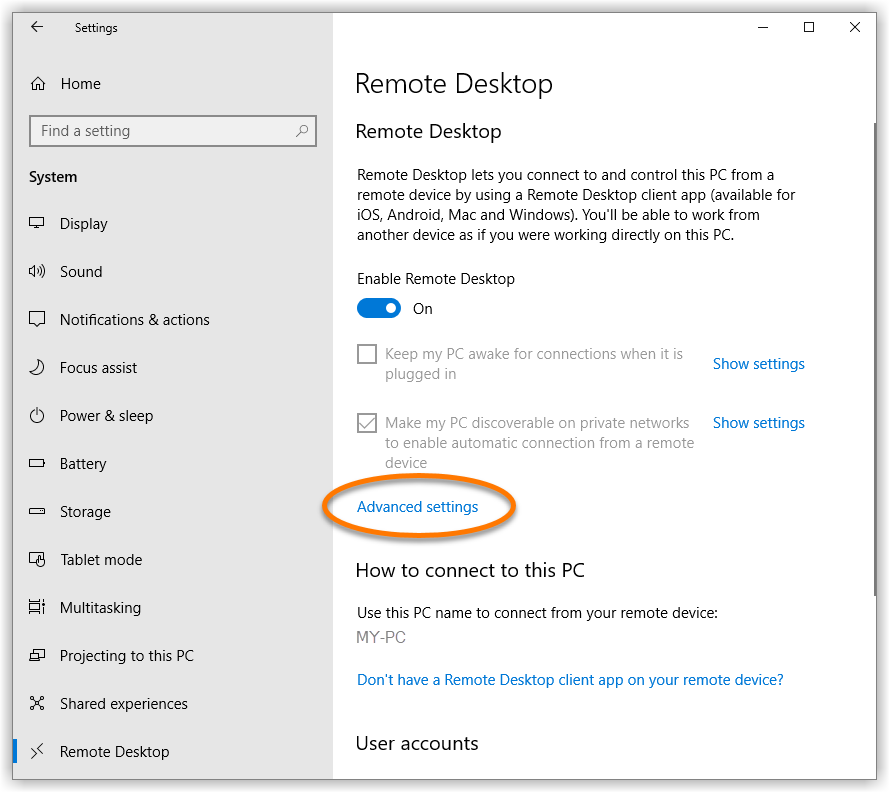
- Click Advanced settings.
- Tick the box next to Require computers to use Network Level Authentication to connect (recommended).
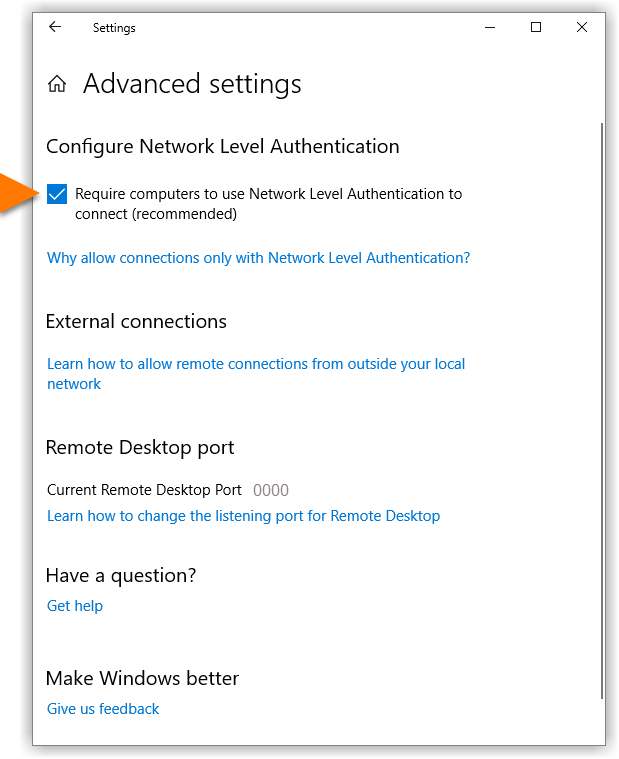
Network Level Authentication is now enabled, and your PC is protected against unwanted connections via Remote Desktop.
Earlier versions of Windows 10
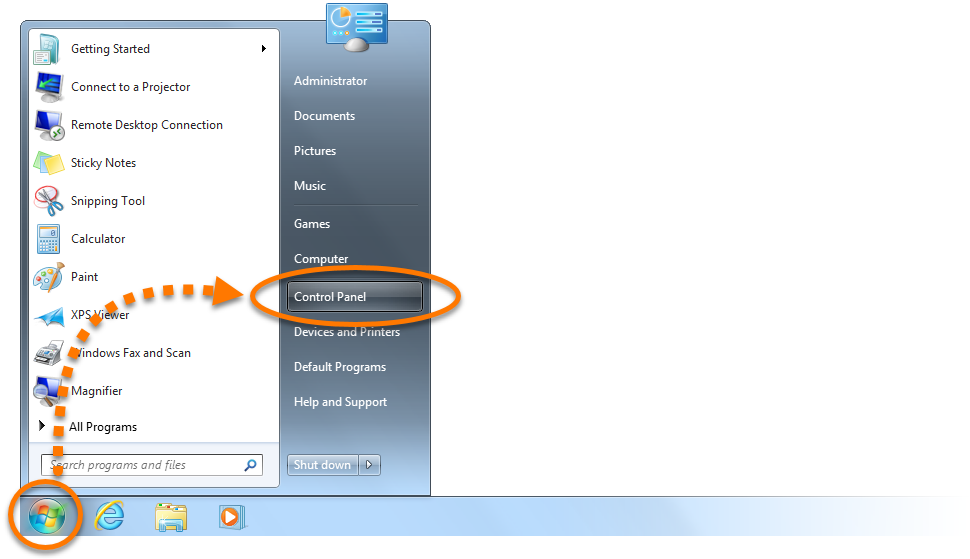
- Click the Windows Start button, start typing
control panelto open the search box, then select Control Panel from the search results.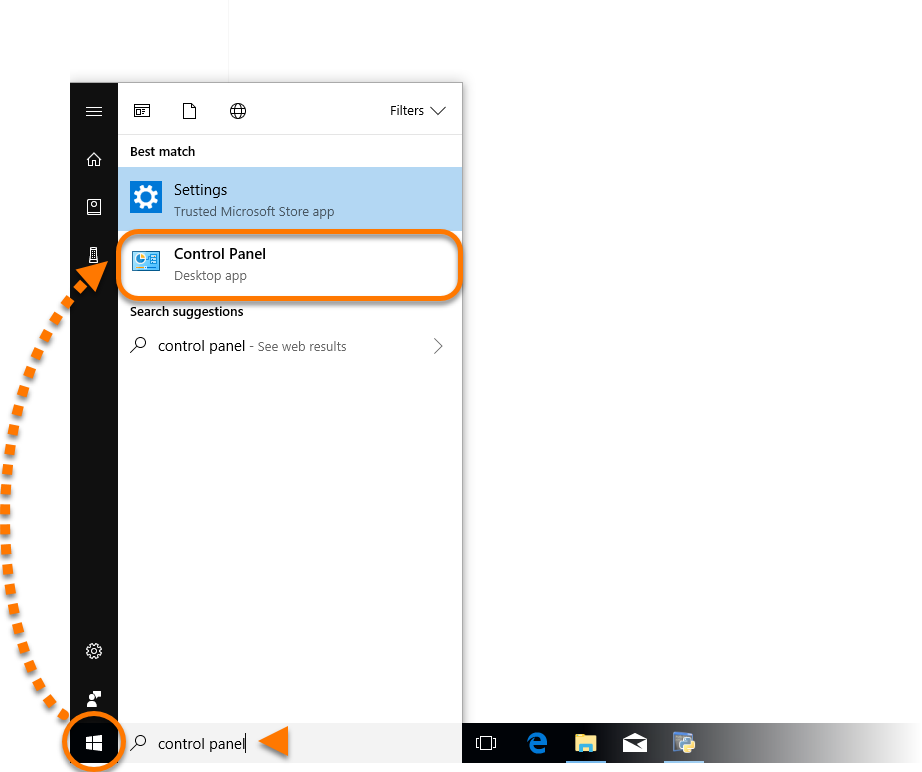
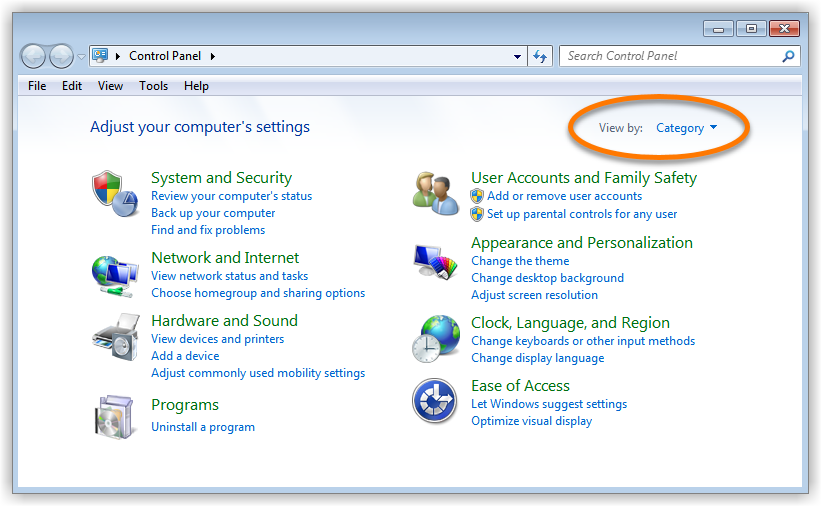
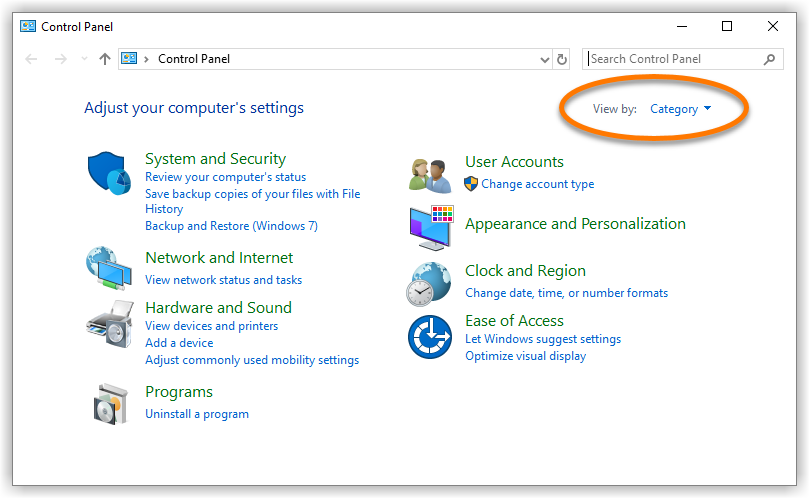
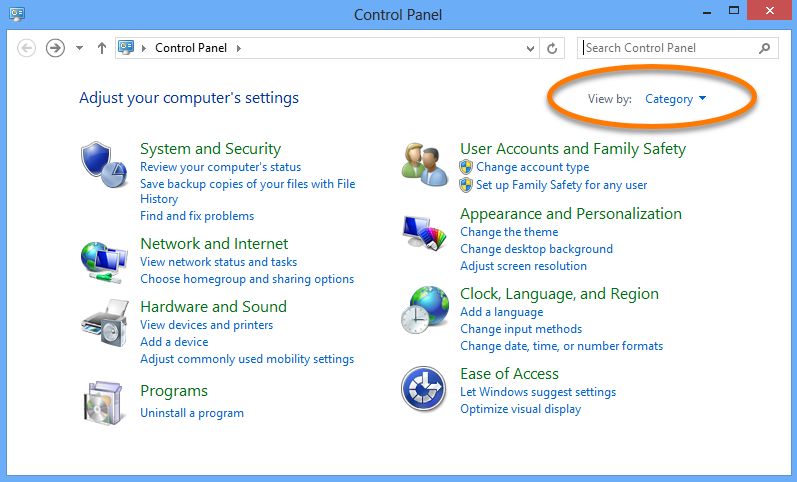
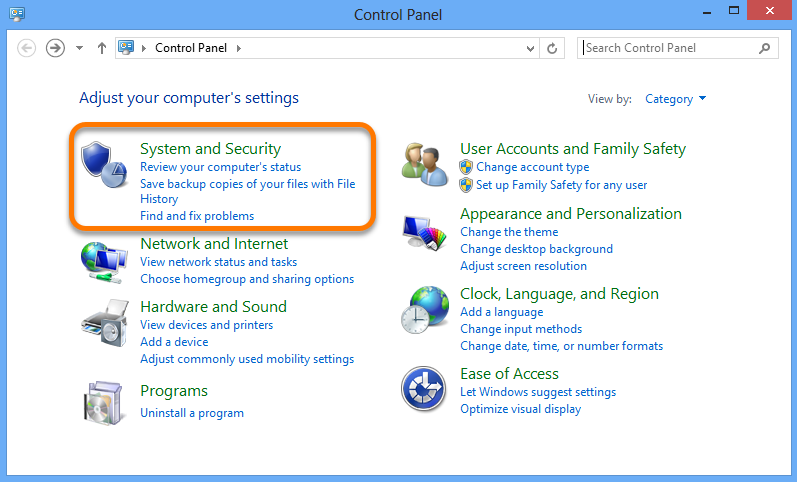
- Next to View by, ensure you are using the Category view.
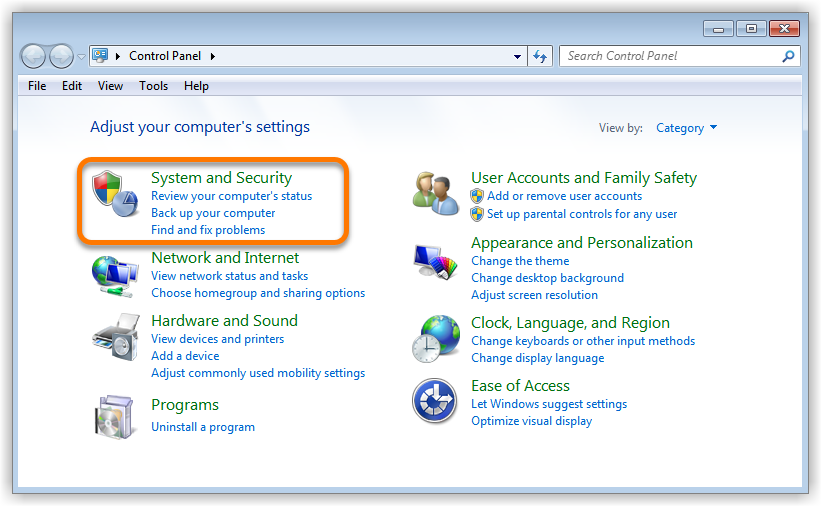
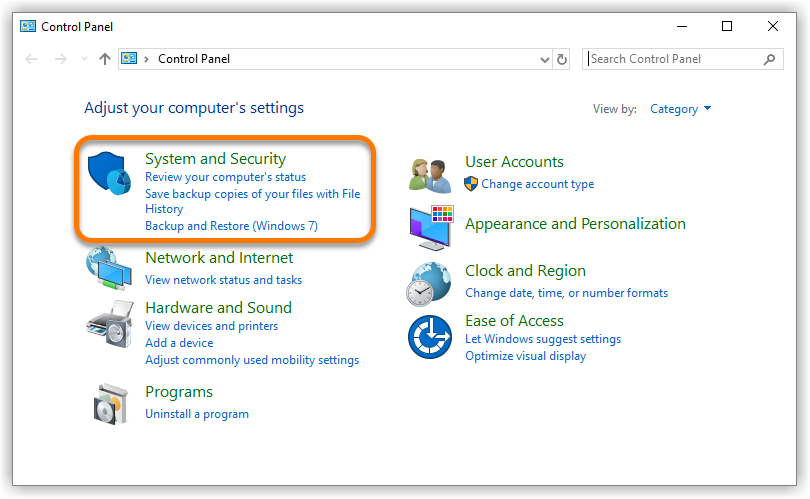
- Select the System and Security tile.
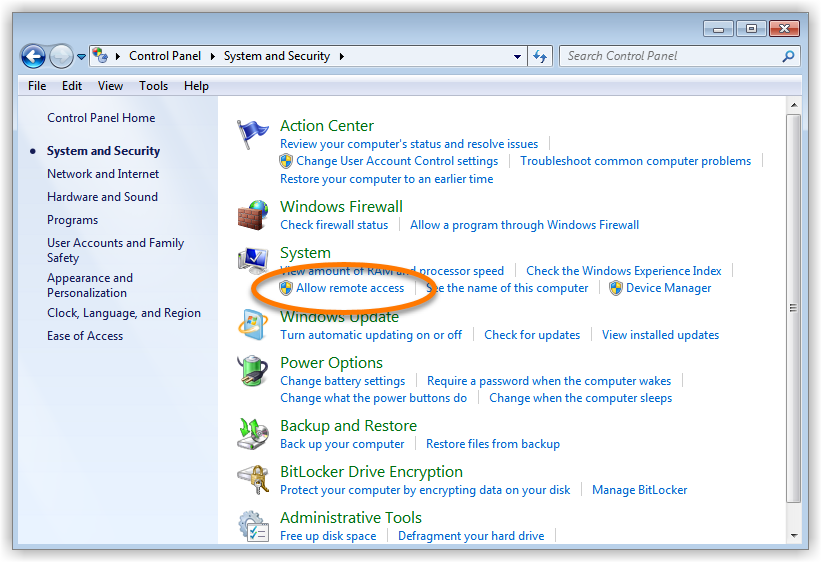
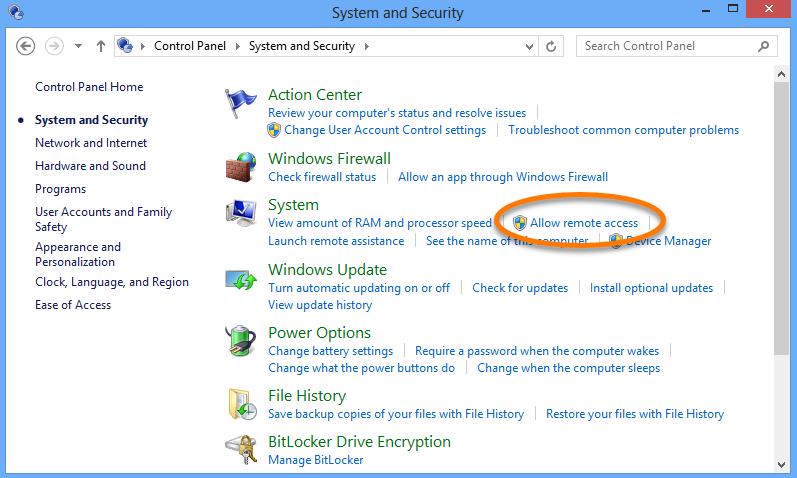
- Under System, select Allow remote access.
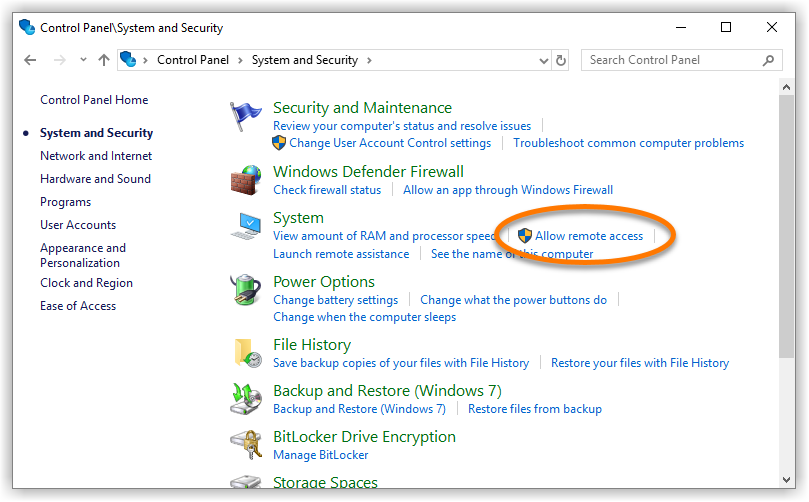
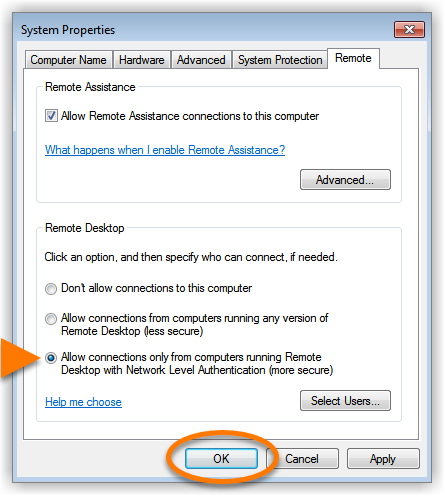
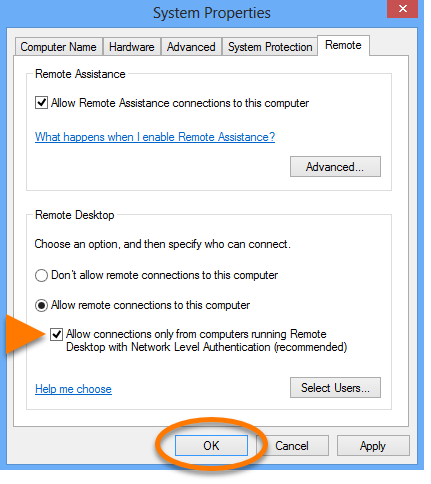
- Under Allow remote connections to this computer, ensure the box next to Allow connections only from computers running Remote Desktop with Network Level Authentication (recommended) is ticked. Then click OK.
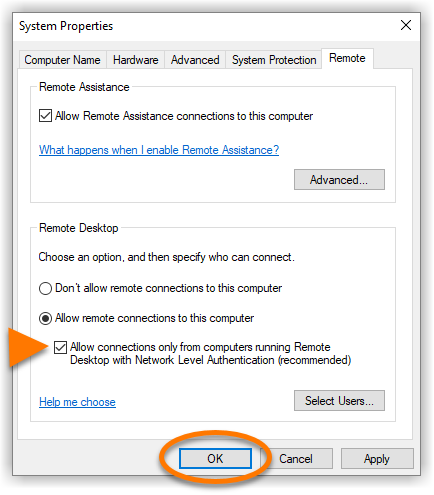
Network Level Authentication is now enabled, and your PC is protected against unwanted connections via Remote Desktop.
 Win
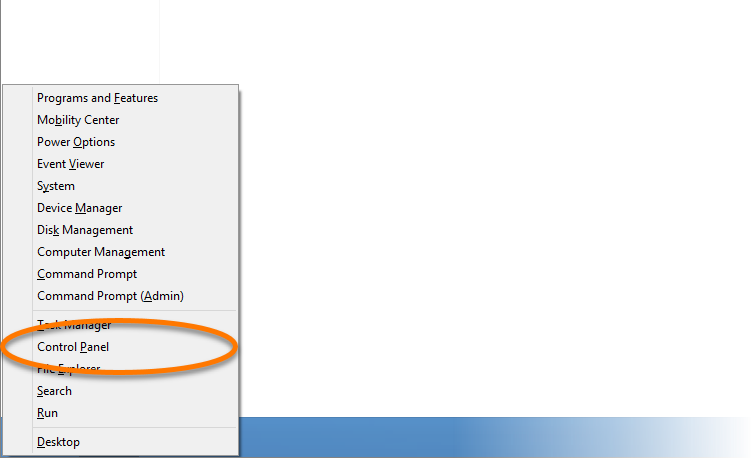
 Start button and select Control Panel.